Gorgeous Green

2 Comments

One of our plans during our holidays was to do some painting. This may not sound like much of a holiday but we were happy to help out our daughter who lives interstate.

A recently completed renovation had completely transformed the bathroom and just needed some finishing touches of paint. The vanity, doors, wall and floor tiles are all white or very light coloured so she was looking for a strong, dramatic colour for the remaining small areas of wall. Green was her preference, however, there are many choices. After one previous false start with a test pot we narrowed our choice.

The internet is a great resource and much better than simply looking at a colour chart in a shop as we have done in the past. We were able to compare technical specifications such as the depth of colour, reflective capacity and formulation. Finally, there are photos of completed rooms so we were able to visualise how our choice might look with a substantial portion of white contrast.

Here is the result of our handiwork.

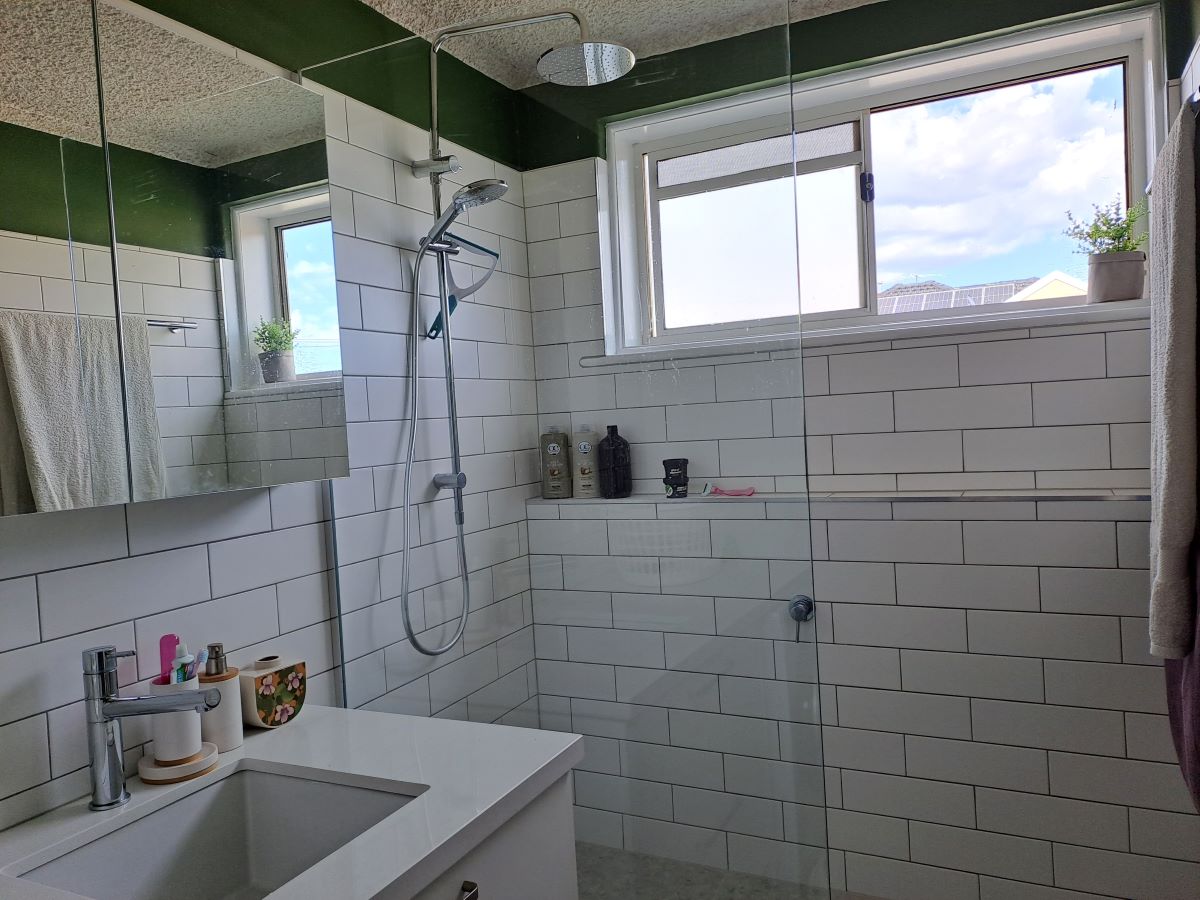
The colour is Dulux ‘Plasticine’. I would love to know how they come up with the names for some of these colours.

This is the image which confirmed that our idea would work. Although it is not a bathroom it does have a substantial portion of white or light coloured elements. The tan/natural colours were the inspiration for the light fitting in the toilet.

Project Preparation

1 Comment

Well, I had a couple of days off from blogging as we have been out and about. Yesterday WordPress decided it did not want to play the game when I tried to write this post. However, all seems to be well again and I am back in business.

Over the last couple of days we have purchased some materials and equipment for the next DIY project. 

For a number of years we have talked about creating a defined entertaining area under our high-set house.  When we first moved here over 14 years ago, this area was simply sloping dirt which was of absolutely no use and merely contributed to the dirt and dust which made its way into the house.  So, we had the area concreted , albeit on a couple of levels.  Since then it has really been a storage area for materials collected for future projects as well as overflow from the workshop area.  We had decided that the best approach was to screen off an area for casual entertaining using battens and the remainder could still be used for storage.  After literally years of discussion and refinements of the design we are ready to begin.

Initially, we planned to use salvaged hardwood for the rails but realised that we could not source enough timber of consistent dimensions that was straight and true so we opted for new timber from Bunnings in this instance.  After carefully measuring and calculating our requirements we bought the necessary lengths whilst ensuring the minimum amount of waste.

2020-06-24 02
The other major requirement for this project which GMan had identified was a saw which would make a quick and accurate cut.  There were 21 rails to be cut plus approximately 170 (yet to be purchased) battens.  He decided on this mitre saw and stand.

2020-06-24 01

The rails were cut to length in no time and are now ready to be painted.  We also need to sand and paint the rusted steel posts before attaching the rails.  

This is clearly not a job which will be done in a week but we are confident that our planning and preparation will ensure the success of the end result.

I am looking forward to being able to use the entertainment area during the summer as our summers are becoming increasingly hotter and this area is definitely the coolest place in the house.