Kitchen Reveal

Leave a comment

I finally have the kitchen pretty much the way I want it so now I can show you a few more photos.

It is a fairly simple layout with the stove and refrigerator along the back wall and plenty of bench space on either side of the stove. There are good-sized drawers for storage.

The island bench includes a large sink. There are also cupboards and drawers below the bench.

The bench has an overhang suitable for a breakfast bar, however, I am yet to decide whether to utilise this feature as the dining table is a mere couple of steps away. At the moment I have some of the bulk buckets stored under here whilst I work out the best spot for them.

The butlers pantry is adjacent to the kitchen and includes a sink and dishwasher as well as the microwave, open shelving, bench space and cupboards.

We have future plans to extend the size of the pantry but that is a story for another day.

Warts and All

Leave a comment

I am sure we have all been guilty of only showing the good/perfect/happy stuff online.  In fact, I do not believe we should feel guilty because none of us share everything about ourselves  – either online or in real life.

However, I do try to keep things as real as possible in what I discuss here on the blog and today is no exception.

I have microwave oven which sits in a purpose-built cavity below the bench in my kitchen.

2018-11-23 01

For a number of years I have had a piece of non-slip mat under the microwave which which works reasonably well.  I remove and clean this mat but over time it has become stained with mould and even soaking it in bleach and scrubbing does not restore it.  This is not a long-term solution as I try not to use bleach.

After some particularly wet weather a couple of weeks ago it was looking awful and I decided that I had to change my strategy.  I decided to make a towelling mat from an old bathmat.

2018-11-23 02

I cut the bathmat in half.  The next step was to find some fabric suitable to bind the edges.

Bias strips cut and ready to join.

2018-11-23 03

A roll of home-made bias binding – just like a bought one!  All you need is a ruler and iron.

2018-11-23 04

The finished product.  No cost and not a lot of time.

2018-11-23 05

Back to the microwave and the cavity.  Once I removed the microwave it really does look disgusting.  Time to get rid of the mat.

2018-11-23 06

I cleaned the space and once it was properly dry I added the new towelling mat.

2018-11-23 07

After cleaning the microwave inside and out, I replaced it in the alcove.

2018-11-23 08

I have enough bias binding to bind the other half of the bathmat so I will be able to alternate them and wash each week.

The Pantry Project

Leave a comment

It is hard to believe that it is almost 3 months since I wrote this post about my new labeller.  Although that post was about labelling the small drawers in my sewing room, if I am really honest, my main motivation was so that I could re-organise my pantry and label everything.

Unfortunately, the labeller has languished in the cupboard while the state of the pantry went steadily downhill.  Until yesterday.  The thing that finally prompted me was the arrival of some more Mason jars that I had ordered online.  They would not fit in the cupboard as it stood so this required some major re-thinking.

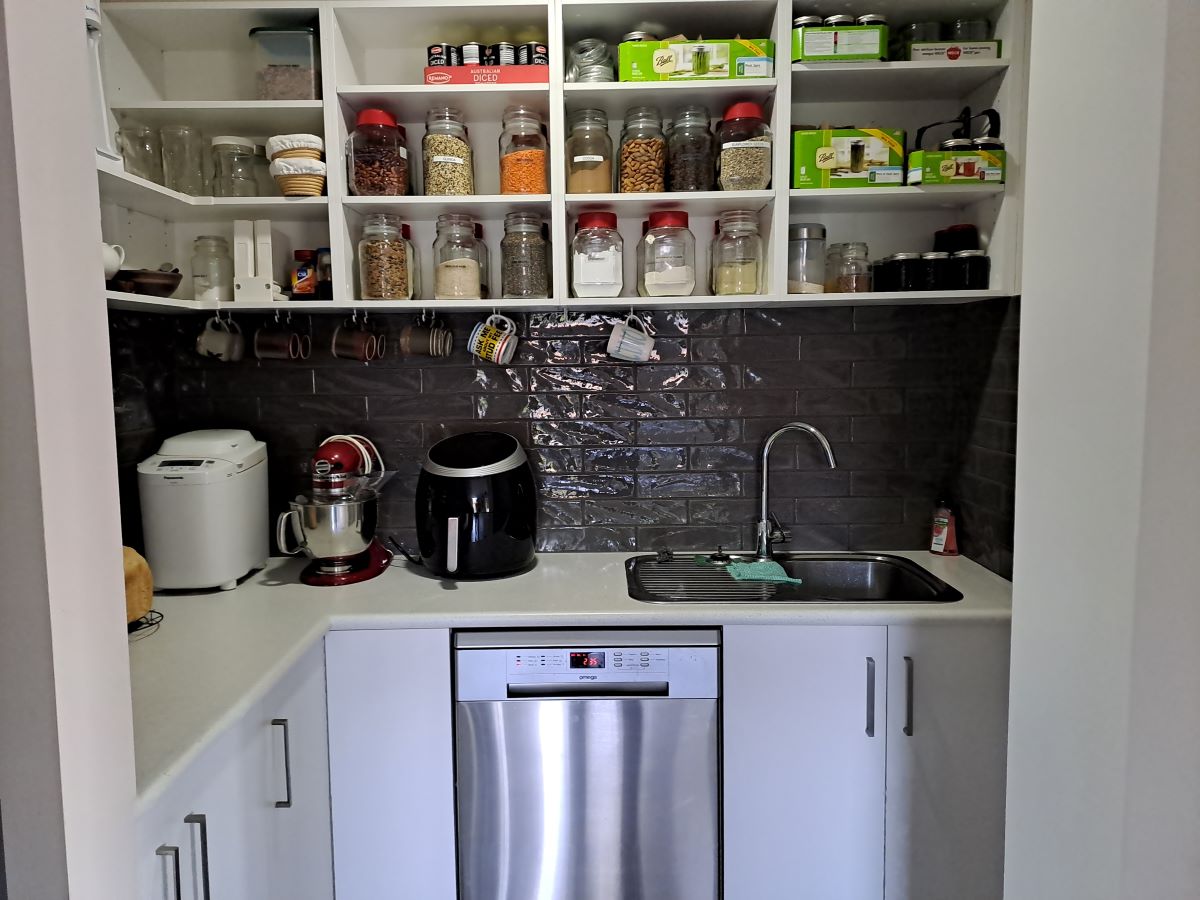
I am really very fortunate to have plenty of storage space so it was simply a matter of utilising it better.  I have a large corner pantry as well as a floor-to-ceiling cupboard on the other side of the refrigerator.  There had previously been a mix of both food and other items in both cupboards so the first step was to remove the remaining foodstuffs (mostly canned goods and jars) from the cupboard.

I did not take any before photos as I launched into this endeavour early yesterday morning without a specific plan.

This is the cupboard once I had finished it.

2018-05-20 01

The top shelf is pretty much as it was with the Soda Stream, Easiyo, bucket with spare gas cylinder and Soda Stream bottles and pasta attachments for my KitchenAid mixer.  The pasta attachments were previously in the corner pantry.

The second shelf has 2 plastic tubs of glass jars and bottles which I use for storing juice and homemade sauces.  I have culled these considerably over a period of time as I have invested in more Mason jars.  In fact, I was able to swap them from a large and medium tub to a medium and small tub and move them from the top shelf of the corner pantry to this shelf which means they are much more accessible.  The large plastic tub fits neatly in the bottom of one side of the wardrobe in the sewing room so I will utilise it there.  But first, I have to finish the cupboard and the corner pantry.

The third shelf is various sizes of Mason and Weck jars with some spare lids and bands as well as a pair of lifting tongs from my most recent order.  These will make retrieving jars from the hot water bath much safer and easier.

2018-05-20 02

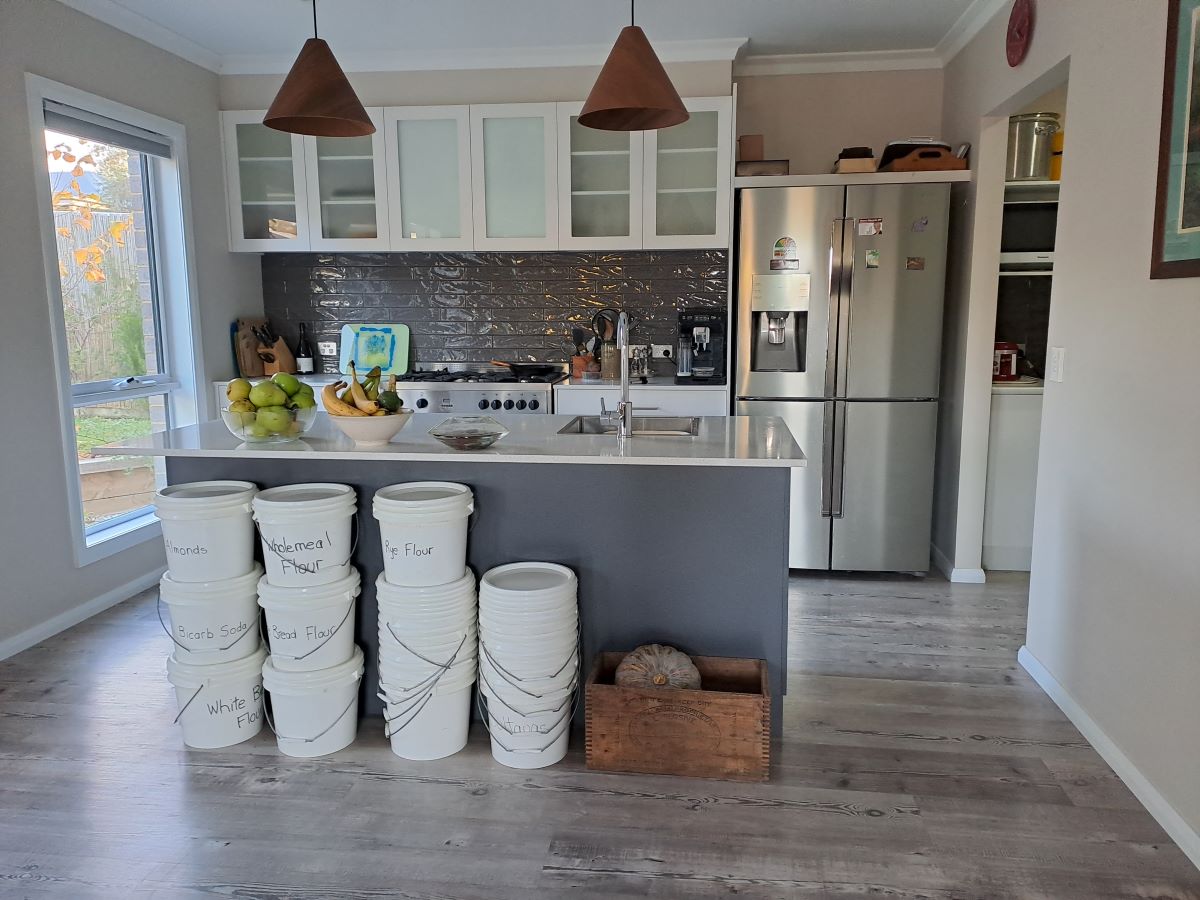
The bottom shelf is 4 buckets of bread flour – 2 white, 1 wholemeal and 1 rye.  This is GMan’s domain as he amkes the bread.

The corner pantry is still a work in progress but more about that tomorrow.