A Chilli Kind of Day

1 Comment

I went down to the garden this morning to pick the bell chillies. Here they are ready for me to slice and de-seed them.

2012-02-04 01
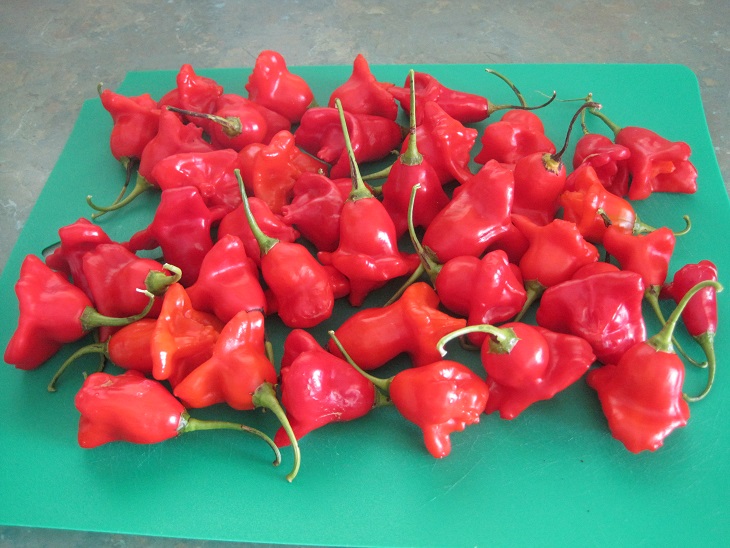
While I was picking them I noticed the other chilli bush which I call Birdseye chillies.  I have never picked or used them as I am sure they would be too hot.  The bush looks pretty in the garden, especially as the chillies ripen.

2012-02-04 02Here is the bush after I had picked most of the red ones.  I decided to check Google and see if I could make Tabasco sauce as I knew I was getting to the point where I would need to buy some more.  Sure enough, there are dozens of recipes on the internet so I decided to try it.  From the photos I saw on the internet my bush is what are called tabasco chillies in the USA.

First I covered my hands with a couple of bread bags and secured them with rubber bands.

2012-02-04 03Then I set to work.

2012-02-04 04Here are 4 trays of sliced and de-seeded bell chillies ready to go in the dehydrator.  Once they are dried I will be grinding them to make chilli powder.

I adapted a couple of recipes I found for the tabasco sauce and this is my version.

TABASCO SAUCE

150g of hot chillies
165ml white vinegar
3/4 teaspoon salt

165ml white vinegar, extra

2012-02-04 05Chop the chillies (including seeds) roughly (I actually put them in whole), place in a small saucepan with vinegar and salt.  Bring to the boil, simmer gently for 5 minutes.  Remove from heat and allow to cool.  Blend until smooth.  Add another 2/3 cup vinegar and combine.  Press through a fine strainer.  Discard the residue.  Pour liquid into sterilised bottles.  Store for 2 weeks before use.

2012-02-04 06WARNING:  THIS IS VERY HOT!!

Friday Favourites – Tuna Patties

2 Comments

I posted a comment on this post at Frugal Downunder this morning and promised that I would do my Tuna Pattie recipe for Friday Favourites this week

TUNA PATTIES

425g can of tuna
1 1/2 cups cooked rice
2 large potatoes, cooked and mashed
2 tablespoons lemon juice
Black pepper

Drain and flake the tuna.  Place in a bowl with other ingredients and combine thoroughly.  Form into patties, dust lightly with flour and fry in a little oil.

Drain and serve with salad or steamed vegetables.

HINTS & MODIFICATIONS

I have tried all sorts of variations when making these patties but find that the combination of potato and rice provides the best binding agent.

I use arborio rice but any shortgrain rice which is well-cooked should work.  Do not add any milk or butter when mashing the potatoes.  The quantities are fairly flexible depending on how far you are trying stretch a tin of tuna.

I freeze these patties and they make a quick and easy meal when you are pushed for time.

You can vary them by using salmon or any freshly cooked fish.  I have made them using leftover poached salmon and they were really delicious.  Seasoning can be adjusted to suit – I have used lime juice, celery salt and French mustard at various times.  You are limited only by your imagination.

I do not have any photos to go along with this post but I do hope you are inspired to experiment with this very basic recipe.

Make Your Own Pasta

11 Comments

I have finally set some time aside to try out my pasta maker.  It is an attachment for my Kitchen Aid.  Here are some photos from my effort on Sunday afternoon.

2012-01-31 01The mixer with flat blade

2012-01-31 02Ingredients – flour, salt, eggs, water

2012-01-31 03Pasta roller

2012-01-31 04

Spaghetti cutter

2012-01-31 05Lasagne sheets – cut, floured and packaged for freezing.

2012-01-31 06Spaghetti – dried, coiled into a nest and ready to refrigerate or freeze.

I also made fettucine which we had for dinner that night.  I don’t think I will ever buy dried pasta again.I am very pleased with the results of my first attempt and am looking forward to experimenting with different flours and flavourings.

This is another food that I have complete control over the ingredients.  I have also eliminated more packaging from our lives.

New From Old

2 Comments

A couple of weeks ago, in this post I outlined what I was planning to do to rejuvenate an old bed.

Firstly, I covered the mattress in plastic, using one of the heavy-duty bags that was packaging from the new mattresses.

I stitched it to fit using my sewing machine.  It was a bit awkward but I was happy with the result.  Here is a close-up of the stitching.

Then I trimmed the excess plastic and set to making the fabric cover.  I made it so that it fitted neatly and at the open end I made a velcro fastening.

2012-01-29 03Here it is on the bed and you can see the straps which go underneath to secure it.  I don’t want to find the mattress at the other end of the verandah after we have a storm.

2012-01-29 04The straps are elasticated so that they easily slip over the ends of the frame and hold the mattress snugly in position.

All I need now is some nice warm days to invite me out to use my new creation.

Friday Favourites – Savoury Quiche

2 Comments

At the risk of sounding monotonous, here is another quiche recipe.  I use different fillings depending on what is available but the principle remains the same.

SAVOURY QUICHE

PASTRY SHELL

1 quantity of shortcrust pastry.  The recipe is here.  I use a 25cm (10 inch) quiche dish and this is more pastry than I need.  You can freeze the excess or use it and make something else while the oven is turned on for the quiche.

FILLING

4 eggs
Cream/milk/milk powder/evaporated milk
1/2 cup grated cheese
1/4 teaspoon cayenne pepper
2 rashers shortcut bacon, diced
1 onion, finely chopped
Free choice – could be asparagus, mushrooms, corn kernels, spinach, tomato slices

Lightly fry the bacon and onion.  Spread mixture over the base of the quiche.  Add whatever other filling ingredients you choose and top with the grated cheese.  Beat the eggs with milk and or cream.  I usually use milk powder and water mixed in equal proportions to make a slightly richer mixture.  Add the cayenne pepper.  Pour over the filling until it is within about 1cm of the top of the pastry shell.  Bake in 180 degree oven for about 40 minutes.

2012-01-27 01

I did not get an opportunity to photograph the finished product before dinner last night so here is what is left.  I have cut it into portions to freeze.  We will then have it in our lunches next week.

I love recipes like this that allow for a degree of flexibility depending on the available ingredients.  It is a great way to use up a few sad vegies from the crisper.

Keep It Simple – Laundry

Leave a comment

After reading ‘Simplify’ I keep looking at how I can make various aspects of my life as simple as possible.  The laundry is one example.

I have previously written about tips and tricks for the laundry as well as organisation.

We do not need umpteen different cleaning agents or hair products and the same goes for washing clothes.  This shows all of my laundry products in 2 small racks inside the cupboard door.

2012-01-26 01In the top rack is pre-soak which I use occasionally, box of Sunlight soap and the washing liquid.  Half a capful of liquid is all I need for a load of washing in my front-loading machine.  I use Sunlight soap in a soap saver for most of the hand-washing that I do or rarely a couple of drops of the laundry liquid.

The bottom rack has a cut-down container and tablespoon which I use to measure the pre-soak and dissolve it before adding to a bucket of hot water.  I have a bar of Sard Wonder soap which I store in the container.  Beside this is a partly used container of Napisan which is from when I was soaking cloth nappies for my young grand-daughter.  She no longer wears nappies but I have kept the Napisan as it can be useful for soaking to remove stubborn stains.  Once it is used up I will not replace it.

Silent Green Giants – An Update

2 Comments

In March last year, during the first couple of weeks of this blog, I posted this entry about our ‘big 3’ – the solar panels, solar hot water and rainwater tanks.

Today I finally received our statement from our electricity company for the meter reading which was done back at the end of November.  This means that we now have the statistics for a full 12 month period of having solar panels and exporting generated power, which is excess to our requirements, back to the grid.

In one year of having our solar panels connected to the grid we will receive a refund of $1,244.33 as well as having $0 in power bills.  This represents a total turnaround of costs over 12 months of $2,392.17.  I am really pleased with the result as it was achieved despite one of the wettest summers on record (and next to no sunshine) in the first 3 months after the installation of the panels.

We have a 3.7kW system which cost nearly $14,000 after the rebates.  We anticipated that we would recover our costs (in refunds and no bills) within about 5 years.  We will go close to achieving this and my goal for the next year is to reduce our electricity consumption even further by being more vigilant in monitoring our usage.  I will also endeavour to make sure that more of our necessary consumption is at night, thereby maximising the power being exported to the grid.

I am pleased that we can minimise our costs as well as making a positive contribution to reducing our carbon footprint.

Multitasking – Friend or Foe?

4 Comments

As our lives just seem to keep getting more pressured we often resort to multitasking in both our personal and professional lives.  There are several reports now that seriously question of effectiveness of such behaviour.  I read recently that there were recommendations that we close our email when we are in the office and only check it twice per day.  How often are you derailed from a task by an email that pops up in your inbox?

The other day I had an afternoon with no particular things to do.  I thought of doing the ironing and contemplated taking it into the lounge and watching a DVD series.  I decided against this and opted to recline on the lounge and immerse myself completely and utterly in the mini-series, “All The Rivers Run”.  I was transported back to the early days of river transport on the Murray River.  I enjoyed the DVD at a level which simply would not have been possible if I was ironing at the same time.

2012-01-21 01Later in the afternoon I did the ironing .  I spent a little over an hour on it and completely finished a basketful of ironing.  I was able to do it quickly and efficiently by concentrating on the ironing.

2012-01-21 02I am going to consider other instances where multitasking is not really beneficial.  What do you think?

Friday Favourites – Zucchini Quiche

2 Comments

A friend gave this recipe to me nearly 30 years ago.  It seems to be commonplace now but at the time it was a real novelty.  I use it for main meals, packed lunches and finger food depending on the the serving size of the pieces.  The ability to serve it either hot or cold just adds to the versatility.

ZUCCHINI QUICHE

350-400g zucchini, grated
1 cup grated cheese
1 onion, finely chopped
1 cup self-raising flour
¼ cup oil
5 eggs
Black pepper for seasoning

2012-01-20 01
Place all of the ingredients in a large mixing bowl and combine.  Spread in an ovenproof dish and bake for approximately 45 minutes at 180 degrees.

2012-01-20 02
HINTS & MODIFICATIONS

2012-01-20 03
I love this recipe for several reasons.  It allows me to make use of the things we produce – eggs, zucchini and onion.  The recipe is one of the most forgiving and versatile ones I have come across.  At various times I have used 1 less egg, substituted milk for 1/2 of the oil, used up to 100 g more or less of zucchini, substituted half of the zucchini for other vegetables such as grated carrot, diced capsicum or corn kernels.  The results may not be perfect but it is definitely edible.

The quiche is usually served with salad here, but the options are almost endless.

2012-01-20 04
I am pleased to say that all of the salad is home-grown except for the capsicum.  The eggs, zucchini and onion are also home-grown and even the oil I used is local avocado oil.

Please let me know if you are inspired to try this recipe if you are not already familiar with it.  I trust that you will enjoy the results as much as we do.

NOTE:  To make this gluten-free, I use gluten-free flour and add 2 teaspoons of baking powder.

Minimise For Multipurpose

Leave a comment

I know that keeping our stuff to a minimum and simplifying as much as we can is a good thing but sometimes it is difficult to articulate why this is the case.  It is not until something occurs that we are reminded of just how useful it is to live with less.

Last weekend we had 20 guests for a BBQ lunch on the verandah.  About an hour before they arrived, The Duke announced that we could use the folding table as well.  This happens to be my sewing table and it was far from perfectly tidy.

I quickly tossed a few pieces of fabric and UFO’s on the spare bed and almost instantly we had an extra table for our entertaining.  Even though I had to move a few things it was no real imposition.  It makes sense that this table is being used almost every day rather than being folded up and gathering dust, waiting to be used once or twice per year.

This is the spare bed with everything that was on the sewing table.

2012-01-19 01The BBQ is over and the table is back in the room.  Everything is still on the bed as I am going to take this opportunity to sort out a few more things and find proper homes for them.  The table is pretty well bare at the moment apart from my sewing machine.

I will have to get the sorting done before Saturday afternoon when Miss O and Izz come to stay the night as this is the single bed and trundle bed that they use.