Make & Mend – Shelving

4 Comments

My latest project is something completely different.  I designed and made a piece of furniture.  ‘Furniture’ is probably a slightly too grand to use as a description for the rustic shelving unit which is made from vintage wooden crates and lengths of undressed pine.

Shelving
This creation is the culmination of much discussion over a number of years.  When we first moved into our home in a country town in South Australia we discovered that the large shed held numerous old treasures that had been collected, perhaps even hoarded by previous owners.  Amongst these items were 5 solid wooden crates which had been used to hold explosives.  This was evident from the markings on them.

Box detail
Over the years we have moved house twice, downsized and decluttered many things but the crates, which were someone else’s cast off stuff always managed to make the cut.  The Duke would vaguely suggest that we could use them for shelving and they have often been simply stacked one on top of the other and used to store various things in the workshop.  I had always had a rough idea of a design for shelving which would make the best use of the boxes that we had.  After (yet another) clean-up in the workshop the other weekend my plan finally became clear.  I found 2 identical pieces of undressed pine in amongst the odds and ends of wood. The Duke said that they were part of the packaging on the roll of fencing wire we had bought when we were building the chicken run.  I needed 8 matching pieces for my planned shelving so I asked at the local farm supplier from whom we had bought the wire.  He was happy to give me 6 more pieces that were sitting on a bench out the back of the shop.  The pieces of pine would make the ends and legs for the unit.

Shelving showing the legs
The Duke trimmed the pine to the length required and we then set about assembling the shelving unit using my design which I had roughly sketched on a piece of paper to convince him that it was feasible.

The only cost was $7.00 for some screws. Some were from our stash but we needed to buy more to complete the project.

The shelves will provide some additional storage in the workshop and were a practical way to use the boxes which had been deemed as too good to throw out.  By the way, I checked on eBay and found that similar ones were for sale at between $20 and $60 each.  What is my designer original shelving unit worth?  I would say that it is priceless!


Make & Mend – Cot Quilt

2 Comments

As promised here is another of the things I have been working on.

On one of my many attempts to sort/tidy/declutter my sewing room I found some offcuts of material.  It is calico with blue teddy bears.  I also had some plain calico.

Material
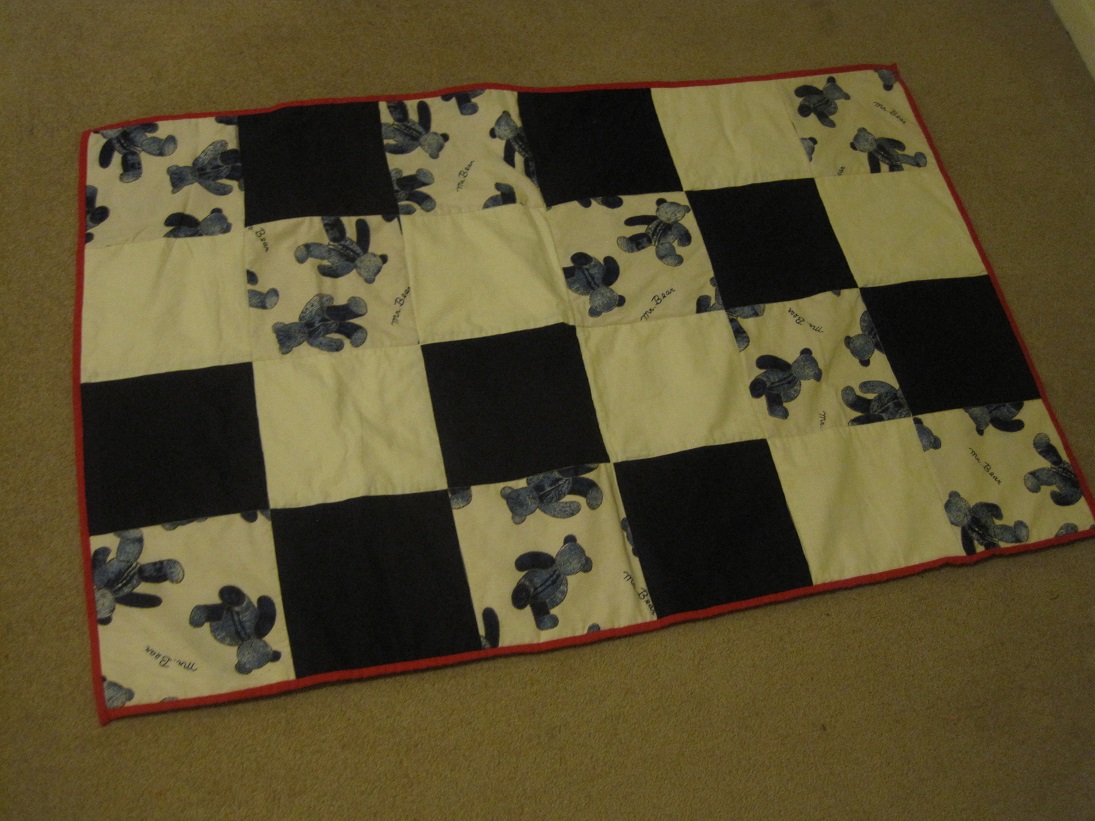
With no-one particular in mind I decided to make a quilt.  I discovered that I could make enough blocks to make a cot quilt if I added some plain navy blocks.

Patchwork quilt top
The batting and backing were added and the quilting was a simple ‘stitch in the ditch’ where the blocks were joined.

Then it just sat waiting to be bound and finished.  I finally got inspired and completed the quilt.  Handsewing the binding took a little time but I set myself a goal to get it done and here is the finished product.

Cot quilt
I am planning to send it to a friend whose patchwork group are busily making quilts for those who lost their homes in the recent NSW bushfires.  I hope it will help a family in need.

I am very gradually decluttering my sewing room.  It is a gradual process because I do not want to get rid of stuff but rather to use it up.  I plan to make things from the fabric that I have and donate them through various avenues so that others can benefit.

Make & Mend – Picture Frame

4 Comments

This week I want to share a few of the projects I have been working on recently.

First up is the picture frames.  These are 2 large timber frames which belong to my mother.  They have family photographs in them and usually stand on her sideboard.  The problem is that the stand is actually very heavy cardboard.  After several years of very wet and humid weather the cardboard has absorbed moisture and now has flexed and will not stand and support the frame.

Picture frame with stand
I brought these home with the idea of repairing them and this is what I did.

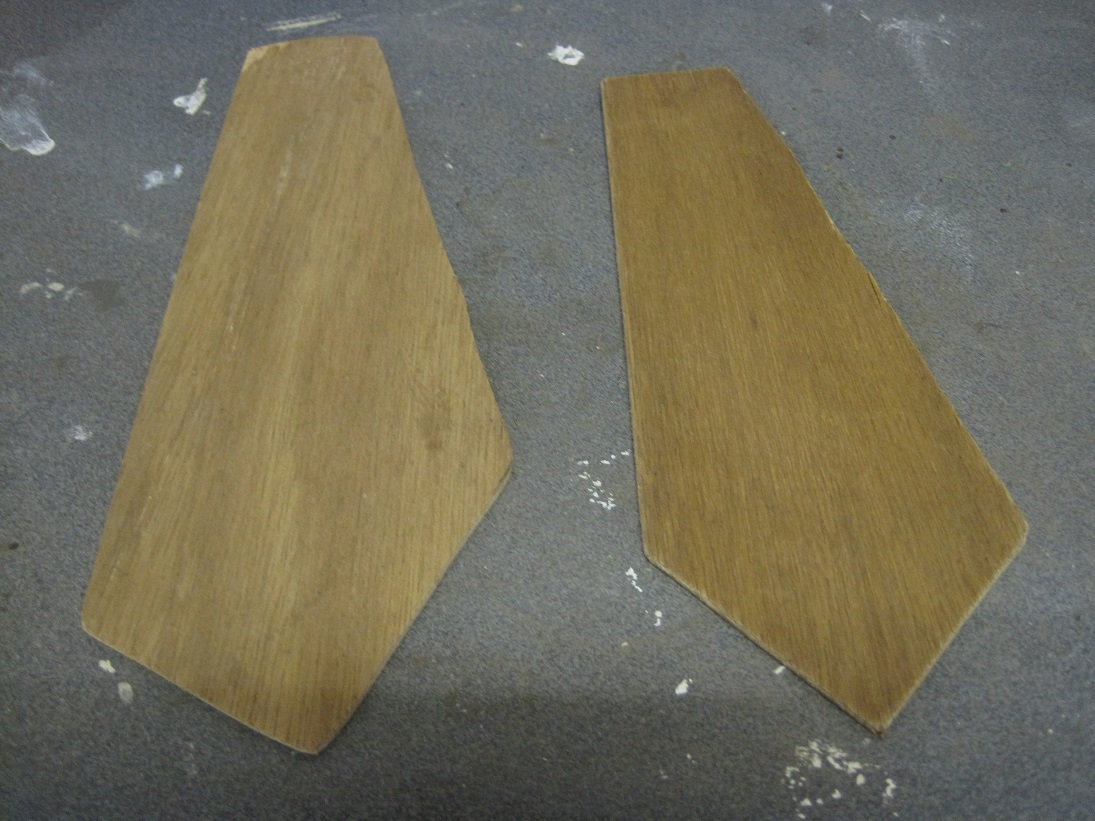
I made a pattern from the stand on each frame and then marked it out on a sheet of plywood.

Pattern
The pieces of plywood were cut using a jigsaw.

Plywood
I then spread the glue (Aquadhere) over the plywood and placed it on the cardboard stand.  I used several clamps to make sure firm contact was maintained between the surfaces.  I left the clamps in place for 24 hours.

There are no photos of the clamps as my camera battery was flat.

Tonight I removed the clamps and the repair has been successful.  Now I need to finish the other frame then return them to my mother.

Repaired
Tune in again tomorrow for the next project.

Project 333 – Wardrobe Orphans

2 Comments

While I have been busily writing about some of the strategies you can use to reduce your stuff, I have been reviewing the contents of my wardrobe.

Wardrobe

As I have said before, I do not have a bulging closet.  Nevertheless, there are still items that get overlooked when I am planning an outfit to wear.  Why?  They fit and there is no good reason but they just tend to get overlooked.  They are the wardrobe orphans.

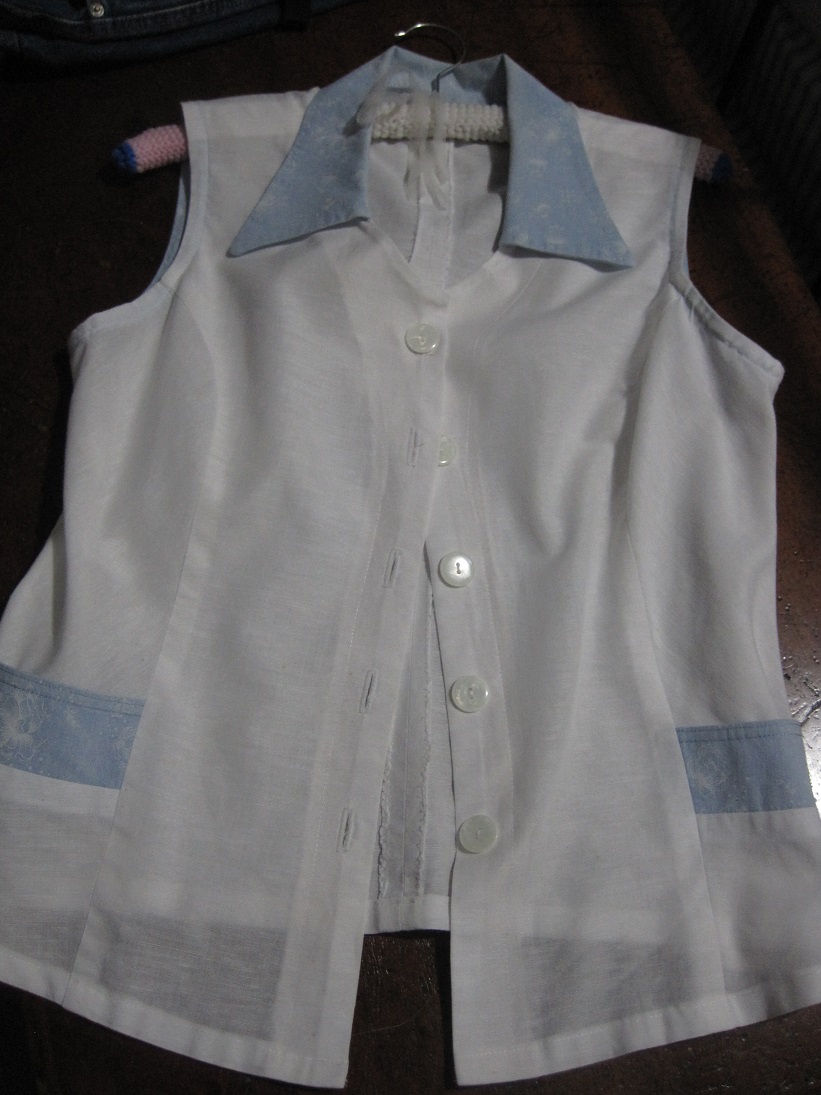
Blouse

This sleeveless shirt is an identical style to others that I wear regularly but although I like it the top it does not really work with other pieces.  My skirts are all patterned and therefore I wear plain tops with them.  My shorts are white, black, red and khaki.  I don’t get excited about any of those combinations.  I think it needs denim or navy shorts or skirt.  I don’t have either nor am I planning on adding them to my wardrobe.  The final straw is that it obviously requires a white or nude bra and the 2 white bras that I have are too big and really past their use-by date.  So, the shirt has to go.

Shirt

Another white shirt.  This time it is a 3/4 sleeve one with light blue metallic pinstripes.  Unlike the other one I have never really loved it.  I bought this when I needed another ‘business’ shirt but it generally gets cast aside in favour of others that I prefer.  It is just not right for me.

I am going to move both of the shirts out of my wardrobe and was planning on putting them in the op shop bag.  However, my first option is to offer them to any of my readers who are interested.  You may have one or both if you wish.  I am giving them away on the understanding that you will pay for any postage costs.  I am willing to post overseas if required.  They are best described as an Australian size 10 – 12.  The sleeveless shirt was made by me and is cotton.  The 3/4 sleeve one is Jacqui E cotton/nylon/elastane.

If you are interested please email me.  gandy79atgmaildotcom

Are there any orphans lurking in your wardrobe?

Simply Sewing

6 Comments

One of my favourite activities is sewing.  More specifically, sewing clothes.  In years gone by I have made everything from business shirts to swimwear but in recent years I have not done as much as I used to.

I have never had a huge stash of fabric, although The Duke may think otherwise.  Nevertheless, over the last couple of years I have been working on gradually whittling down what I do have.  I decided that a cupboard of excess fabric is of no benefit to anyone so I should use it up to make things, whether they be for the family, to sell or simply to donate.

Sometimes it seems that as fast as I use up fabric I am given some more so I have set myself the challenge to use up everything I have.  This weekend I made a pair of satin boxer shorts from some gifted material which I think I will give to my daughter.  I will make a camisole from some white interlock fabric to make a set of summer pyjamas.  Here are the shorts.

Boxer shorts

In the same bundle was some crinkle cotton fabric which was a fairly unappealing yellow check but I managed to brighten it up with the addition of some plain red for the contrasting pockets on this dress I made for Izz.  It will be perfect for summer days at childcare.

Dress

I also started sewing a toddler dress which I will show you when it is finished.  Then there was the mending/alteration pile.  I hemmed 2 pairs of trousers for The Duke and have adjusted the hemline on a new skirt of mine.  It is now pinned and ready to handstitch.

My goal is to do some sewing each day and gradually work through the ‘to do’ pile before starting on some new projects.  I have 2 skirts which I am altering that are waiting as well as a cot quilt which needs the binding sewn on and some hand-quilting to be done.  I have several pieces of gifted fabric which I contemplating what I will make.  Not all of it is suitable for our family so I am busily planning what to sew that will be of use to someone.

Clean Clothes

9 Comments

Housework is a never-ending circle.  Whether you view it as a closed-loop system which supports and sustains your family or as a treadmill that you cannot escape is entirely up to you.  I prefer the first view because it is positive and values homemaking as an important role.

I was interested to read recently that ‘doing the washing’ is not about tossing a heap of clothes into the washing machine, followed by the dryer or perhaps hanging them on the line.  In this scenario the final step is then seen as throwing the heap of clean clothes on the nearest sofa or bed.  This results in disorganisation and clutter while various members of the household grab whatever they need to wear.

Unsurprisingly, the above view emanated from a discussion about how clutter and disorganisation go hand-in-hand.  It is easy to imagine that over time the pile of clean clothes becomes dusty and soiled and then need rewashing.  Perhaps items cannot be located which results in buying more clothes.  Items which need mending are left and forgotten.  Then there is a downward spiral, the pile becomes a permanent fixture, the bed is no longer able to be used for its original purpose and so on.  This is an extreme picture but one that it is best to avoid.

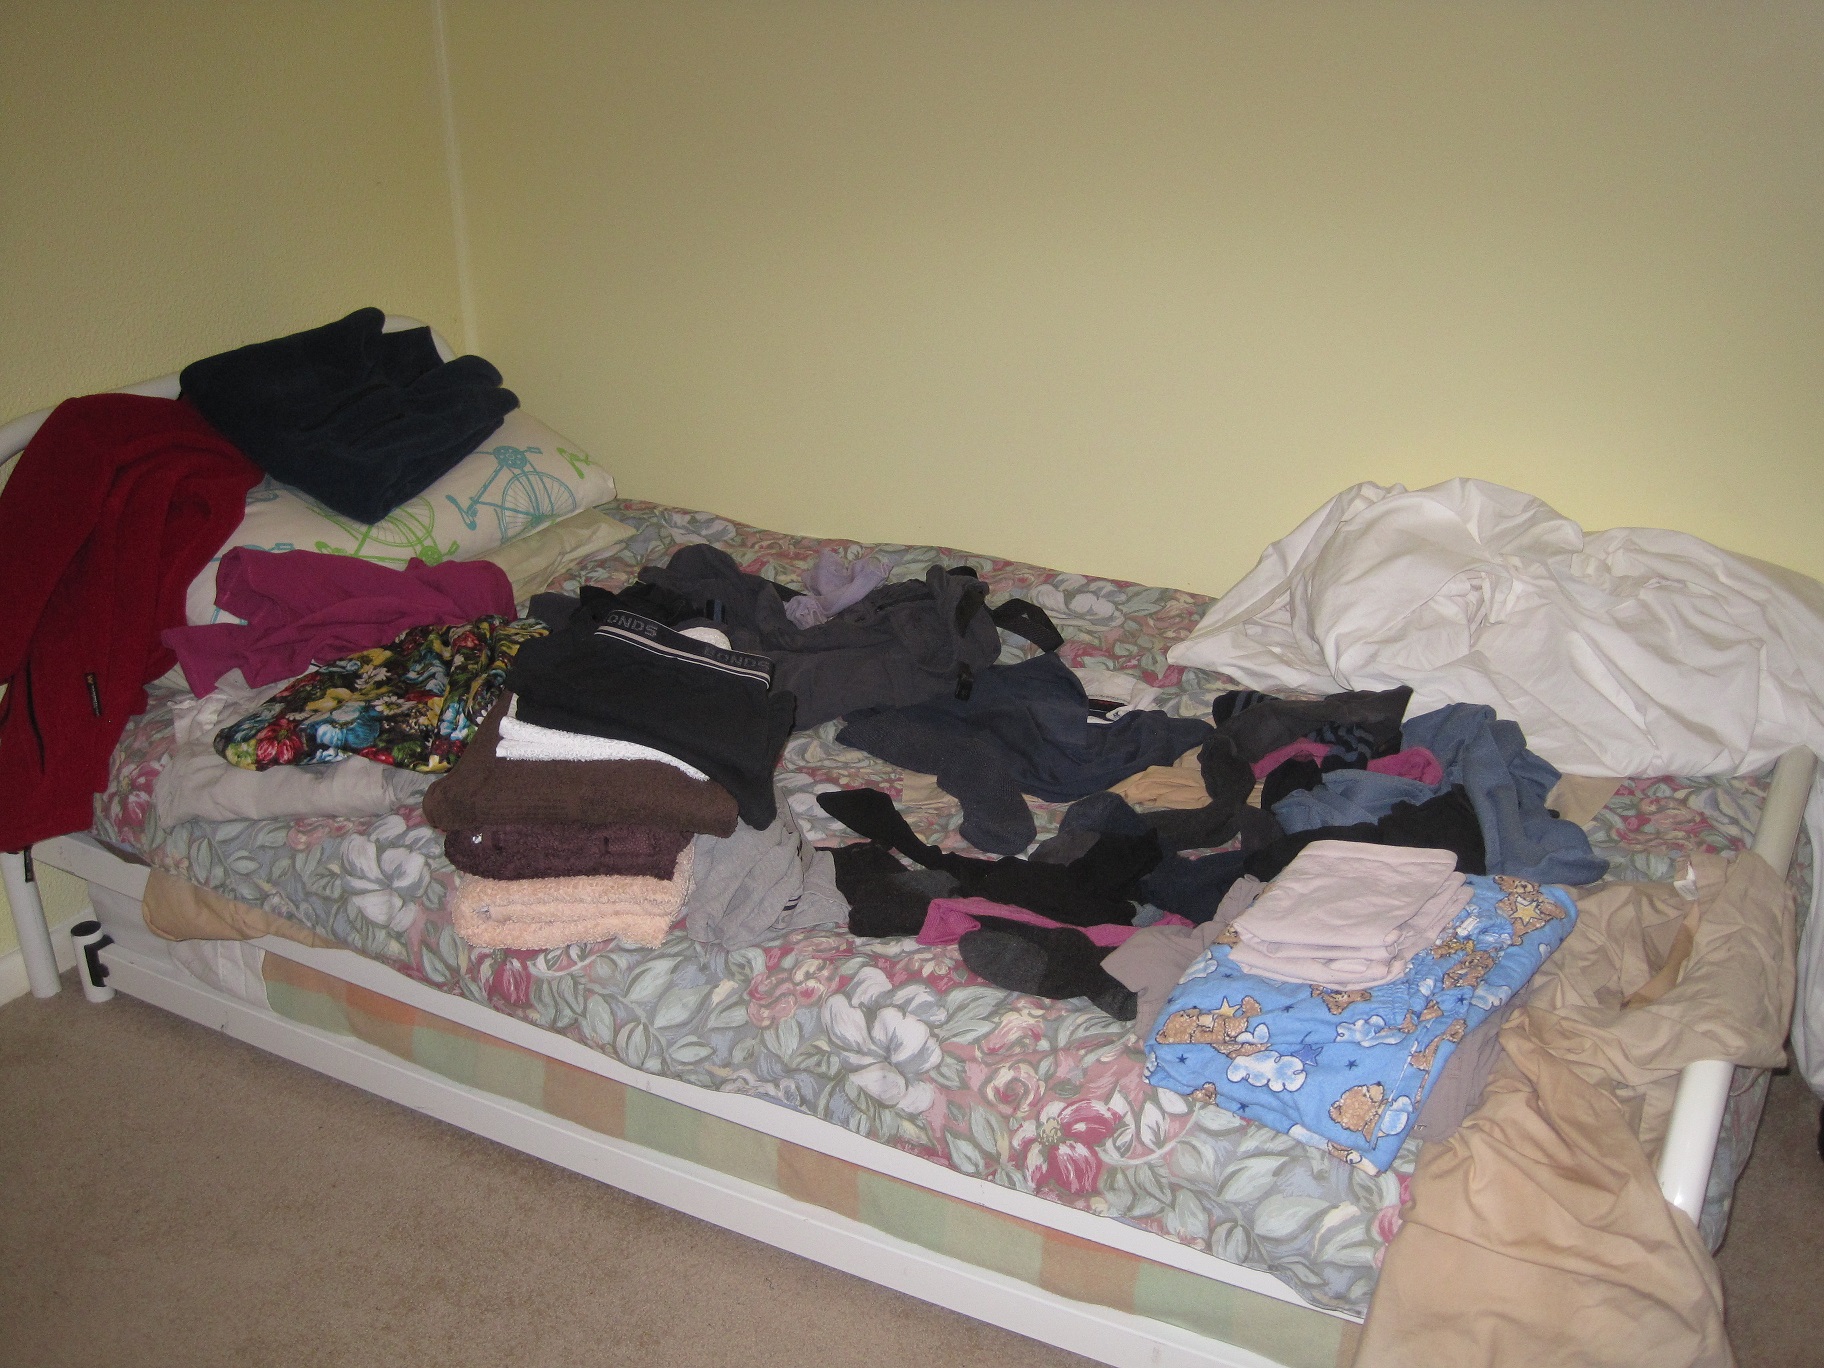
Clean clothes

Confession time:  I resorted to this practice last week and here is some of the evidence.

It took me 5 minutes yesterday to set things to right which made me wonder why I hadn’t done it sooner.

Folded clothes

The discussion went on to say that you should not regard the washing as ‘done’ until the clothes are dry, sorted, folded and put away as well as any ironing any items which require it.

I generally manage to do all of this in one go except the ironing.  Ironing is always done at least once a week.  This is one of the benefits of having a streamlined wardrobe.  The selection of clothes are limited and I am being perfectly honest when I say that I have to do the ironing otherwise we would have nothing to wear to work next week.

By considering tasks within the home to be a closed-loop it is easier to gain satisfaction from the work you do.  It is not simply a chore of folding clothes but rather can be seen in the following way.  A hamper full of soiled clothes is washed, dried in the fresh air and sunshine (hopefully), sorted, folded and drawers and wardrobes replenished with clean clothes for the next week.  It is also an opportune time to review the state of clothes and do any repairs as required.  You can rejuvenate items before they become beyond repair.

How to you deal with washing, folding and ironing?  Do you fold clothes as they are taken off the line?

Started and Finished

Leave a comment

Today I began a sewing project and finished it in one day.

I created a pattern from an existing top which I bought a couple of years ago and made this cotton lycra 3/4 sleeve top.

2013-07-10 01I am quite happy with it, however, I will be making a few adjustments to both the pattern and my sewing technique next time.  There will be a next time as I have another piece of fabric which is a narrow black and cream stripe.

I have made clothes from stretch fabrics for many years yet I am never entirely satisfied with the finish that I can achieve on the hems.  I use a stretch stitch on my sewing machine and have tried several alternative stitches.  Iam currently debating whether an overlocker is the way to go.

If you have any experiences of using an overlocker when sewing stretch fabrics I would love to hear your thoughts.

Slow Living – June

4 Comments

Another month has flown by and it is time to review it in the spirit of the monthly round-up at Slow Living Essentials . {nourish*prepare*reduce*green*grow*create*discover*enhance*enjoy}

Here are the Slow Living categories:

{Nourish}  More gluten-free discoveries this month.  I have successfully made gravy, stuffing for roast beef and cheese sauce.  For the gravy I used the pan juices and potato flour to thicken it.  The cheese sauce was made using equal parts of potato and chickpea flours.  I had previously tried making stuffing using well-cooked rice instead of the soft breadcrumbs and although it tasted good enough it just crumbled as we carved the meat.  This time I used chickpea flour, almond meal, flaxseed meal, finely diced onion, chopped parsley, mixed herbs, salt and butter.  I was able to create a texture very similar to the stuffing I used to make using soft breadcrumbs, it cooked well and stayed in place as we carved the meat so I was very happy.

{Prepare}  Citrus harvest is in full swing here so I have many the first of what will probably be several batches of lemon syrup cordial.  I also diced up some chillies that we were given and stored them in oil.

Lemon cordial

{Reduce}  Another blouse gone from my cupboard.  I continue to be vigilant about reducing the ‘stuff’ that seems to insidiously creep in while we are not watching.  The fabric stash reduced slightly when I made a cot quilt.  It is not yet finished but you can see it under ‘Create’.

Blouse

{Green}  For many years I have worked on reducing our reliance on single-use plastic items.  Many of these habits are simply second nature now but it never hurts to be challenged and reminded of what else you can do.  I have signed up for Plastic Free July and will be tracking my success (or otherwise on my blog).

Picture

{Grow}  The garden beds are filling with green.  The seed potatoes are growing apace and need earthing up if this rain ever stops.  We planted garlic in the top bed and I counted them yesterday – we have 99 garlic seedlings poking their heads skywards.  Judging by a couple of gaps, I think there are 3  that have not yet come up.

Garlic bed

{Create}  I started making a cot quilt with some fabric from my stash.  I have the binding to finish attaching and some hand quilting.

Quilt

I am working on refashioning a skirt for myself.  This is the before photo.

It is now too big and too long so I am making a simple, knee-length skirt.  I love the fabric and did not want to part with it.

{Discover}  I am spending time reading and researching about making liquid soap.  My mother gave me this book for my birthday and I am finding that there is so much to learn.  Perhaps next month I may be able to report on my first attempt??

{Enhance}  This month most of the things that fall into ‘enhance’ have been in my head.  I am mulling over ways to encourage closer ties and co-operation amongst our neighbours.  It is most definitely a challenge as there are many ‘weekender’ properties that are only inhabited intermittently.  The other complicating factors include distance between homes (most are are on small acreage) and a clear reticence by some folk to have any real rapport at all with their neighbours.  But it is a matter of small, incremental steps.

{Enjoy}  A couple of weeks ago my mother came to visit for the weekend and we enjoyed a day out at  ‘Gardening on the Edge’ which was 6 local gardens oren to the public.  I certainly enjoyed what they had to offer but it also made me realise that ours is pretty darned good in its own way. 

The last day of the month and we took ourselves off to see ‘The Great Gatsby’ with some free tickets that The Duke had been given from work.  We took our own snacks and drinks so were set.  Our treat was fish and chips on the way home.

Now I am off to check out some of the slow living blogs.

Til next month………..

Quilt Update

4 Comments

I have done some more work on the quilt today.  The blocks are all sewn together, the batting and backing are attached and I have machine quilted between the blocks.

Patchwork quilt topHere is a view of the backing with the stitching.

2013-06-13 02This is the fabric I will use to make the binding.

2013-06-13 03I was undecided about the binding until I had the quilt assembled.  This was a piece which I had planned to use when making reuseable Christmas gift bags.  I will buy more if I actually need it for that purpose.

No more craft posts until I show you the finished product.  However, I am pleased to have set myself this challenge otherwise this would still be a pile of fabric on the sewing table.

A Bit Less Fabric

1 Comment

Last night I made a start on the teddy bear quilt.  I have cut out 24 blocks of fabric.

It is all spread out on the kitchen bench as I had to work out the combination of colours.  Although there are 24 blocks, it is not 8 of each.  I actually have 9 patterned, 8 navy and 7 calico.  This evolved because of the amount of each fabric that I had.  It really is a matter of making do with what you have.

Quilt squares
I chose to make it very simply from large blocks of fabric because otherwise the look of the teddy bears would be lost if each piece just had a bit of a leg or an ear.

The first 8 blocks are sewn together.

Assembling the quilt

I plan to have the remaining blocks sewn together tonight.

Fabric Update:  This project has completely used the navy and teddy bear fabric so they are now gone from the stash.  I still have some pieces of calico left but it is actually a slightly different weight and colour to the piece that I used for the quilt.