Clutter-Free – Start Small

4 Comments

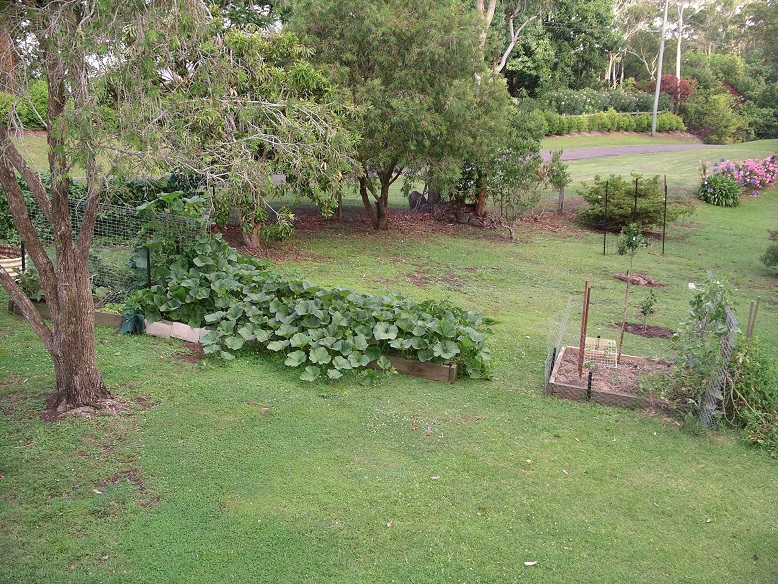
I often talk about decluttering various spaces and having less but today I want to focus my attention on having clear spaces.  I am not advocating jamming your cupboard full of stuff, however, the benefit of clear surfaces cannot be underestimated.  It is a task that is unlikely to be achieved in one go and can be enormously overwhelming.  That is why I focused my energy on one room – the bathroom.  It is the smallest room in the house and is designed for a specific purpose, therefore logically should be the easiest to minimise the ‘stuff’.

VanityI have had the benefit of a renovated bathroom which has an inherently streamlined design.  I love the fact that there is no plug lying around on the side of the sink.  There are only 2 items on the bench – a ceramic shell dish which holds a small bar of soap and a repurposed vase (The Duke drilled a hole in the base of it) which holds our toothbrushes.  It is a quick and easy task to keep this area clean and tidy.

Shower recess
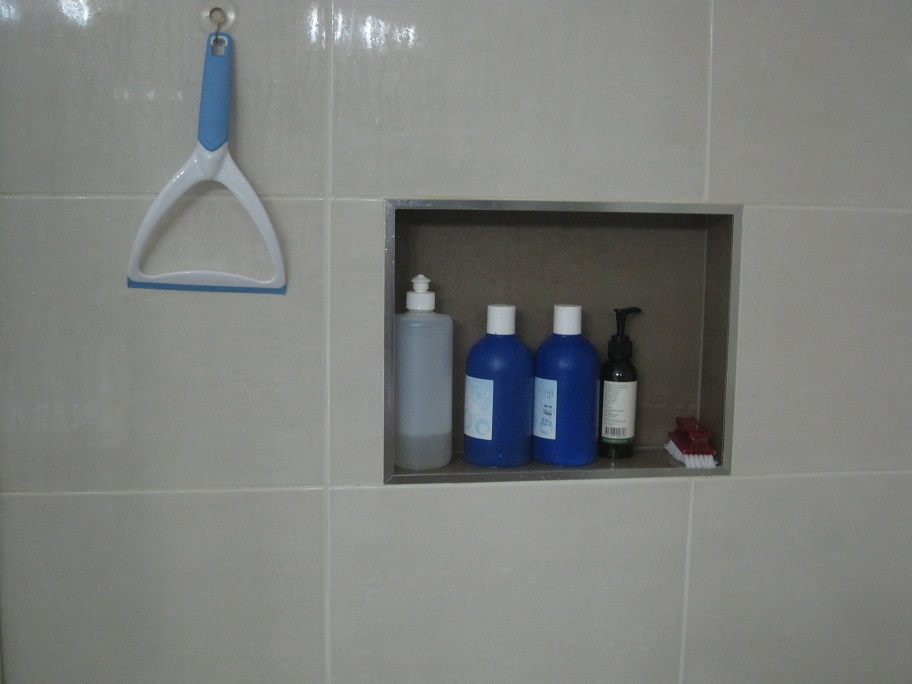
As this is quite a compact area we chose not to have a bath – just an easy to access shower area.  I had seen this type of recessed shelf in motel bathrooms and asked the builder to create one when we remodelled the room.  I love the idea because it is simple and streamlined to the eye, nothing to rust or gather soap scum and there is no encroachment to bump into when you are showering.  From left to right there is shower gel, shampoo, conditioner, facewash and a nail brush – everything required when showering.

Toilet and floorThe floor is another place where clutter can gather.  I found these fittings which attach to the wall – a holder for extra rolls of toilet paper and the toilet brush holder are both clear of the floor and do not need to be moved when sweeping or mopping the floor.

Scales and baskets
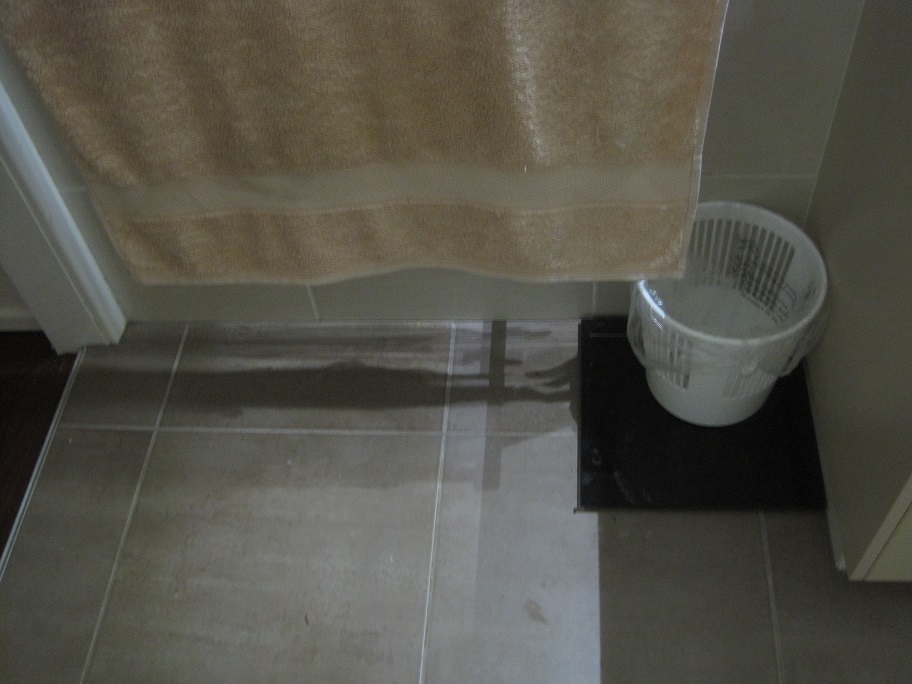
The only 2 things on the floor of the bathroom are a set of scales and the waste paper basket.

My whole house does not look this clear but it is lovely to have achieved it in at least one room.

The vanity unit has a 2 door cupboard and 4 drawers.  Tomorrow I will reveal exactly what is lurking in there.

Downsizing the Drawers

6 Comments

Last week I showed you some of our furniture restoration projects.  Like everything we do they did not come to fruition quickly.  In fact, The Duke found the receipt for the new hardware for the drawers which was dated May 2012!!

The drawers are finally finished (apart from the mirror) and have been moved into our bedroom.

This is what they have replaced.

Chest of drawers
The first step was to remove the contents from the existing chest of drawers.
As per any good decluttering guide, the first step is to remove everything from its existing location.  Even though it was completely necessary to do it in this instance,it is certainly sobering to see the entire contents piled on the floor.  I was amazed at the things that I ‘found’ that had not been worn for some time.  After carefully sorting the items I managed to toss 2 pairs of socks  and an old t-shirt.  There probably should have been more but it is a case of small steps.

My clothes
I also removed the drawer liners and cut the pieces to size to re-use in the new drawers.

Drawer liners
It took a bit of judicious re-arranging but the clothes all fitted in.  This was mainly because the drawers in the new dressing table are somewhat deeper than in the previous chest of drawers even though there are less drawers.

Dressing table
This is my new dressing table/clothes storage which is silky oak timber.  The silky oak tree is native to the local area in which we live.  We bought this about 2 years ago and The Duke stripped all of the paint from it, sanded and stained the piece of furniture.  All of the drawer handles are new reproductions of a style similar to what would have been on the drawers originally.  All that is left to do is to get a new mirror cut and place in the oval frame which will be suspended between the 2 timber uprights that you can see in the photo.  We are taking the old mirror to town tomorrow to get it done.

I am really pleased with how this has turned out.  There is a huge degree of satisfaction in restoring old pieces of furniture and bringing them back to life.

Furniture Restoration

3 Comments

I do not have photos of each piece but The Duke and I have been busy today, working on 3 different pieces of furniture.

Furniture restoration

The main piece is a silky oak chest of drawers/dressing table which we finally got around to beginning to stain.  We bought it unrestored a couple of years ago and the Duke worked hard to strip all of the paint and sand the individual pieces.  The oval mirror which attaches to the top has been dismantled and that was what was holding us back.  We needed to have it resilvered and there always seemed to be something more pressing to do.  The Duke searched on the internet and found that a large glass and mirror business in the city no longer do resilvering as it is cheaper, easier and more accurate to cut a new one, no matter what the shape or if there are bevelled edges.  We will have the frame stained and take it with the old mirror next week to get a new mirror cut and fitted into the frame.  Once it is finished it will replace the current pine chest of drawers that I am using.

On the left-hand side of the photo is what was originally our TV cabinet which was used by our daughter for a few years and then found its way back home.  Today we have sanded and undercoated it and the finish will be gloss white enamel and it will go in the guest (Air BnB) bedroom instead of the small decoupage desk which is there at the moment.

Finally, there is a pine blanket box standing on its end in the background.  We plan to use this as a storage box on the verandah.  It will hold BBQ supplies and tools and will be painted ‘Woodland Grey’ which is the colour that we will be using for a lot of the exterior trim as well as all of the fenceposts.  We have had this box for over 30 years but it has been superseded in our bedroom by an antique cedar chest.  It had heavy rope handles which we removed and are replacing with metal handles.  We bought them some time ago from Paddington Hardware along with all the new handles for the chest of drawers.  The holes where the rope was attached needed to be filled so I sanded a piece of an old broomstick and cut it into pices to plug the holes.  We overfilled them with Plastibond and tomorrow will sand the box including the Plastibond.

It may take us a couple of weekends to finish them all but I am looking forward to taking photos of the finished articles to show you.

Make & Mend – Shelving

4 Comments

My latest project is something completely different.  I designed and made a piece of furniture.  ‘Furniture’ is probably a slightly too grand to use as a description for the rustic shelving unit which is made from vintage wooden crates and lengths of undressed pine.

Shelving
This creation is the culmination of much discussion over a number of years.  When we first moved into our home in a country town in South Australia we discovered that the large shed held numerous old treasures that had been collected, perhaps even hoarded by previous owners.  Amongst these items were 5 solid wooden crates which had been used to hold explosives.  This was evident from the markings on them.

Box detail
Over the years we have moved house twice, downsized and decluttered many things but the crates, which were someone else’s cast off stuff always managed to make the cut.  The Duke would vaguely suggest that we could use them for shelving and they have often been simply stacked one on top of the other and used to store various things in the workshop.  I had always had a rough idea of a design for shelving which would make the best use of the boxes that we had.  After (yet another) clean-up in the workshop the other weekend my plan finally became clear.  I found 2 identical pieces of undressed pine in amongst the odds and ends of wood. The Duke said that they were part of the packaging on the roll of fencing wire we had bought when we were building the chicken run.  I needed 8 matching pieces for my planned shelving so I asked at the local farm supplier from whom we had bought the wire.  He was happy to give me 6 more pieces that were sitting on a bench out the back of the shop.  The pieces of pine would make the ends and legs for the unit.

Shelving showing the legs
The Duke trimmed the pine to the length required and we then set about assembling the shelving unit using my design which I had roughly sketched on a piece of paper to convince him that it was feasible.

The only cost was $7.00 for some screws. Some were from our stash but we needed to buy more to complete the project.

The shelves will provide some additional storage in the workshop and were a practical way to use the boxes which had been deemed as too good to throw out.  By the way, I checked on eBay and found that similar ones were for sale at between $20 and $60 each.  What is my designer original shelving unit worth?  I would say that it is priceless!


Make & Mend – A New Garden

Leave a comment

Today I made a garden bed, or more accurately refreshed an old one.  Unlike most of my gardening posts this one does not include growing food.

This is an area between the side of the garage and the front steps which originally had a selection of fairly unappealing shrubs and plants.  They had been cleared out some time ago and the space badly needed revitalising.  I did have a before photo, however, it is on the desktop computer which seems to have some issues so I took it to be looked at/repaired today.

Front garden
We bought the plants at a local garden centre on the weekend.  They are Australian natives – low-growing shrubs and ground covers.  The area has quite a considerable slope so I move some more rocks to build up the edges to prevent the mulch washing away in the first heavy shower of rain.  We were lucky to be offered a large pile of mulch by our neighbours who had several large trees lopped and mulched.  We moved 3 loads in the back of the ute last weekend so some of it was used on this garden with several layers of newspaper underneath to help suppress any weeds.

I thought we may have had some rain late this afternoon as the storm clouds were building rapidly and the thunder was rumbling in the distance as I put the finishing touches to my new garden.

Storm clouds

The threatening weather dissipated quickly and we have been left with a warm, humid night.

Make & Mend – Picture Frame

4 Comments

This week I want to share a few of the projects I have been working on recently.

First up is the picture frames.  These are 2 large timber frames which belong to my mother.  They have family photographs in them and usually stand on her sideboard.  The problem is that the stand is actually very heavy cardboard.  After several years of very wet and humid weather the cardboard has absorbed moisture and now has flexed and will not stand and support the frame.

Picture frame with stand
I brought these home with the idea of repairing them and this is what I did.

I made a pattern from the stand on each frame and then marked it out on a sheet of plywood.

Pattern
The pieces of plywood were cut using a jigsaw.

Plywood
I then spread the glue (Aquadhere) over the plywood and placed it on the cardboard stand.  I used several clamps to make sure firm contact was maintained between the surfaces.  I left the clamps in place for 24 hours.

There are no photos of the clamps as my camera battery was flat.

Tonight I removed the clamps and the repair has been successful.  Now I need to finish the other frame then return them to my mother.

Repaired
Tune in again tomorrow for the next project.

Sustainable House Day 2013

8 Comments

Sustainable House Day 2013 is an opportunity to check out a variety of dwellings in your area with sustainable features.  You can check out the website here.

We have chosen to be involved and are included in this list.  If you are in the area and would like to see ‘The Castle’ in real life please come and say hello.

House

I am looking forward to being able to show people some of the features of our house and garden which reduce our impact on the environment and invariably save us money at the same time.

Demolition Derby

6 Comments

We have managed to get a bit more done in the garden this weekend but is has not been all about building.  Some of it has entailed destruction – namely demolishing the original vegetable gardens.

Vegie Garden

This is what it looked like about 2 years after we moved here.  These beds served us well but we are now working on a revamped plan.  So far we have built 3 raised beds and eventually there will be nine of them in a fully-fenced garden area.

New garden beds

You can see some of the old beds in the enclosure in the background of the photo above.  Below is what it looks like now.

Demolished

You can see the posts for the chicken run in the background.  That will share a common fence with the bottom of the garden enclosure.  The string line on the left hand side marks the eastern boundary of the vegetable garden enclosure.  As well as the 9 raised beds I plan to grow herbs in beds along the fence line nearest to the house and asparagus and rhubarb on the eastern side.  I do not want these in one of the raised beds as they are perennials rather than annuals.  There will also be chilli bushes and blueberries nearest to the front boundary as well as a screened area for the compost tumblers.  We have one tumbler at the moment and will probably get a second one as well as keeping one ‘open’ compost bay.  I am quite keen to clear up the ‘Steptoe & Son’ arrangement that is there at the moment with a cut down rainwater tank as well as a rusty 44 gallon drum.

We put in 4 more posts for the chicken run fencing so next weekend we should be able to attach at least some of the top rails and the strainer wires.  Because the fence is 1800mm high in this section we will have three horizontal wires.  One at the top, one close to the ground and the other in the middle so this should prevent any sagging of the fencing wire.  We are using heavy gauge chicken wire as our plan is to make sure that the chickens do not get out nor any unwanted guests finding their way into the run.

Our original plan included incorporating a coop into the run but it all got too complicated so we have opted to have a ready-made, freestanding coop situated in the run.  It will be something like this.

Minimalism and Multipurpose

6 Comments

While the nature of some tasks require a specific tool or space to complete the job, many things do not.

The first thing that comes to mind are the plethora of single-task appliances which seem to take up residence in many kitchens.  You know the ones – waffle makers, ice-cream makers, popcorn makers, juicers, breadmakers and so on.  I admit to having a breadmaker – The Duke makes all of our bread and has done for many years, although he is playing with the idea of artisan-style bread baked in the oven and successfully made a loaf the other day.  We also have a juicer which could be used more.

However, today I want to take the concept of multipurpose away from appliances.  When we had our kitchen re-modelled a few years ago we created a large amount of bench space, including this breakfast bar.

2013-02-20 01We use this space for eating meals, serving food and general food preparation so it does not always look like this.  Once I have finished using the bench, it is cleared and we try not to use it as a ‘dumping ground’.

By having a clean, clear bench I am able to use it for other purposes.

2013-02-20 02I can pull the chairs back out of the way and I have a cutting table and workbench for when I am sewing.  It is the perfect height and totally stable.  I am also able to access it from almost any direction.  My sewing machine is in the closest bedroom (a few steps along the hallway) but this is the perfect solution for me.

So, which comes first minimalism or multipurposing?  If I had more stuff the bench would probably not be clear to use.  If I could not use the bench would I acquire a suitable table and contribute to more stuff?

This is a winning solution whichever way I look at it.