Old News

Leave a comment

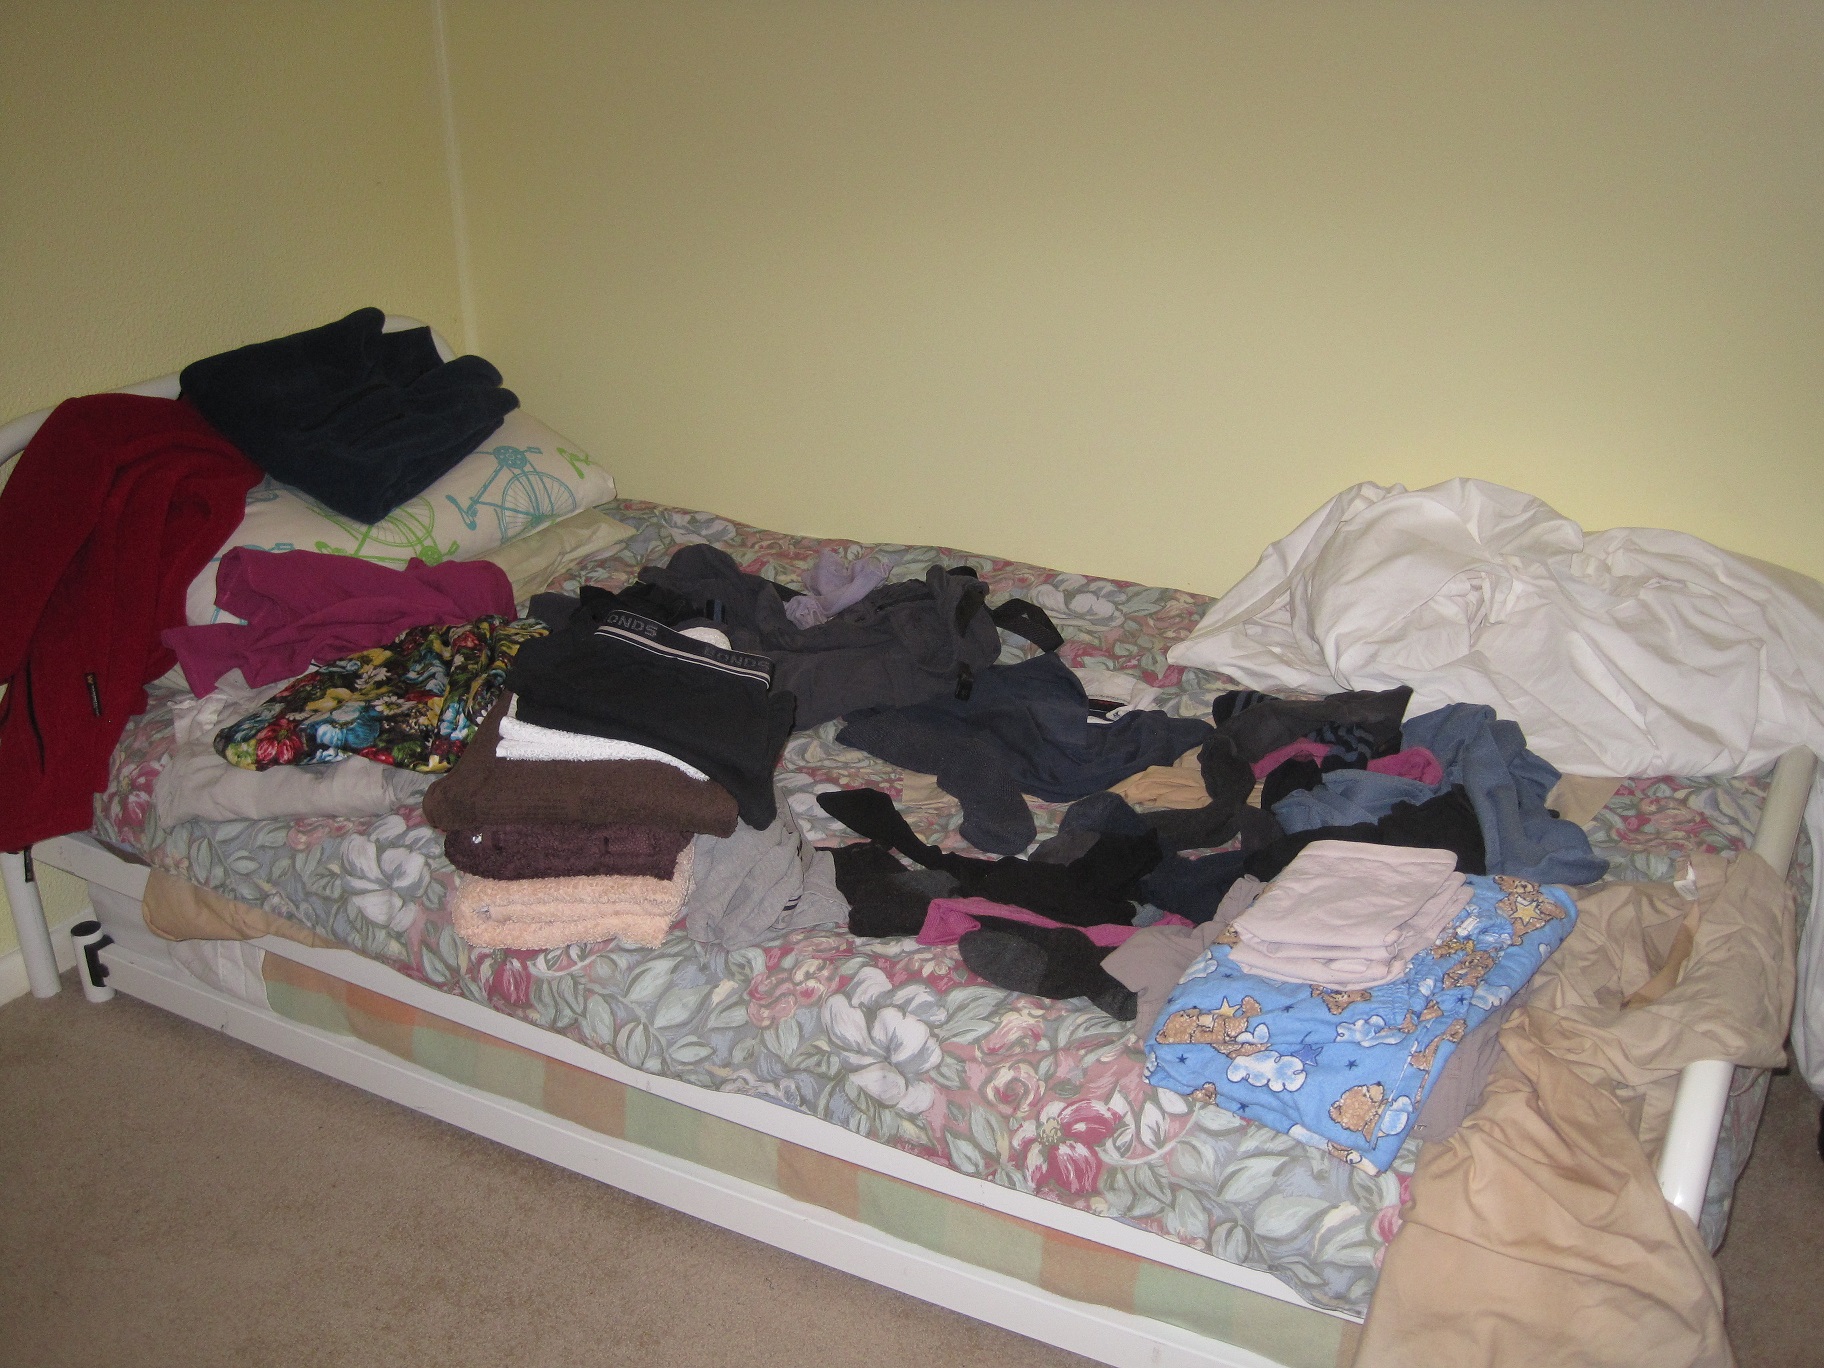
While I have been sorting through the blog photos, I have come across some that I took to use in blog posts that never eventuated.  Maybe it was because something more exciting came up or I simply did not get around to it.

Anyway, here are some that were sitting in a folder just waiting for the story to be written.

2015-03-17 01
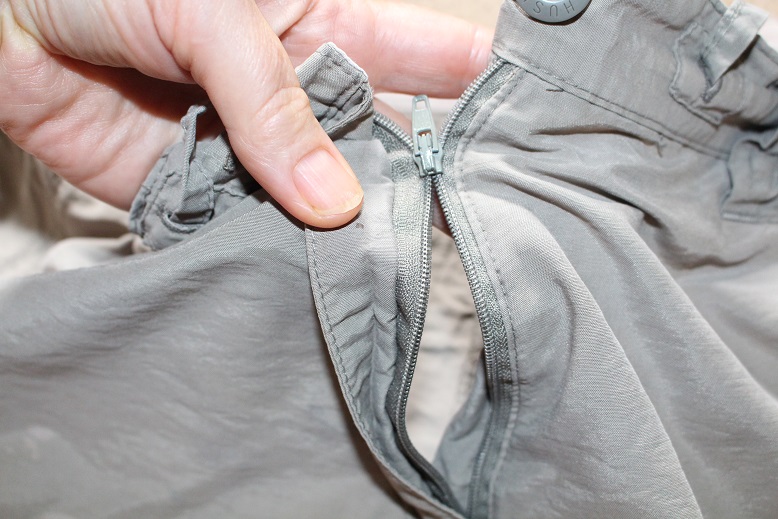
I noticed these small holes just below the collar on one of The Duke’s polo shirts.  It was where the label was stitched on and it was beginning to tear away as there was only a single layer of fabric and no facing.  2015-03-17 02

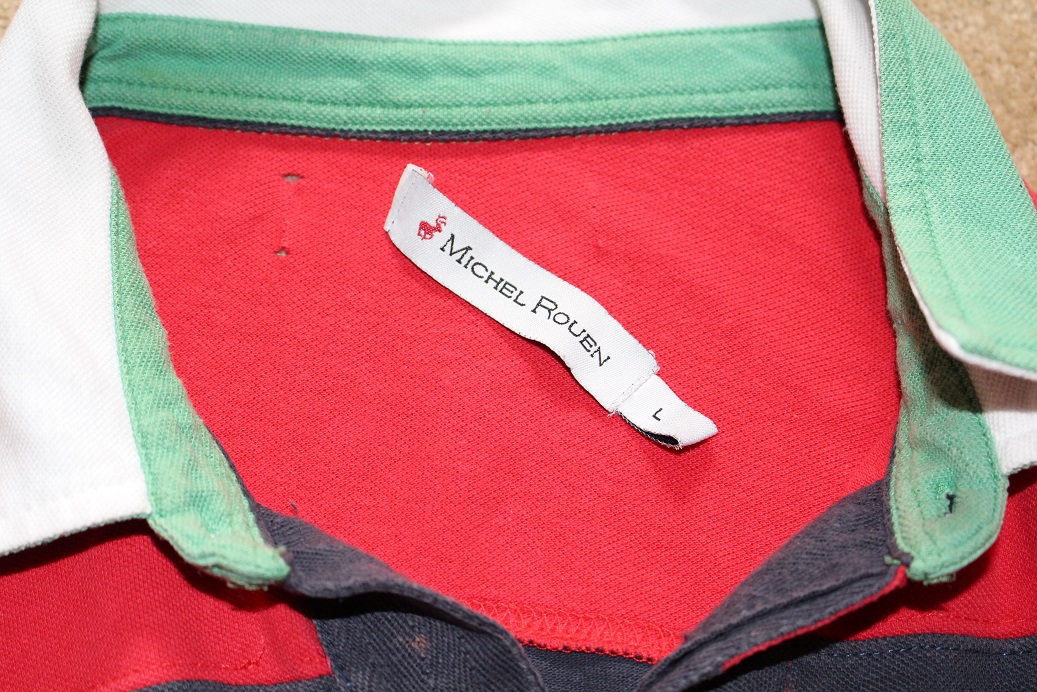
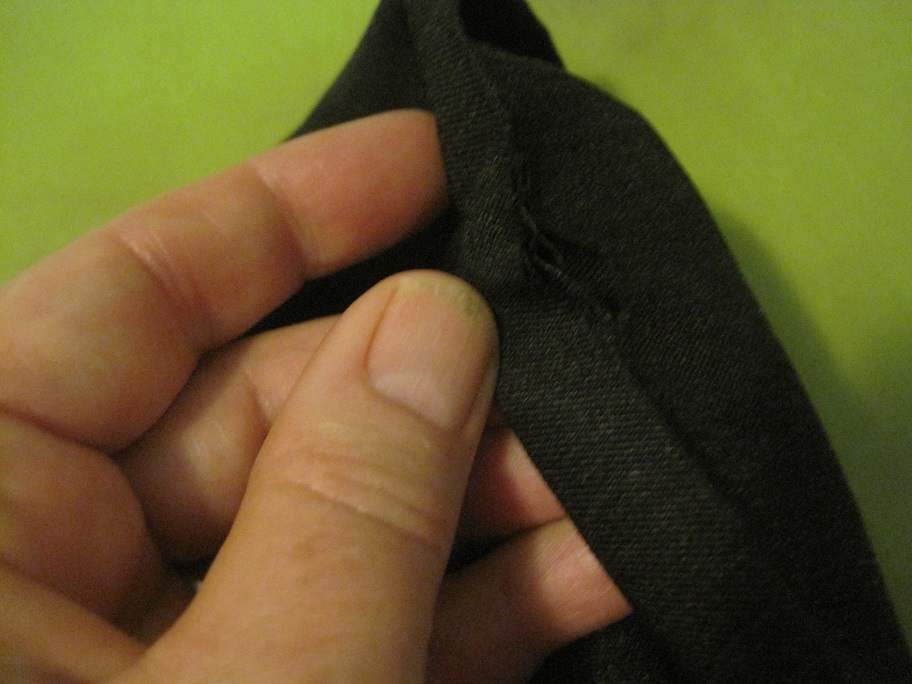
I carefully unpicked the label.

2015-03-17 03The next step was to iron a small piece of fusible interfacing to the wrong side.  This helps to reinforce the fabric.

2015-03-17 04I then stitched over the holes using a zigzag stitch.  The thread was a close match and the mend is barely visible.  It is certainly an improvement on the holes that were there.

2015-03-17 05Finally, I trimmed the interfacing back close to the stitching and the repair was complete.

In future, I think I will remove any labels that are on a single layer of fabric when the garment is new to avoid this happening.

Oh, and you may have noticed that ‘The Duke’ still exists.  Thank you for your suggestions and I have have come up with a couple but none of them really captured his imagination so I will ponder a bit more.  It is enough of a challenge to change once but I do not want to find myself in the same position in the future.

Sew My Stash Sunday – 6

2 Comments

The only problem with having a commitment to a weekly series is that the weeks fly by incredibly quickly.  This week has not been completely devoid of progress as I have cut out the mint green linen skirt.

2015-02-15 01Belle was here today and was most impressed with the skirt I had completed.  I showed her the pattern drafting system and some of the pattern choices.  She commented that she wanted some long-sleeved shirts for work but that she finds that the ready-made ones are not long enough to stay tucked in.  We delved into the stash and found a piece of fabric which would be suitable and she has chosen a pattern so that has been added to the list.

2015-02-15 02Meanwhile, I had a couple of bits of mending to do so I completed those jobs and can now get back to the skirt.  I darned a sock for The Duke.  There is nothing fancy about my ‘darning’.  I use a zigzag stitch on the sewing machine  which is not particularly pretty but is effective.

2015-02-15 03Then I patched (yet again) a pair of his trousers.  These are his stylish weekend wear when out in the yard and there are now patches on the patches!

2015-02-15 04This is the inside of one leg with no fewer than 3 patches!  I guess there will come a time when they are more patches than trousers but in the meantime they remain perfectly serviceable.

Adding More Life

2 Comments

It is nearly 3 years since I wrote this post about extending the use of a pair of 3/4 trousers by making them into shorts.  That project worked extraordinarily well as I still have the shorts and wear them almost every weekend during the summer.  They are lightweight and comfortable and great for gardening and generally hanging about at home.  Imagine my despair a few days ago when I realised that the zip had broken.

001I thought that they were finally destined for the bin but after rummaging in my stash of extra zips I found one that would be suitable.

002I decided that I had nothing to lose as they were no use with a broken zip so I set to work.  In my opinion, there is only one thing more challenging than putting in a zip and that is replacing one because when putting a zip in a new garment it is inserted near the beginning of the construction rather than at the end.  Due to the purpose of the shorts, I was not too worried about the finished look.

003While it is somewhat rustic, I was very pleased with the end result which is a perfectly functional pair of shorts.

004This whole project took me about 10 minutes to complete.

Patchwork – Part 2

2 Comments

It is a week since my last post and I have not even replied to your kind and thoughtful comments.  I think work got in the way last week.  I also went to a community meeting about solar power one evening and spent time with members of my family so blogging has taken a back seat.

Today I did some more of my patchwork.  I now have 22 of the 36 squares I need.  I have decided that I will just join the blocks directly rather than putting sashing between them as I am looking for a random allover pattern.  I spread the completed blocks out on the floor to get an idea of how it is going to look and I am very pleased with the result so far.

Patchwork
I also mended a pair of jeans for DD’s partner.  They were brand new but the stitching had come undone for about 3cm on one side seam.  I completely reinforced both side seams so hopefully they will be OK now.  There was a pair of The Duke’s socks with a hole in the toe so they are now fixed too.  Finally, I put my skills to the test and replaced the legs of this bear.

Bear
It was signed by DD’s friends when she finished school and we were moving interstate so it has some sentimental value for her.  However, I think my granddaughters had been ‘playing’ with him and the buttons that hold his legs in place had come adrift.  Luckily the thread was still through his torso so with a bit of ingenuity and a large curved needle I was able to reattach the legs.  I don’t think I will repair dolls and bears for a living!

It has been a long weekend here and I have enjoyed the break from work.

More Mending

12 Comments

Mending is to sewing like using leftovers is to baking.

Most people can bake or create a meal by following a recipe but often you need to have a good understanding of the underlying principles of cooking and meal preparation to be able to creatively and effectively use leftovers or random ingredients.  The same applies to sewing.  It is one thing to follow the instructions on a pattern to make an item but sometimes you need to use your understanding of some of the methods to apply it to mending tasks.

Today I was confronted with a pair of The Duke’s business trousers that had worn through right on the crease of the hem.  I do not know how this happened as the trousers are the correct length and do not drag on the ground.  It is difficult to see but the area just to the right of my thumb is a split.  It is more obvious in the following photograph.

Worn trousers
I unpicked a section of the hem.

Split in trouser hem
The damage is clearly evident.  I trimmed the couple of loose threads.  I placed a piece of iron-on interfacing over the split on the wrong side.  I made sure that the two edges of the split were closely aligned and then ironed the interfacing to seal it.  With the sewing machine set on a short zigzag stitch, I stitched over the split.

This is the wrong side after I had stitched it.

Mended trousers
Then it was a simple matter of rehemming the section of the hem which had been unpicked.  I have not posted the ‘after’ photo as the mend is virtually invisible.

Do you mend clothes?  If you have any mending questions please ask and I will see if I can help.


Busy with Bags

1 Comment

This afternoon I re-acquainted myself with my sewing machine.  I have several projects that I want to get done but I decided to start with something manageable that I could finish in an afternoon.

First, I mended this reuseable silk bag which I was given about 10 years ago.  It is used frequently and some of the stitching at the top of the side seams had come undone.

Ecosilk bag

Next, I retrieved a piece of material I bought some years ago for the purpose of making another bag using this one as a pattern.  Sometimes my grand plans turn out to be more complex than I imagine but it was not the case this time.

New bag

I successfully replicated the original, complete with side gussets and double stitched seams on the handles and bottom edge of the bag.

The best part about these bags is that they are lightweight and fold down to almost nothing.  I was spurred into action as I wanted to have 2 lightweight bags to take when we travel overseas.  They can be used for grocery shopping, carrying personal effects to a shared bathroom or keeping worn clothes separate from clean ones when packing.  They can be easily washed and will dry in a matter of hours.  The total weight of the 2 bags is 79g.

Folded bag
Finally,  I made a lining for a hessian carry bag that I bought when we were in the USA in 2012.  The bag originally had a plastic coating on the inside but it was starting to crack and deteriorate as you can see here.

Inside of hessian bag
I removed all of the plastic coating and then washed the bag as it was quite grubby from use every week.  I measured the dimensions of the bag and then cut out and made a lining from some navy poly cotton fabric.  It matches nicely with the print on the outside of the bag.

Stitching new lining
Here is the new lining assembled and pinned in place.  Tonight I will sit and handstitch the lining to the top edge of the bag.  I will add a photo of it when I am finished.

It has been a successful afternoon of some small sewing tasks.  Do you make or repair items that you use?  Do you use reuseable shopping bags?

Make & Mend – Picture Frame

4 Comments

This week I want to share a few of the projects I have been working on recently.

First up is the picture frames.  These are 2 large timber frames which belong to my mother.  They have family photographs in them and usually stand on her sideboard.  The problem is that the stand is actually very heavy cardboard.  After several years of very wet and humid weather the cardboard has absorbed moisture and now has flexed and will not stand and support the frame.

Picture frame with stand
I brought these home with the idea of repairing them and this is what I did.

I made a pattern from the stand on each frame and then marked it out on a sheet of plywood.

Pattern
The pieces of plywood were cut using a jigsaw.

Plywood
I then spread the glue (Aquadhere) over the plywood and placed it on the cardboard stand.  I used several clamps to make sure firm contact was maintained between the surfaces.  I left the clamps in place for 24 hours.

There are no photos of the clamps as my camera battery was flat.

Tonight I removed the clamps and the repair has been successful.  Now I need to finish the other frame then return them to my mother.

Repaired
Tune in again tomorrow for the next project.

Clean Clothes

9 Comments

Housework is a never-ending circle.  Whether you view it as a closed-loop system which supports and sustains your family or as a treadmill that you cannot escape is entirely up to you.  I prefer the first view because it is positive and values homemaking as an important role.

I was interested to read recently that ‘doing the washing’ is not about tossing a heap of clothes into the washing machine, followed by the dryer or perhaps hanging them on the line.  In this scenario the final step is then seen as throwing the heap of clean clothes on the nearest sofa or bed.  This results in disorganisation and clutter while various members of the household grab whatever they need to wear.

Unsurprisingly, the above view emanated from a discussion about how clutter and disorganisation go hand-in-hand.  It is easy to imagine that over time the pile of clean clothes becomes dusty and soiled and then need rewashing.  Perhaps items cannot be located which results in buying more clothes.  Items which need mending are left and forgotten.  Then there is a downward spiral, the pile becomes a permanent fixture, the bed is no longer able to be used for its original purpose and so on.  This is an extreme picture but one that it is best to avoid.

Clean clothes

Confession time:  I resorted to this practice last week and here is some of the evidence.

It took me 5 minutes yesterday to set things to right which made me wonder why I hadn’t done it sooner.

Folded clothes

The discussion went on to say that you should not regard the washing as ‘done’ until the clothes are dry, sorted, folded and put away as well as any ironing any items which require it.

I generally manage to do all of this in one go except the ironing.  Ironing is always done at least once a week.  This is one of the benefits of having a streamlined wardrobe.  The selection of clothes are limited and I am being perfectly honest when I say that I have to do the ironing otherwise we would have nothing to wear to work next week.

By considering tasks within the home to be a closed-loop it is easier to gain satisfaction from the work you do.  It is not simply a chore of folding clothes but rather can be seen in the following way.  A hamper full of soiled clothes is washed, dried in the fresh air and sunshine (hopefully), sorted, folded and drawers and wardrobes replenished with clean clothes for the next week.  It is also an opportune time to review the state of clothes and do any repairs as required.  You can rejuvenate items before they become beyond repair.

How to you deal with washing, folding and ironing?  Do you fold clothes as they are taken off the line?

Sew Quick and Easy

11 Comments

Yesterday I finally picked up my sewing machine from having it serviced, so today I decided to spend some time sewing.  Some of it has been quite challenging, a pleated skirt which is now too big for me.  I have completely disassembled it and am in the process of re-making the skirt but in the meantime it was good to start and finish a couple of simple projects.

First was a pair of boxer shorts for summer pyjamas for me.  These were from some material kindly given to me by a friend.

2013-02-17 01I teamed them with an existing tank top to make this set.

2013-02-17 02She also gave me a piece of flannelette with a cute teddy bear pattern that was just begging to become winter pyjama bottoms.

2013-02-17 03I did some mending, too.  This pair of shorts is about 12 years old and I wear them when painting or gardening.  The fabric is in good condition but the elastic had given way so I unpicked the waist and old elastic, replacing it with 2 rows of new 6mm elastic.

2013-02-17 04The shirt which was waiting to have the buttonholes done is also finished.

I will keep you updated on the progress of the skirt.

In the meantime, don’t forget to comment on this post and follow my blog for a chance to go in the draw for the mystery giveaway.

A Pile of Clothes & Something For Me

2 Comments

I am gradually working my way through a pile of clothes that I brought home from Missy’s place nearly 2 weeks ago.  I was helping her to sort and declutter in preparation for her interstate relocation.

Some items were deemed not suitable, too old, worn out or simply no longer loved.  Most would suitable for someone else so they went to the local op shop.

I did score a scarf which Missy no longer wanted.  I am not usually a huge scarf fan but this was a small lightweight one in turquoise, black and beige/gold colours  which caught my eye.  I have worn it twice in less than a week.  The first time was out to dinner when I had a black skirt and 3/4 sleeve top of the same turquoise colour.  The top has a v-neck and no collar so the scarf really finished it off nicely.  Secondly, I wore white 3/4 trousers and a black camisole with a gold tie-up 3/4 sleeve mesh top.  I used the scarf as a belt for the trousers and it added a bit of colour and brought the whole outfit together.  I certainly had not gone out looking for a scarf like this but once I saw the opportunity it fits really well with my existing wardrobe.

Like most people she had some items lurking amongst her clothes which were not wearable for a variety of reasons.  We assessed the viability of each piece and I brought some home for some alteration/mending to return them to fully functional pieces.

The handiwork has included replacing buttons, letting down hems and a multitude of minor adjustments that enhance the wearability of a garment.

One dress gaped where the bodice crossed over but since it was a stretch fabric I just permanently sewed the crossover section.  Another top had fold back cuffs on the armholes which needed to be pressed into place each time before wearing so I stitched them so that it stays in place.  These adjustments are not usually evident at the time of purchase and it is not until you wear an item a few times that you realise that it is not as ‘easy’ to wear as you would like.  Sometimes there is a simple solution that can make all of the difference.

This is the pile that I have finished.  There were some other maintenance jobs like trimming off loose threads and pilled fabric.  All of this combined with washing has created a pile of items with a new lease of life.

I still have a bit left to do but it is not as bad as it looks spread over the ironing board.  Soon it will be a neat pile of wearable clothes.

One of the things that I have learned from my involvement in Project 333 is that nothing deserves a place in your wardrobe unless it is wearable and you love it.

Do you find yourself with a cupboard full of clothes and ‘nothing to wear’?  Perhaps it is time to check out what is lurking in the cupboard.