Kitchen News

2 Comments

Tonight I have a quick update on the subjects of the last couple of posts.

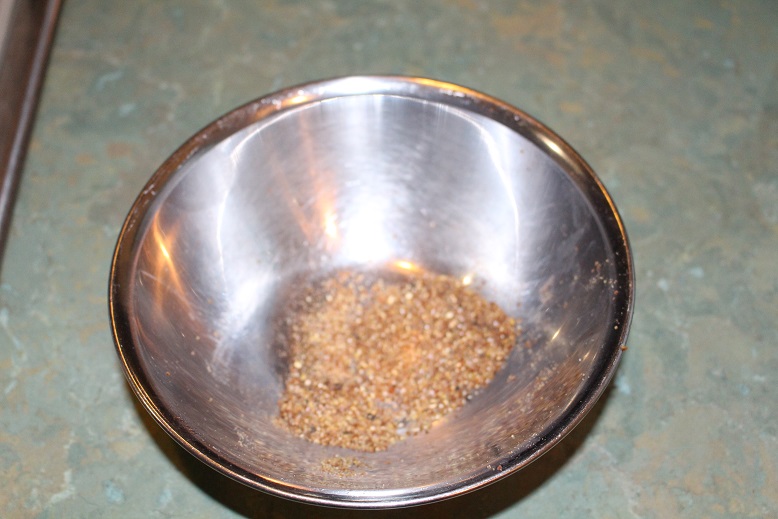
The dehydrated onion has now been ground and here is the result.

2015-07-29 01This is a 450g Vegemite jar which is about 3/4 full.

While the powdered onion can be used as is, it is actually part of a bigger plan that I have.  I hope to make my own vegetable stock powder and have noted that the commercial varieties have onion powder and celery powder as two of the main ingredients.  Since I have celery growing quite profusely at the moment I plan to try dehydrating some celery, including the leaves as they have the strongest flavour.  Watch this space for more on the progress of this venture.

On the appliance front, we took some time on Monday to look for a new microwave oven.  We have chosen one and I am going to buy it tomorrow.

Finally, I am hoping to collect the breadmaker which has been offered to us on the weekend.

Onion Tears

4 Comments

Do the tears flow when you start cutting up onions?  Here is a way to minimise the suffering in the long-term.2015-07-27 01I bought this 10kg bag of onions last weekend for $7.99.  I shared a couple of kilos with a friend and had used a few myself but today it was time to prepare them.  I peel and quarter the onions before chopping them in lots using the food processor.

First I filled the four trays of the dehydrator.

2012-02-02 01When the onion is thoroughly dried I will grind it to make flakes/powder.  It takes up very little space and stores well.

I bagged the remainder of the chopped onions in as many ziplock bags as I could muster.  I do not buy ziplock bags.  I collect mine through “dumpster diving”.  There are people in my office who bring 2 Weetbix to work for their breakfast in a brand new ziplock bag, tip them into a bowl and toss the bag in the bin.  If I open the bin and the discarded bag is on the top I simply bring it home and wash it for reuse.

Anyway, I digress – the chopped onion is in ziplock bags.  I pack 150g which is equivalent to a medium onion in the small bags and 300g in the larger bags.  I ended up with 10 small packs and 7 large packs of diced onion.  Because I packed the diced onion fairly flat, it is easy to break off a section if you only want a small amount of onion.

2015-07-27 03I sliced the remaining onions by hand and they are packed in the red lidded container.

This means that that I will not need to chop or slice an onion for several months.

End of Life

2 Comments

Before you start offering condolences, it is not a person but a couple of my kitchen appliances.

In the past week or two both the microwave and breadmaker have ceased to function.  GMan and I are planning to go to the appliance store tomorrow to purchase a new microwave.  I have previously had a Panasonic and from what I can see from my research we will probably buy another similar one this time.

Through the wonders of social media I have discovered that a friend has an unwanted breadmaker languishing in a cupboard which she has kindly offered to me.  I am not sure when our paths will cross so in the meantime GMan decided to have a go at mixing the dough using the dough hook on the KitchenAid mixer and baking it in the oven.

I think this is what success looks like.

2015-07-26 02He baked it in this cast iron Dutch oven.

2015-07-26 01It is a little more time-consuming than the ‘set and forget’ breadmaker but will suffice until we replace the breadmaker.

Although we have managed to bake bread and create meals using alternative methods, there is no doubt that both the breadmaker and microwave definitely have a place in my kitchen.  In fact, I would not hesitate to replace most of my appliances as they perform a valuable function.

What about your appliances?

Gluten-Free Pasta – An Update

Leave a comment

A couple of weeks ago I wrote this post about making my own gluten-free pasta which includes the recipe.

004The fettucine and lasagne sheets were packaged and frozen for later use.

003I made a large dish of lasagne last week and GMan declared that it was really good.  That is high praise indeed, especially since he can happily eat conventional pasta if he wishes.

Tonight was the big test when I boiled the fettucine to add to sliced sauages in a spicy sauce.  I made sure the water was at a rolling boil and I added the frozen bundles of pasta.  Once it had come back to the boil it was only about 2 minutes until the pasta was ready.  My worst fears of a gluggy mass at the bottom of the saucepan were not realised and I will definitely continue to make my own gluten-free pasta.

No Waste

Leave a comment

One of the challenges of growing your own food is dealing with the gluts of produce which invariably occur.

The issue today was passionfruit.  We planted a passionfruit vine about 18 months ago and in now covers a large section of the perimeter fence of the chicken run.  For several weeks now I having been collecting and eating passionfruit almost every day but today I decided to store some for when there are no fresh ones available.

001My efforts yielded 2 trays of passionfruit pulp to be frozen and stored for later use.

The vine appears to have 2 different types of fruit on it.  One of them is a common purple passionfruit but the other are much larger and are yellow when ripe  and the pulp is a very bright orange and has a somewhat different flavour.  You can see the different skins in the compost bucket in the following photo.

002These will go back in the compost and eventually be added to the garden beds to grow more food.

Made from Scratch

Leave a comment

I have previously written a post about making your own pasta from scratch.  Barely 6 months after I wrote this post I made the decision to eat a gluten-free diet for the sake of my health.  The pasta making attachment has languished at the back of the pantry and I keep promising myself that I will try making my own gluten-free pasta.  Well yesterday was finally the day.

After searching the internet and using some ideas gained through making other gluten dough such as pizza bases, I decided to give it a try.

Here is my recipe:

2 cups gluten-free flour
1/2 teaspoon salt
10g psyllium husk
3 eggs
25ml water
25 ml olive oil

2012-01-31 01Combine the dry ingredients, add the eggs and then gradually add the water and oil.  The mixture will not roll into a ball as it does if using wheat flour but it should be damp enough that you can squeeze it together in your hand.  Mix thoroughly for about 3 minutes.  Cover bowl with a damp teatowel to retain the moisture and work as quickly as possible.

Take a small ball of dough and knead well in your hands, press out into a thick disc and feed through the pasta roller on thickest setting.  The dough will crumble but persevere and do it several times until the dough starts to feed through in sheets.  Continue to fold and feed through until you have a good consistency and then feed it through progressively thinner settings.

003Once you have the thickness that you want you can cut it into lasagne sheets or attempt the next step of making fettucine.004It is certainly more difficult to make than conventional pasta but I am hoping it will be worth the effort.  Both the lasagne sheets and fettucine have been frozen so the final verdict will be when they are cooked.  I am very confident that the lasagne will be successful but I will have to wait and see with the fettucine.

Based on what I have done so far, I would say that this has been a worthwhile exercise and I will tweak the recipe further if required.

Watch this space………..

My Turn

2 Comments

Today it was time to clean and tidy up my pantry.

It is really not too bad but was definitely time to check for anything lurking in the background.  I wiped out all of the shelves, decanted a few things into the new jars and generally re-arranged it to work a bit better.

BEFORE

002

001The space on the bottom shelf is where the dehydrator normally lives but I was using it when the photo was taken.  The pack in the bottom right-hand corner of the photo is some gluten-free bread mix which was 18 months past its best before date but I made it anyway and it turned out well.  There is a second pack in the box which I might make up next weekend.

I have moved a few things out of the pantry – a large coffee plunger which now lives on the shelf above the oven with the other coffee plunger and the teapot.  The coffee grinder which we never use is going to the op shop along with a plastic container which belongs in the freezer but I never have it in there as it just wastes space and limits how much I can pack in.  Finally, the pile of plastic plates and bowls (meant to be disposable but I keep washing and re-using them) have been moved from the pantry.  I have kept 2 of each in the cupboard for the grandchildren but the rest will be stored in the sideboard for use at BBQ’s or other events.  One day I may decide to offload them altogether but not just yet.

AFTER

005I did not take a photo of the bottom shelf and the floor but suffice to say they look a bit better, too.

Planning Ahead

2 Comments

On Saturday or Sunday morning I generally make a menu plan of our meals for the coming week.  This based on what is in the fridge, freezer, pantry and garden and is used to create a shopping list for any additional requirements.  I try to incorporate a mix of fish, chicken, red meat and vegetarian meals.

The next couple of weeks are very unpredictable due to family issues and will mean that I am not at home some nights but potentially with very short notice.  So I used a different method today and simply made a list of 20 meals for which we have the ingredients.  We will need some additional fruit and vegetables during that time.

1  Pizza
2  Grilled salmon and vegetables
3  Tumeric chicken and rice
4  Pumpkin soup
5  Chilli con carne and rice
6  Nachos
7  Sausages and vegetables
8  Vegetable pie and salad
9  Hamburger patties and salad
10  Celery soup
11  Beef curry and rice
12  Tuna patties and vegetables
13  Shepherd’s pie and vegetables
14  Scrambled eggs with bacon and avocado
15  Chicken stir-fry and rice
16  Pizza
17  Chilli con carne and rice
18  Pumpkin soup
19  Lasagne and salad
20  Chilli chicken and corn chips

The entire plan is gluten-free.  I make my own gluten-free pizza bases and hamburger patties, buy gluten-free sausages from Aldi, buy gluten free corn chips and lasagne sheets and use gluten-free flour as required.008I intend to work roughly from the top of the list and we had home-made pizzas tonight.  This is how I make them.

Do you plan your meals?  How closely do you stick to a plan?

Eating In – Baked Potatoes

4 Comments

Baked potatoes are one of my favourite meals.  They are probably best wrapped in alfoil and cooked in the coals of an open fire but that is generally not practical so we compromise with what we have.  It is uneconomical to turn on a conventional oven to bake 2 potatoes and for many years I cooked them in the microwave.  While they are not strictly baked it made it reasonably quick and easy meal for a family.

In the last couple of years I read about cooking baked potatoes in the slow cooker.  According to the article, you simply wash and dry and potatoes, rub them with a little bit of oil and put them in the slowcooker on High for 4 hours.  It just seemed too easy but I decided to give it a go as I had nothing to lose – except maybe 2 potatoes.  When I took them out they were cooked to perfection and were even crispy-skinned on the bottom – just like the ones you can buy from the baked potato carts in the street!

Since then I have tweaked the recipe slightly and add a spicy coating.  Black pepper, herb salt, cumin and chilli (just a pinch of each) into a bowl and a teaspoon of flaxseed meal.  I use this because it is gluten-free and it has some nutritional value.  You could just use plain flour (either wheat or gluten-free) if you prefer.

005Rub the potatoes lightly with oil then roll in the spice mixture and place in the slow cooker.  No other oil or liquid is needed. 006I find that 4 hours is perfect for medium-sized potatoes but if you have larger ones you may want to extend the cooking time by another 30 minutes.

I serve these filled with refried beans and topped with a dollop of plain yoghurt and grated cheese.  Coleslaw is a favourite addition and usually some fried mushrooms.  Alternatively, you could fill with a bolognaise mixture or even tuna for variety.  Some salad on the side makes a complete meal.

007

Eating In – Pizzas

Leave a comment

I made a batch of gluten-free pizza bases on the weekend and tonight we are having pizza for dinner.

Here are the partly cooked bases thawed and ready to add the topping.  I find that pre-cooking these for about 8 minutes makes them much easier to handle when assembling the pizzas.

001The dough recipe I use comes from this recipe book.

006If you are looking for good gluten-free recipes I would recommend that you look for it in your local library or you can buy it here.  The updated version has a different cover.

Otherwise just make or buy your favourite bases.

I assembled all of the toppings.

002The ice-cube tray contains frozen basil and you can read about how I prepared it in this previous post.

Once the basil had thawed, I mixed it with a small amount of tomato and spread the mixture on the bases.

003Then the rest of the toppings………

004Pumpkin slices roasted with balsamic vinegar, shredded baby spinach, diced salami, sliced olives, strips of red capsicum and topped off with some grated cheese.  I use low fat cheddar with a bit of strong cheese like partmesan to give a bit of added flavour.

005This is the pizza maker which we use and it takes about 5-6 minutes to cook the pizza to perfection.

008One quarter had disappeared before I had time to grab my camera!

The toppings are never exactly the same.  It just depends on what we have.  This is the first time I have used the basil mixture for the base.  I usually just use a tomato mixture and a sprinkle of mixed herbs.  I have also been known to use mango chutney spread on the base.  The only thing limiting you is your imagination.