Bulk Cooking

Leave a comment

Since there are only 2 of us to cook for, I do not prepare huge quantities of food but it is nice to have a few meals planned and prepared.  The other factor that influences my decision is that I prefer to use the oven efficiently when it is turned on.

Yesterday I sorted out what was lurking in the freezer and decided that this week we would eat what I could make using freezer and pantry ingredients.  I should really only need to buy some fresh fruit and vegetables.

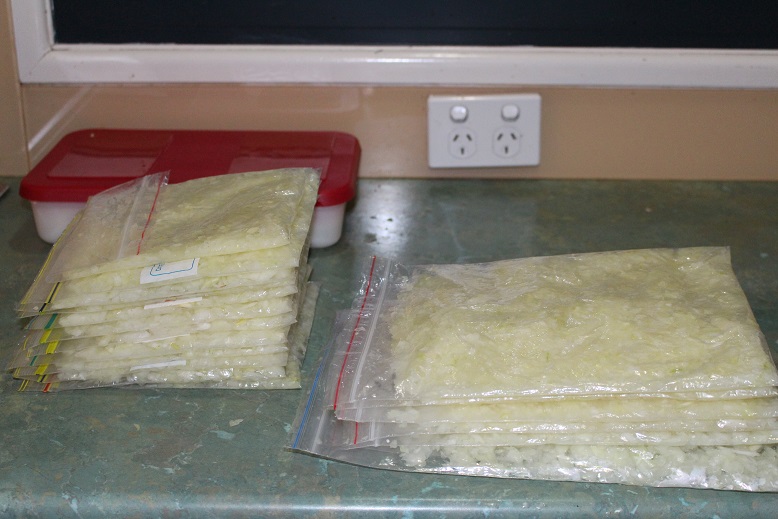
I started by making gluten-free pizza bases.  I par-cook these in the oven then freeze them for later use.

Here they are ready to freeze.  I have some old cereal packets which I use to separate the bases when they go in the freezer.

002It is simply a matter of adding the toppings and cooking in the bench-top pizza-maker.

005Next, I decided to make some gluten-free muffins which turned out to quite acceptable using a standard recipe and simply substituting gluten-free flour.  I made 2 batches – orange, walnut and sultanas in one and the other were banana, walnut and mixed spice.  The catalyst for these were the sad looking banana that I rescued from the fridge at work on Friday and some orange pulp I found in my freezer.

004At the same time I made some gluten-free wraps for lunches.

003These are cooked in a hot, dry frying pan and can be stored in the fridge for a few days.

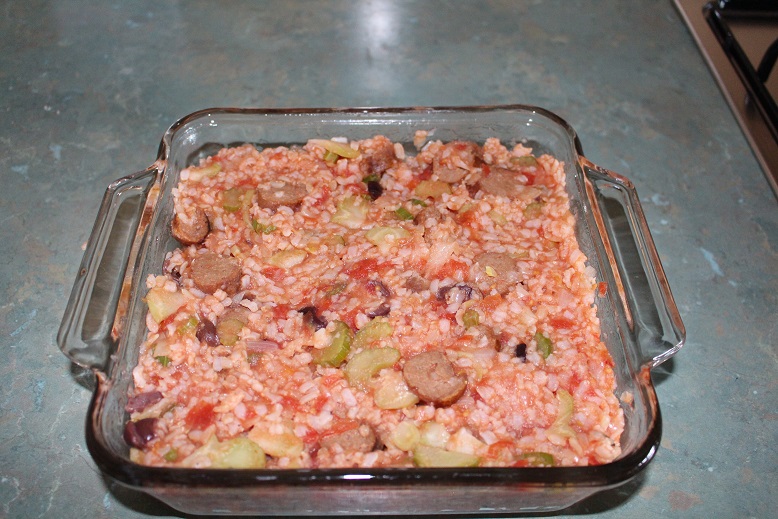
A pack of sausages which had been left in the freezer by our house-sitters were grilled and sliced then made into a sausage casserole which made 4 serves.

005I usually cook a bulk amount of dried red kidney beans in the slowcooker and freeze them in portions ready to use.  I found a pack in the freezer as well as a pack of diced beef so I put them in the slowcooker with frozen cherry tomatoes from last season, frozen diced onion and some spices to make 4 serves of chilli beef.  That bubbled along all day while I was doing the other cooking.

So, I have the basis of 15 serves of dinners, 6 serves of lunches and 20 muffins.

Do you cook more than one meal at a time?  A big occasional cook-up, perhaps?

The Cupboard was Bare – Not Really

Leave a comment

We arrived home early this morning after an overnight flight from Singapore.  I had pretty well cleared out the refrigerator before we left and shopping was the last thing on my mind this morning.  The house-sitters had bought fresh milk for us and GMan made a loaf of bread.

This afternoon I began to think about what we might have for dinner and I really was not in the right frame of mind to go grocery shopping shopping so I decided to make do with what we had on hand.  There were sausages in the freezer as well as some pre-cooked rice and diced raw onion.

I grilled the sausages and then sliced them up. Next, I fried the onion in the pan, added 1/4 teaspoon of chilli powder, sliced celery (from the garden) and a broccoli stalk which was also lurking in the freezer.  A can of tomatoes and 5 olives which was all that was left from a jar in the frig completed the sauce.  I added the thawed rice and sliced sausages and heated the mixture before putting it in a Pyrex dish.

2015-09-13 01I topped it with a mixture of grated cheddar and parmesan cheese mixed with flaxseed meal and ground pepitas and popped it under the grill for a few minutes.

2015-09-13 02Since we had not bought any fruit and vegetables today,  I served it with a generous helping of kale from the garden which I chopped and stir-fried with a sprinkle of chilli powder and squeeze of lime juice.

GMan and I ate one half of this tonight and the other half has been divided into 3 serves for my lunches this week.

A New Recipe

Leave a comment

It is not very often that I come across a recipe that is not just a simple variation of something I already make.  However, here is one I came across from ‘Christine’ on Simple Savings.  I don’t know what the origin of the recipe is.

007It was so good that I did not even have a chance to photograph it before we served up our dinner.

This is exactly as Christine presented the recipe.  I made a few minor adjustments and will continue to do so but more of that in another post.

BEAN & BROCCOLI LASAGNE
Lasagne sheets
Bean Sauce (see below)
Cheese Sauce (see below)
250g frozen broccoli or equivalent fresh (I use fresh & steam it a little)
90g matured cheddar cheese, grated
1 tbsp grated parmesan cheese
½ cup light sour cream

Lightly butter a 20cm square casserole dish
Lay sheets of pasta on base and cover with half bean sauce
Spread half cheese sauce evenly over bean sauce
Chop broccoli into pieces and place on top of cheese sauce
Cover with another layer of lasagne
Spread with remaining bean sauce then cheese sauce
Top with final layer of pasta
Sprinkle with grated cheddar cheese, then with parmesan cheese
Bake, uncovered 180 deg C for 20 minutes
Drizzle sour cream over top and bake a further 10-15 mins or until golden brown
Stand 10 minutes before cutting & serving

Bean Sauce:
1 tbsp butter
1 onion, chopped
2 cloves garlic, crushed
125g mushrooms, sliced
1 x 440g can red kidney beans, drained
Salt & pepper to taste
½ tsp oregano
1 x 425g tomato puree

Melt butter, add onion, garlic and sliced mushrooms.
Saute gently for 3-4 mins
Add beans, salt & pepper, oregano & tomato puree
Bring to boil the simmer 10 mins or until slightly thickened

Cheese Sauce:
2 tbsp butter
4 tbsp plain flour
Salt & pepper
Pinch nutmeg
500ml skim milk
100g matured cheddar cheese, grated

Melt butter, add flour, salt, pepper & nutmeg and blend until smooth
Allow to cook 2 mins
Remove from heat and blend in milk
Return to heat, stirring constantly until sauce boils & thickens
Reduce heat and cook 1 minute
Remove from heat and stir in cheese

Have you ever seen this or a similar recipe?  What do you think?

Never-Ending

6 Comments

Even though I have consistently decluttered for several years there are always random things that elude several attempts.

031These 3 little bottles of food colouring were in my pantry until tonight.  I have overlooked them each time I have cleaned out my pantry.  Tonight I opened the wire drawer to get out black pepper to season our dinner and saw these bottles of food colouring with fresh eyes.  I do not use it in any baking and it is a long time since I have made play dough or anything else that I may wish to colour so they went straight in the bin.  The fact that all of the “ingredients” are numbers made me even more certain that there is no way that I would ever use them again.

What have you decluttered lately?  Anything that should have been binned a long time previously?

Home-made Hummus

2 Comments

I was recently reading a discussion about home-made hummus and what constituted the perfect result.  I realised that I was unable to contribute very little to the discussion as I do not usually measure any of the ingredients as it is all done by taste.

When I made another batch I was careful to measure the ingredients and write down the method and here it is.

HUMMUS

1 1/2 cups dried chickpeas
3 cloves garlic (roasted)
1 large lemon (zest and juice)
60ml olive oil
1 teaspoon salt
1 teaspoon smoky paprika
1 teaspoon cumin
1/2 teaspoon chilli powder
1 heaped tablespoon peanut paste

Cover the chickpeas with 4 cups boiling water and soak for 4 hours.  Drain chickpeas, place in saucepan and add fresh water.  Bring to the boil and simmer for 2 hours or until tender.  Drain chickpeas and place in blender/food processor with garlic, lemon juice, lemon zest and oil and blend until smooth.  Add spices and peanut paste and blend.  If mixture is too thick add a little water or more oil/lemon juice if you prefer.

NOTES:  I always roast the garlic as I found the flavour is sweeter and more subtle.  I use about 1/4 cup lemon juice which is the yield from 1 of our lemons.  The peanut paste is used instead of tahini which I do not particularly like.  I use one made from freshly ground peanuts with no additives.  The salt is important to release the other flavours.  I use pink Himalayan salt.  Although I make my hummus using dried chickpeas you could also use canned chickpeas.  You would probably need 2 cans for the quantity in the recipe.

There is no right or wrong way to make hummus – it really is a matter of personal taste.

Dried chickpeas

001Chickpeas soaking

002Chickpeas ready to cook

005The final result

009This recipe makes a substantial quantity.  It keeps quite well in the fridge for a week or can be frozen.

Do you make hummus?  Any personal tips or tricks?

More Dehydrating

5 Comments

Dehydrating seems to happen in fits and starts around here but I am on a roll at the moment.

My brother-in-law recently gave me a piece of home-grown ginger and I had used a little of it when I decided to try drying the remainder.

I carefully peeled it and then sliced the ginger root fairly thinly.  Here it is spread on the tray of the dehydrator.

004The process did not take too long at all. Four hours later it was dried to a crisp.

006The final step was to grind the dried slices to powder in the spice-grinder attachment of my food processor.

008It has a beautiful, pungent odour which is quite different to the purchased spices.  Next time I think I will cut the slices into slivers before I dry them and store as slivers which will be great for adding to stir-fries.

Dehydrate & Downsize

4 Comments

I don’t use my dehydrator as much as I could but after my recent success of drying onion and making onion powder I decided to experiment a little further.

2015-07-29 01The labels on the commercial stock powder in the pantry reveal that the two main vegetable ingredients are onion and celery so I am planning to have a go at making my own stock powder. There is celery growing in the garden in abundance so I decided to try drying some.

001Here are the four trays filled with the stalks and leaves ready for drying.

And the final result…………

001Here is a tiny Vegemite jar which is about 3/4 filled with 37g (a little over 1 ounce) of powdered dried celery.  This is the yield from a full (albeit small) bunch of celery from our garden.  Along with some of the onion powder, this is the beginning of my home-made stock powder.

The space-saving advantages of dehydrating are amazing.  I am sure some things lend themselves to this process better than others and I am keen to discover other ways I can use the dehydrator.  One of the next things on my list is ginger.

Do you have a dehydrator?  What have you dried in it?

Kitchen News

2 Comments

Tonight I have a quick update on the subjects of the last couple of posts.

The dehydrated onion has now been ground and here is the result.

2015-07-29 01This is a 450g Vegemite jar which is about 3/4 full.

While the powdered onion can be used as is, it is actually part of a bigger plan that I have.  I hope to make my own vegetable stock powder and have noted that the commercial varieties have onion powder and celery powder as two of the main ingredients.  Since I have celery growing quite profusely at the moment I plan to try dehydrating some celery, including the leaves as they have the strongest flavour.  Watch this space for more on the progress of this venture.

On the appliance front, we took some time on Monday to look for a new microwave oven.  We have chosen one and I am going to buy it tomorrow.

Finally, I am hoping to collect the breadmaker which has been offered to us on the weekend.

Onion Tears

4 Comments

Do the tears flow when you start cutting up onions?  Here is a way to minimise the suffering in the long-term.2015-07-27 01I bought this 10kg bag of onions last weekend for $7.99.  I shared a couple of kilos with a friend and had used a few myself but today it was time to prepare them.  I peel and quarter the onions before chopping them in lots using the food processor.

First I filled the four trays of the dehydrator.

2012-02-02 01When the onion is thoroughly dried I will grind it to make flakes/powder.  It takes up very little space and stores well.

I bagged the remainder of the chopped onions in as many ziplock bags as I could muster.  I do not buy ziplock bags.  I collect mine through “dumpster diving”.  There are people in my office who bring 2 Weetbix to work for their breakfast in a brand new ziplock bag, tip them into a bowl and toss the bag in the bin.  If I open the bin and the discarded bag is on the top I simply bring it home and wash it for reuse.

Anyway, I digress – the chopped onion is in ziplock bags.  I pack 150g which is equivalent to a medium onion in the small bags and 300g in the larger bags.  I ended up with 10 small packs and 7 large packs of diced onion.  Because I packed the diced onion fairly flat, it is easy to break off a section if you only want a small amount of onion.

2015-07-27 03I sliced the remaining onions by hand and they are packed in the red lidded container.

This means that that I will not need to chop or slice an onion for several months.

End of Life

2 Comments

Before you start offering condolences, it is not a person but a couple of my kitchen appliances.

In the past week or two both the microwave and breadmaker have ceased to function.  GMan and I are planning to go to the appliance store tomorrow to purchase a new microwave.  I have previously had a Panasonic and from what I can see from my research we will probably buy another similar one this time.

Through the wonders of social media I have discovered that a friend has an unwanted breadmaker languishing in a cupboard which she has kindly offered to me.  I am not sure when our paths will cross so in the meantime GMan decided to have a go at mixing the dough using the dough hook on the KitchenAid mixer and baking it in the oven.

I think this is what success looks like.

2015-07-26 02He baked it in this cast iron Dutch oven.

2015-07-26 01It is a little more time-consuming than the ‘set and forget’ breadmaker but will suffice until we replace the breadmaker.

Although we have managed to bake bread and create meals using alternative methods, there is no doubt that both the breadmaker and microwave definitely have a place in my kitchen.  In fact, I would not hesitate to replace most of my appliances as they perform a valuable function.

What about your appliances?