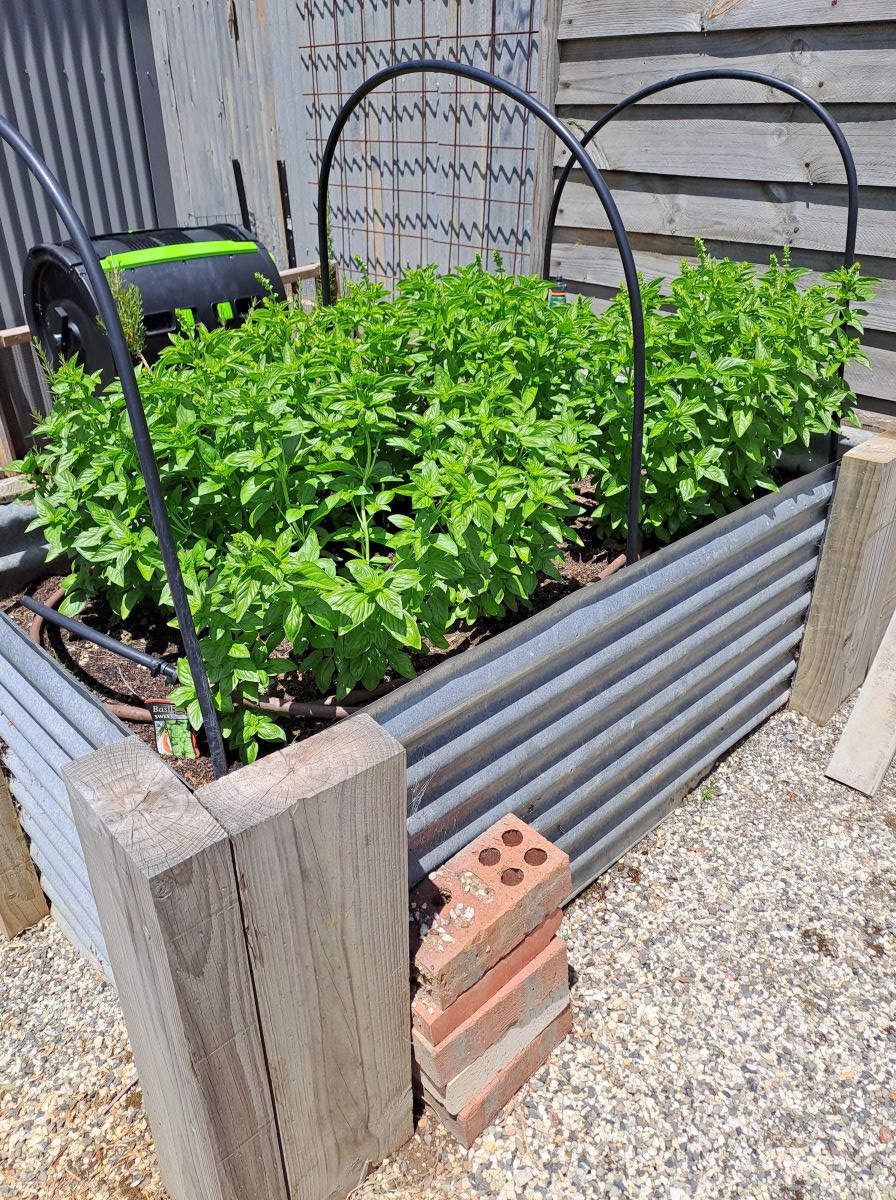
I grew a very successful crop of basil during the summer.
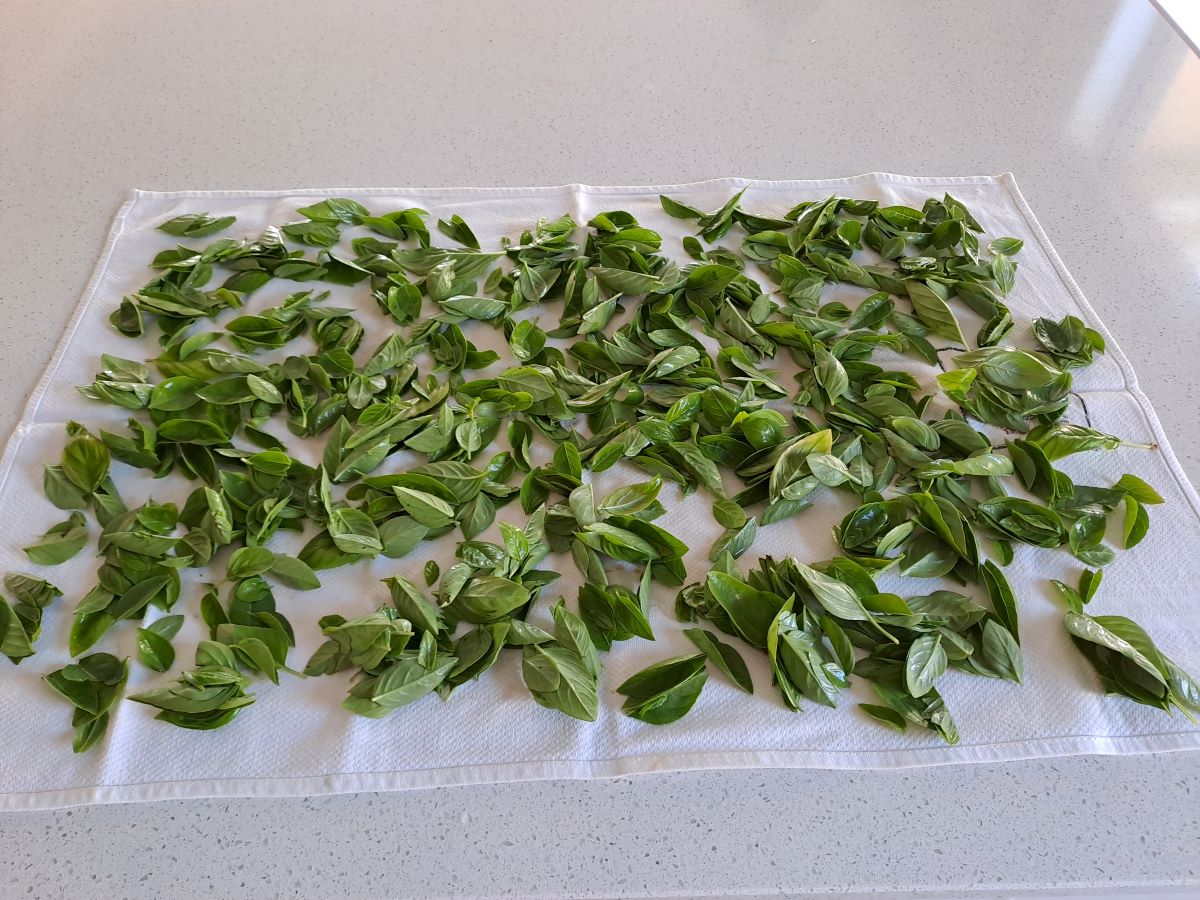
I made some pesto early in the season and also used some of it fresh. However, it is now going to seed and taking up space that I want to use for winter crops so it is really time for it to go. Yesterday I picked an armful of the younger shoots, stripped the leaves and rinsed them.
This haul was 4 tightly-packed cups of basil leaves so it was time to make more pesto.
Here is my recipe.
BASIL PESTO
4 cups basil leaves, tightly packed 7 tablespoons sunflower seeds 4 cloves garlic 1 lemon, juice and rind 5 tablespoons nutritional yeast 3-4 tablespoons olive oil 1/4 teaspoon salt Freshly ground black pepper
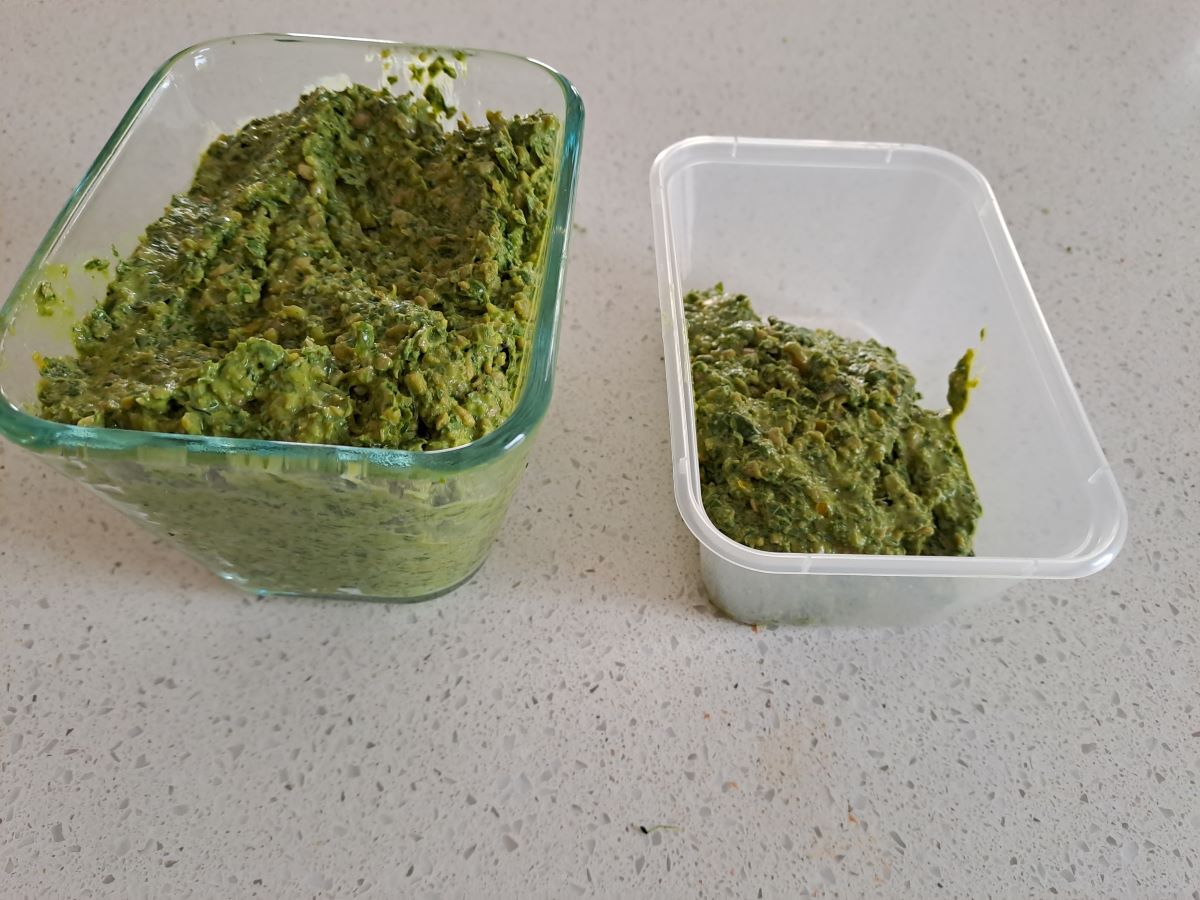
Place the basil, sunflower seeds and garlic in food processor and process until finely chopped and combined. Add the lemon juice, rind and nutritional yeast. Process until thoroughly combined. Gradually add the olive oil until desired consistency is reached. Add salt and pepper to taste.
I have chosen to replace the traditional ingredients of cheese and pine nuts with nutritional yeast and sunflower seeds which makes this recipe not only gluten-free but also nut and dairy free.
It was rather exciting to know that I had used basil, lemon and garlic which I had grown as well as locally produced olive oil.
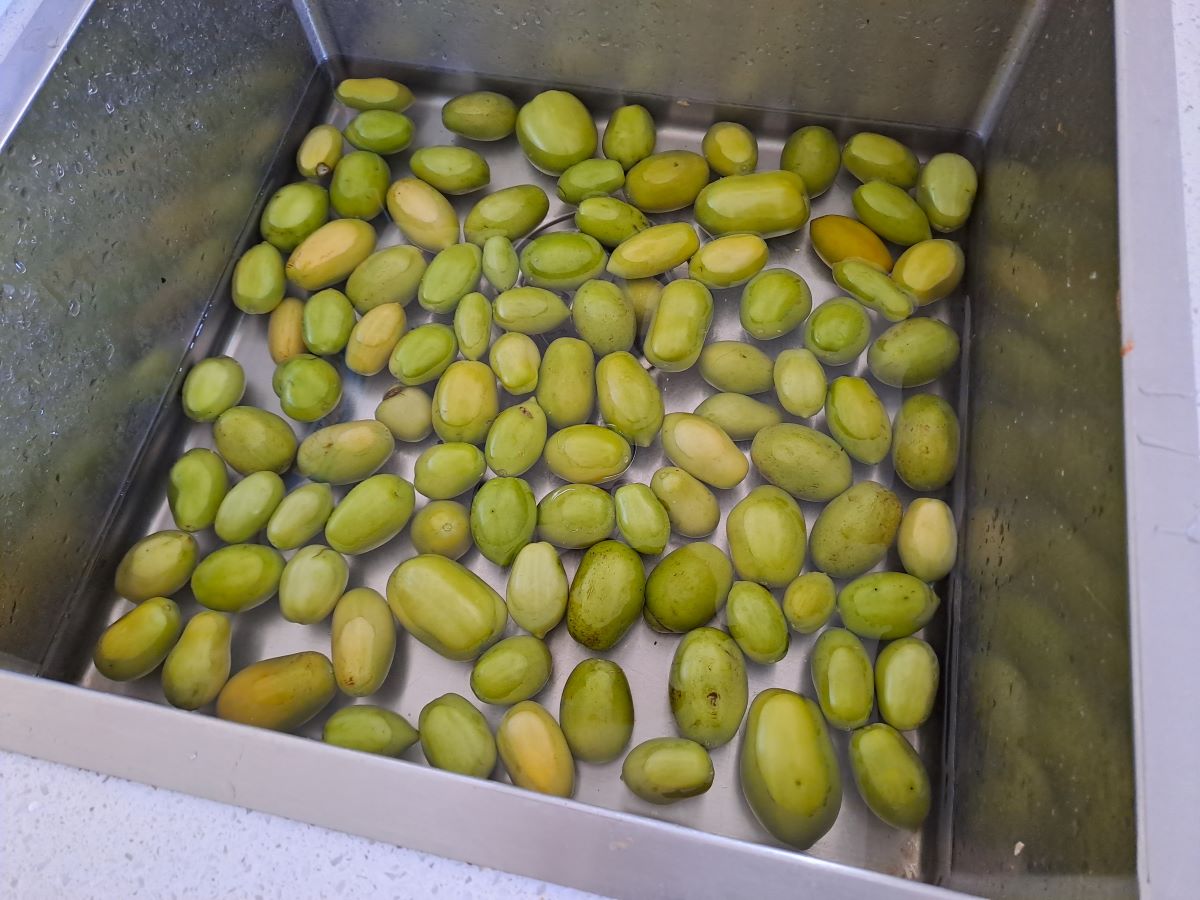
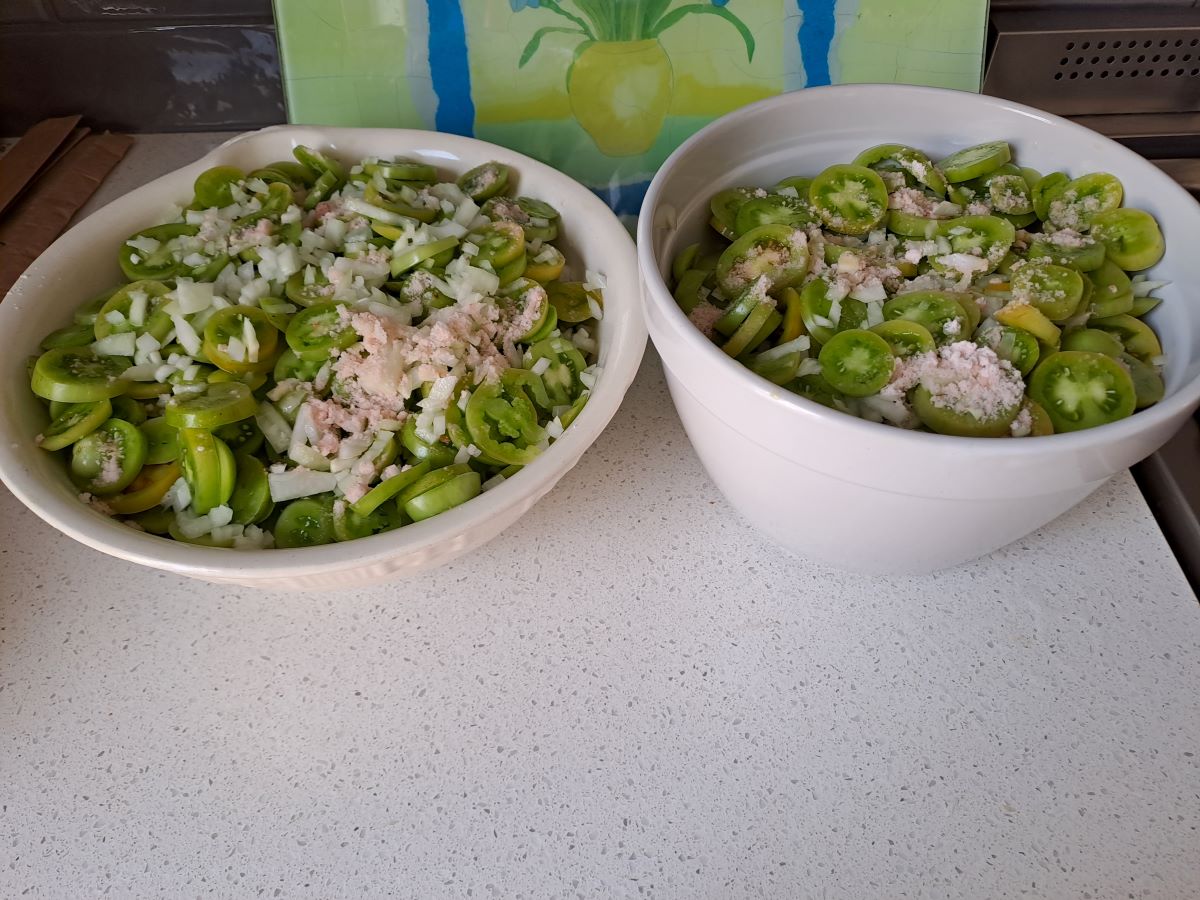
I recently encountered a new ‘problem’. Here in central Victoria the weather had definitely turned quite cool. Summer is well and truly behind us and I was left with an abundance of green tomatoes. This never happened in Queensland as tomatoes literally ripened all the year round.
It was time to remove the tomato bushes so that we could reuse the garden bed so I harvested the tomatoes and found that I could use them to make chutney.
The first step was to wash them thoroughly.
I then sliced the tomatoes and layered them with the diced onion and sprinkled with salt. Then I covered the bowls and left them to stand overnight.
This morning it was time to make the chutney.
GREEN TOMATO CHUTNEY
Ingredients
2.5kg green tomatoes, sliced 500g onions, finely diced 1 tablespoon salt 500g sultanas 500g sugar 500g apples, peeled, cored and chopped 1100ml vinegar, I used half white vinegar and half apple cider vinegar 1/2 teaspoon cayenne pepper 30g ground allspice 30g ground cloves
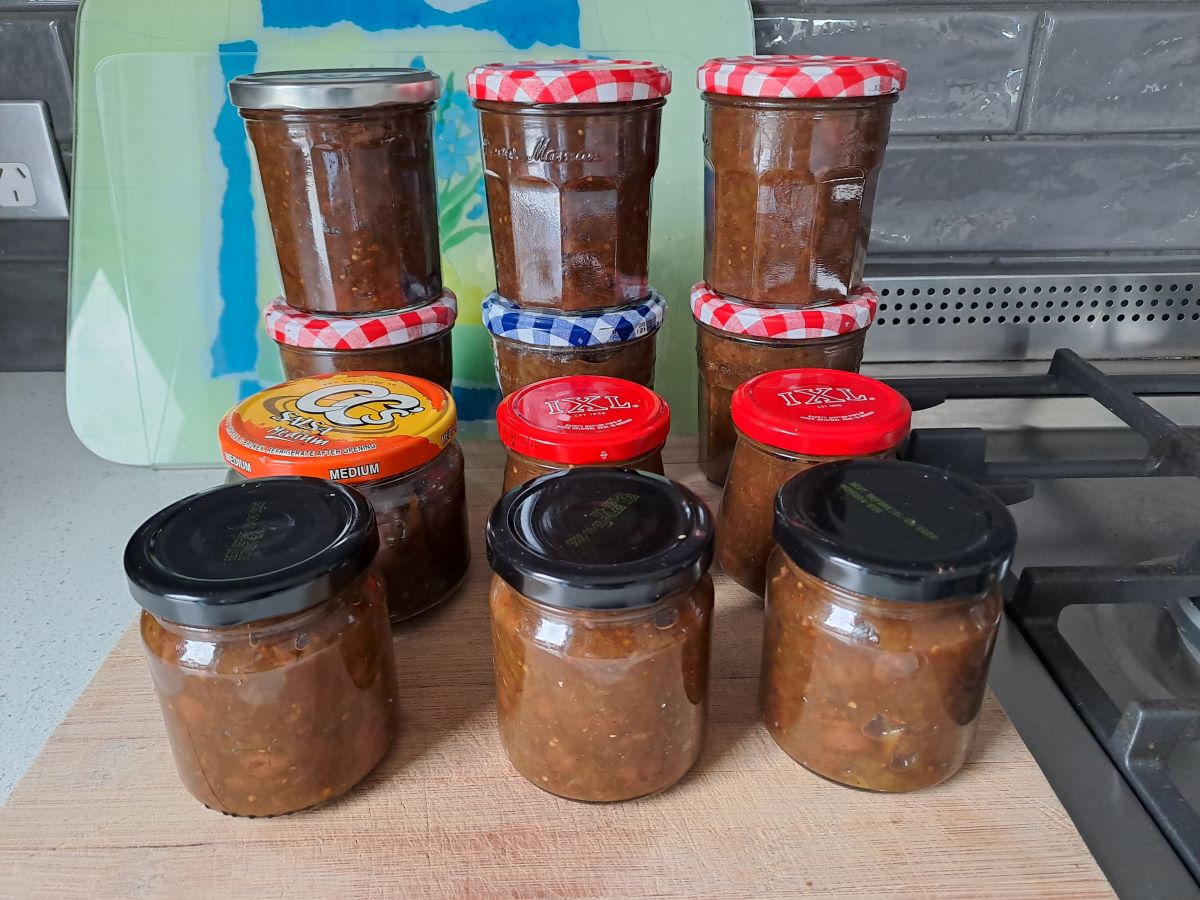
Combine all ingredients in a large stockpot/preserving pan. Simmer gently for about 3 hours. I used a stick blender sparingly to mash the tomatoes a bit more. I kept the pot covered for about 2 hours and then removed the lid for the final hour.
The mixture should be rich, thick and caramel coloured.
Spoon into hot, sterilised jars. This recipe yielded 12 jars so the pantry will be well-stocked.
A couple of weeks ago I successfully made baked beans which GMan declared were better than the ones out of a can. Some years ago I had attempted to make them but they were really not that great. This time I was armed with more experience and a video I had chanced upon as a starting point. However, I did adapt it somewhat to suit myself.
I have made another batch and made notes of the quantities and method as well as taken several photos so that I can share the recipe with you.
BAKED BEANS
Ingredients
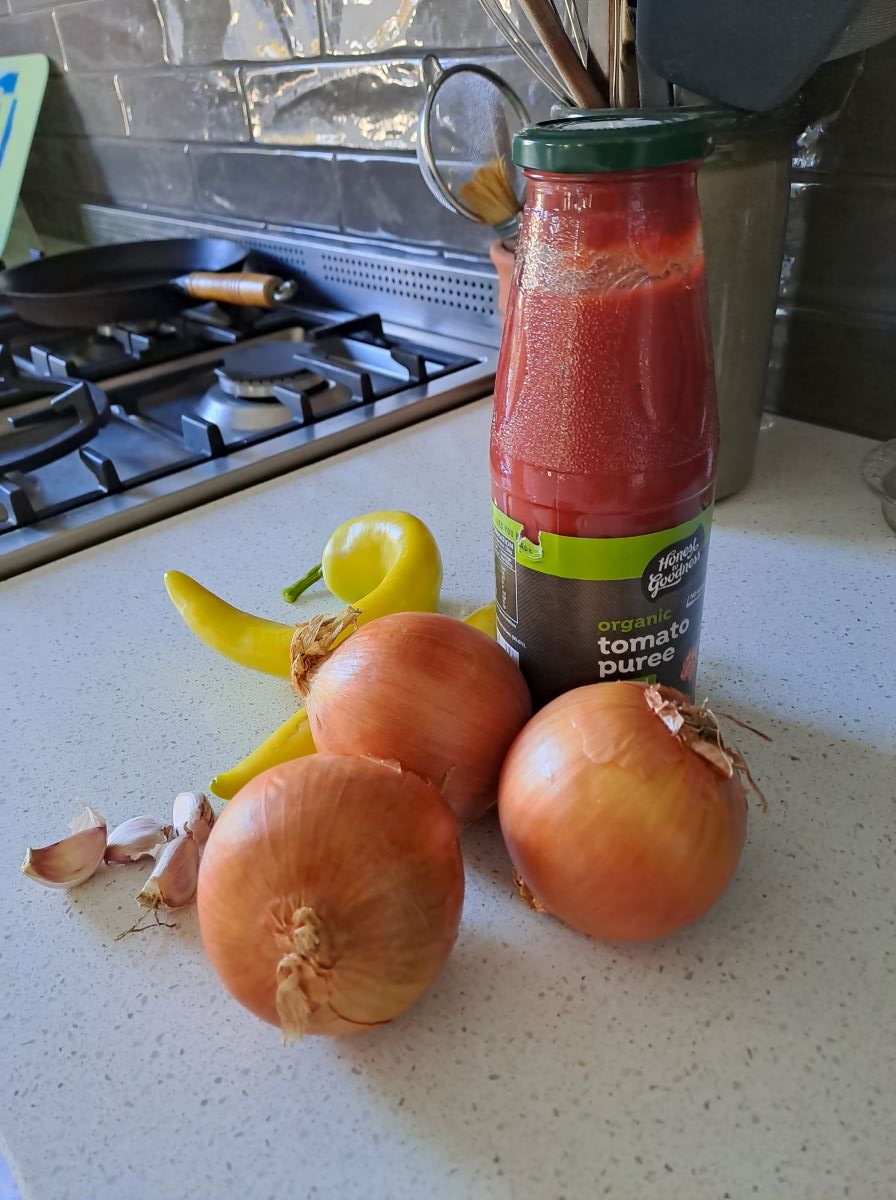
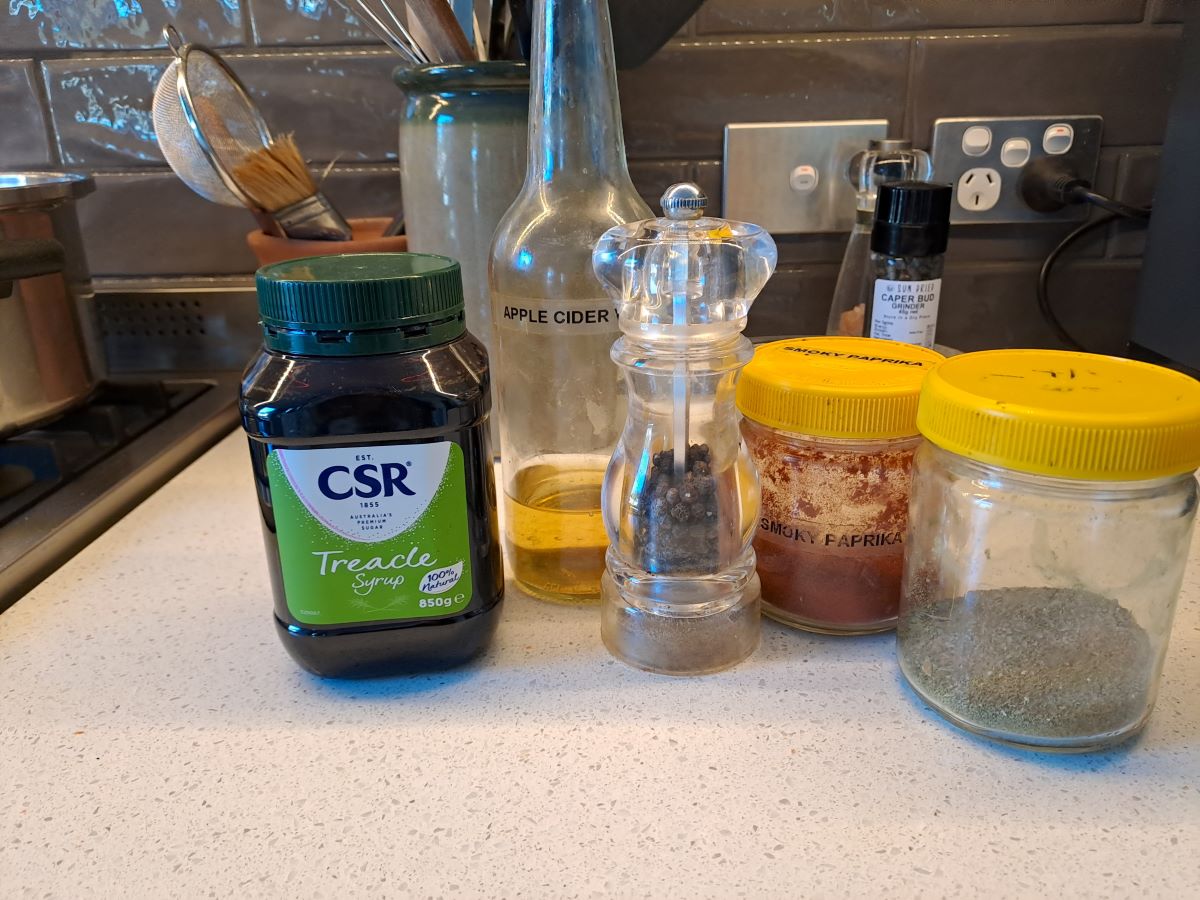
1kg dry white beans Olive oil 3 medium onions, finely diced 4 cloves garlic, crushed 1 capsicum (pepper), diced 700ml tomato passata 250ml water 1 tablespoon treacle 1 tablespoon apple cider vinegar 3 – 4 teaspoons smoky paprika 1 – 2 teaspoons salt 1 teaspoon ground black pepper
Method
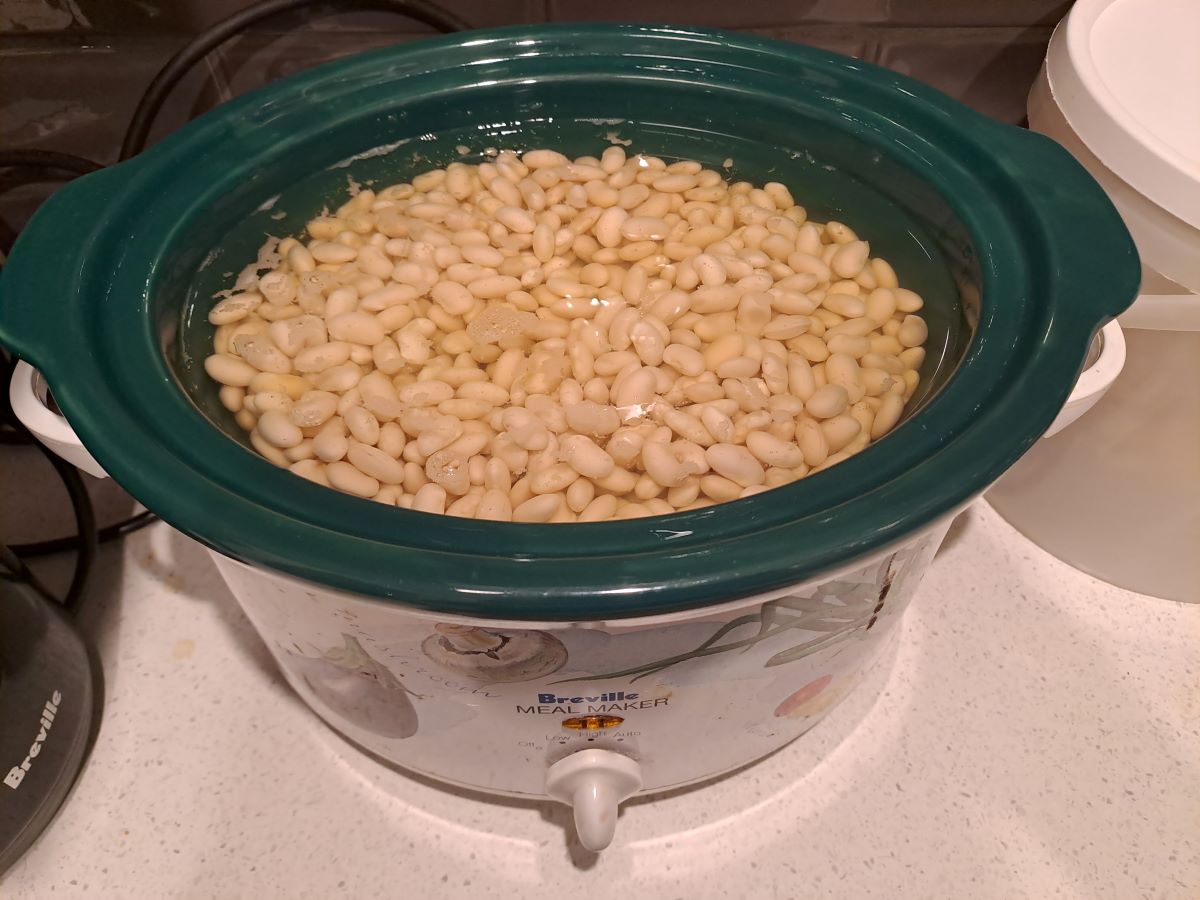
Place the beans in a large bowl and cover with boiling water (about 5cm above the level of the beans). Soak for several hours or overnight. The beans will swell but will still be quite hard. Transfer the beans and water to a slow cooker and add a bit more water. Cook on high for several hours until tender but not mushy.
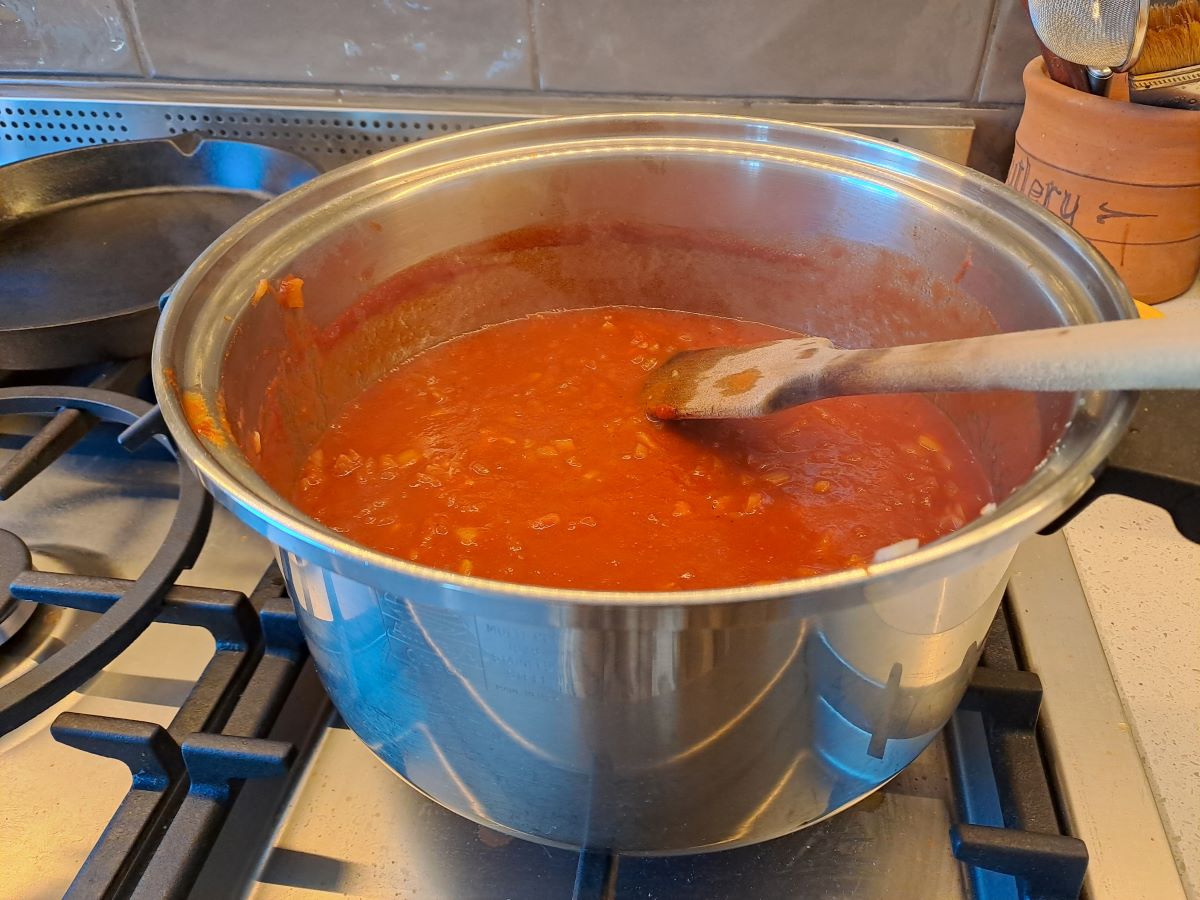
Saute the diced onion in a little oil in a large pan. Cook gently on a low heat so that they soften but are barely coloured. Add the garlic and capsicum and continue cooking. Add the remaining ingredients and simmer gently until well-cooked and the desired flavour.
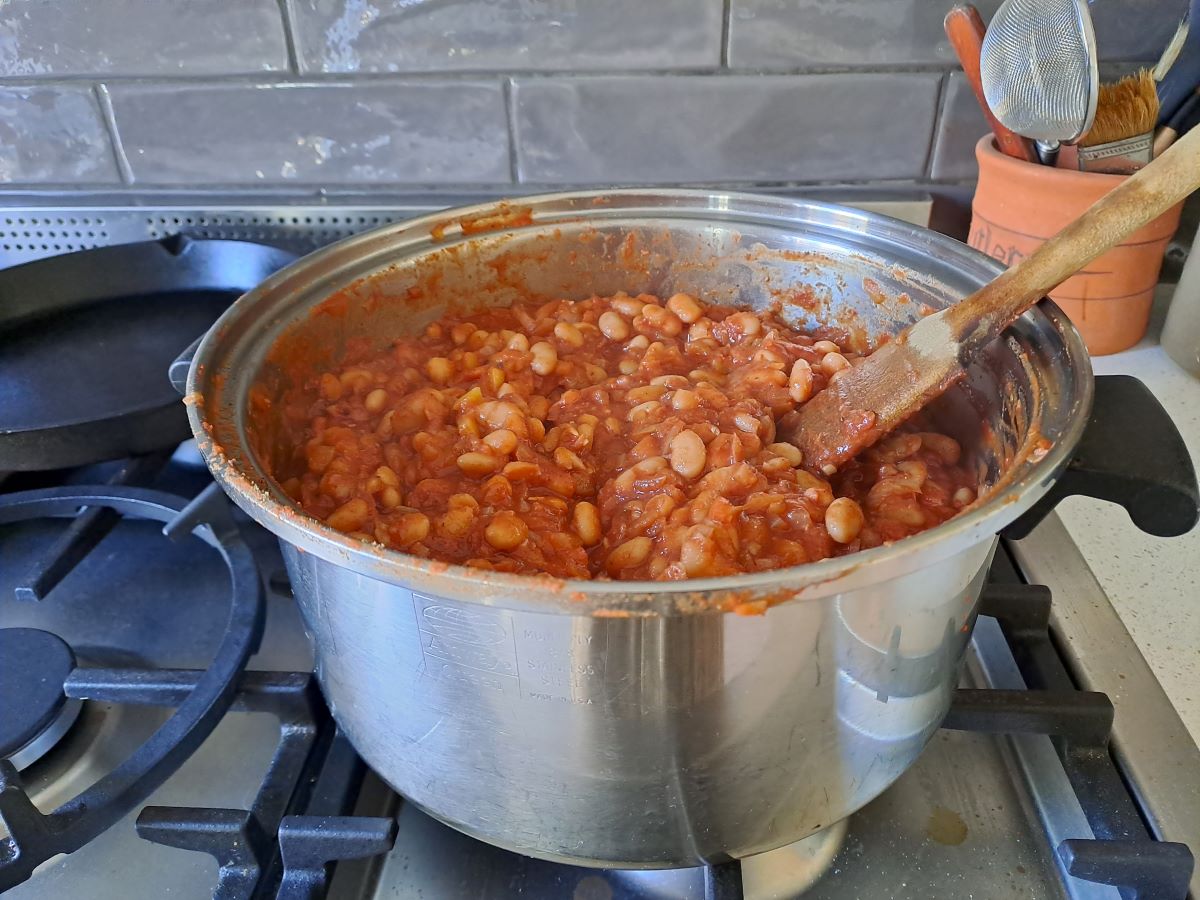
Add the drained beans to the sauce and combine thoroughly but do not break the beans up too much. Allow to stand and cool so that the beans absorb the flavour of the sauce.
Heat, eat and enjoy.
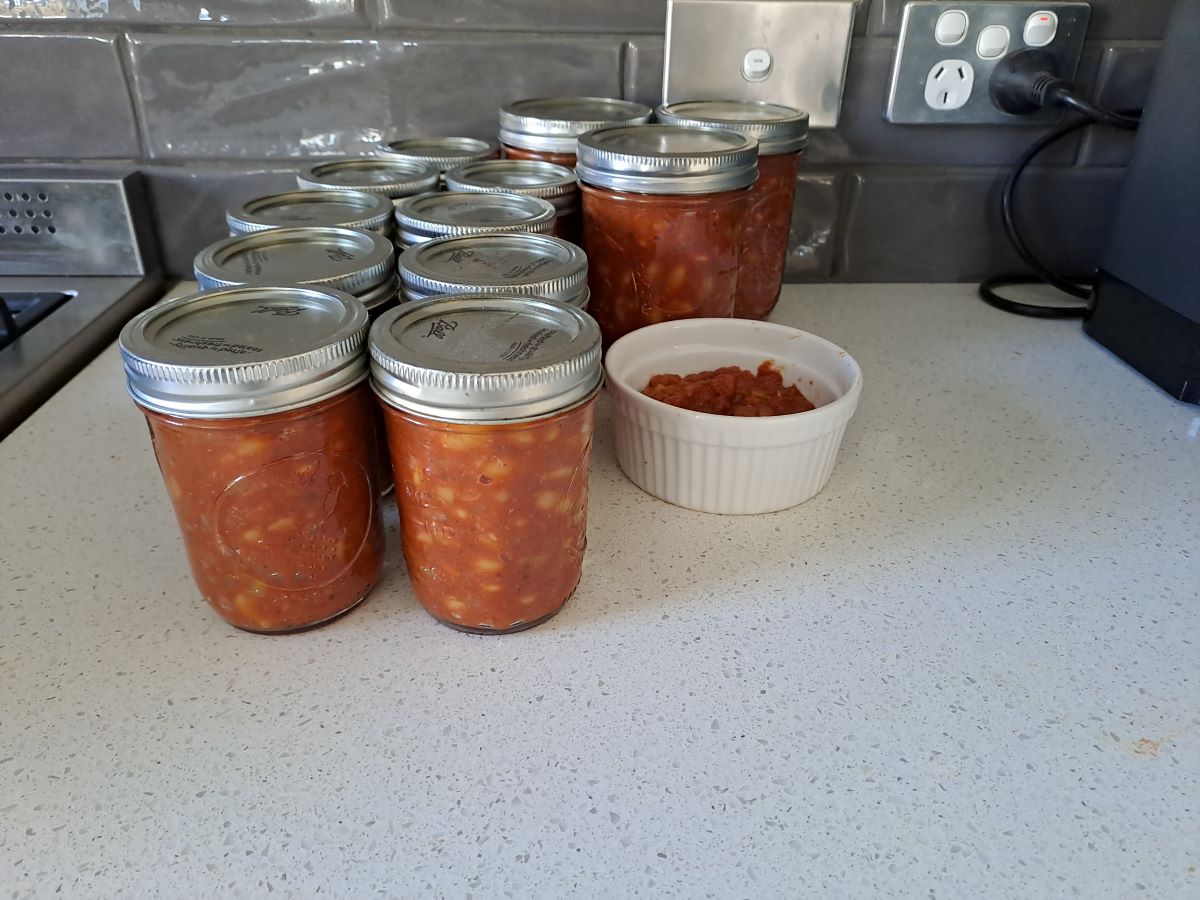
I choose to freeze the prepared beans which works really well. This is the results from the recipe above. The small dish will be my lunch today.
Notes
This is a large quantity – you can reduce the amounts. I used Great Northern beans but you could use navy beans, canellini beans or whatever you prefer. You could used canned beans if you wish. I prefer to use dried beans as they cost less and there is the added benefit of minimal packaging, especially if you buy them from bulk bins. The tomato mixture could be pureed fresh or canned tomatoes or whatever you have on hand. You can also include some tomato paste for a more intense depth of flavour. The original recipe used bacon but I choose to use smoky paprika to replicate the flavour and keep this recipe meat-free. Add the seasonings gradually to account for your personal taste. I used a couple of capsicums from the garden but regular red ones are fine, too. I substituted rosemary salt for half of the salt. I also added 1 tablespoon of Worcestershire sauce and 1/4 cup of my homemade tomato sauce to make it a little spicier.
In other words, this is a basic recipe and you can adjust it to suit your personal taste.
I think everyone has a personal favourite way of making lasagne.
Lasagne was my ‘go to’ dish in the early days of our marriage. In fact, so much so that GMan once commented that our impending dinner guests had eaten at our place previously so we would need to think of something else!
My version of lasagne has evolved noticeably over almost 45 years due to a changing culinary landscape and a variety of dietary considerations. I have reduced the proportion of meat in the dish, eliminated cream, use gluten free flour and pasta. The latest iteration actually replaces the pasta with thin slices of zucchini and the bechamel sauce is made with cauliflower rather than a roux of flour and butter. Interested? Read on for the full details.
LASAGNE
Meat sauce
250g lean minced beef 1 cup dried red lentils 1 large onion, finely diced 2 cloves garlic, crushed 1 large carrot, grated 2 sticks celery, finely chopped 2 teaspoons beef stock powder 2 tins crushed tomatoes } – whatever combination of fresh, dried or frozen tomatoes 2 tablespoons tomato paste } you have on hand. More water may be required. Herbs (fresh or dried) to taste – I used a handful of fresh basil and 1 teaspoons of dried mixed herbs Salt and black pepper to taste
Method
Place the lentils in a bowl and cover with boiling water. Allow to stand for 30 minutes. In a large saucepan fry the onion and garlic, add the mince and brown. Add the remaining ingredients including the drained lentils. Simmer gently until the lentils are tender. Add more water if the mixture becomes too dry.
Chop the cauliflower roughly. The stalk and small leave can be included in this recipe. Steam or microwave until tender. Place cooked cauliflower in blender and gradually add milk until the mixture is smooth and a suitable consistency. Add seasonings to taste. The quantities are only suggestion so add a bit at a time until it reaches your desired taste.
Set sauce aside until required. This sauce can be refrigerated for a couple of days or frozen if you have too much. It can be substituted in any recipe that requires a creamy white sauce. You can use plant-based milk if you choose.
Other
Zucchini, sliced thinly lengthwise Grated cheese, I use a mixture of cheddar, parmesan and nutritional yeast
Assembly
Layer the various components in an ovenproof dish. I usually do meat sauce, zucchini, white sauce and then cheese and repeat 2-3 times until the dish is full.
Cook in the oven until heated through and browned on top. Alternatively, it can be heated in the microwave and finished off under the grill to brown the top.
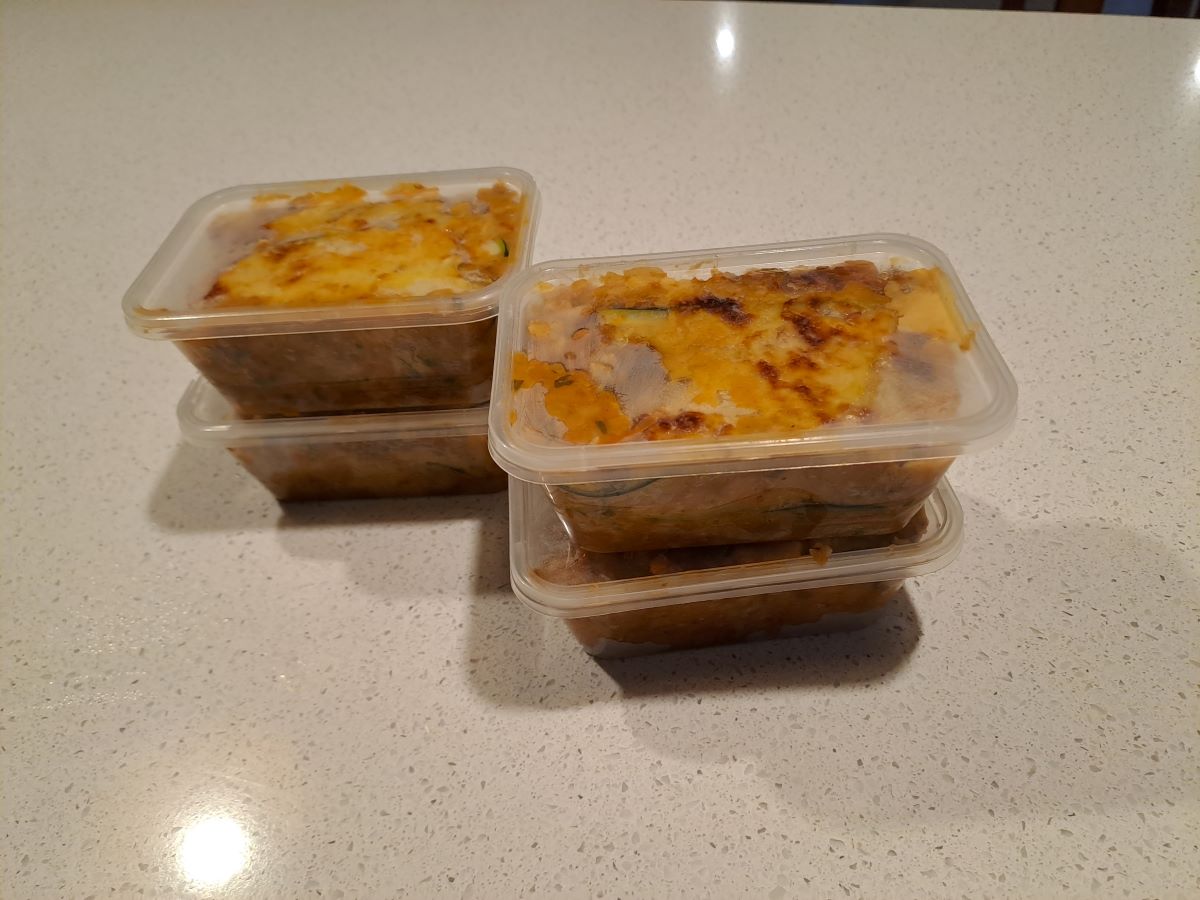
Makes 6 generous serves.
This is the only photo I have as I did not think of writing this post until after we had eaten dinner. We ate 2 serves and the remainder were packed up and frozen in 4 individual serves.
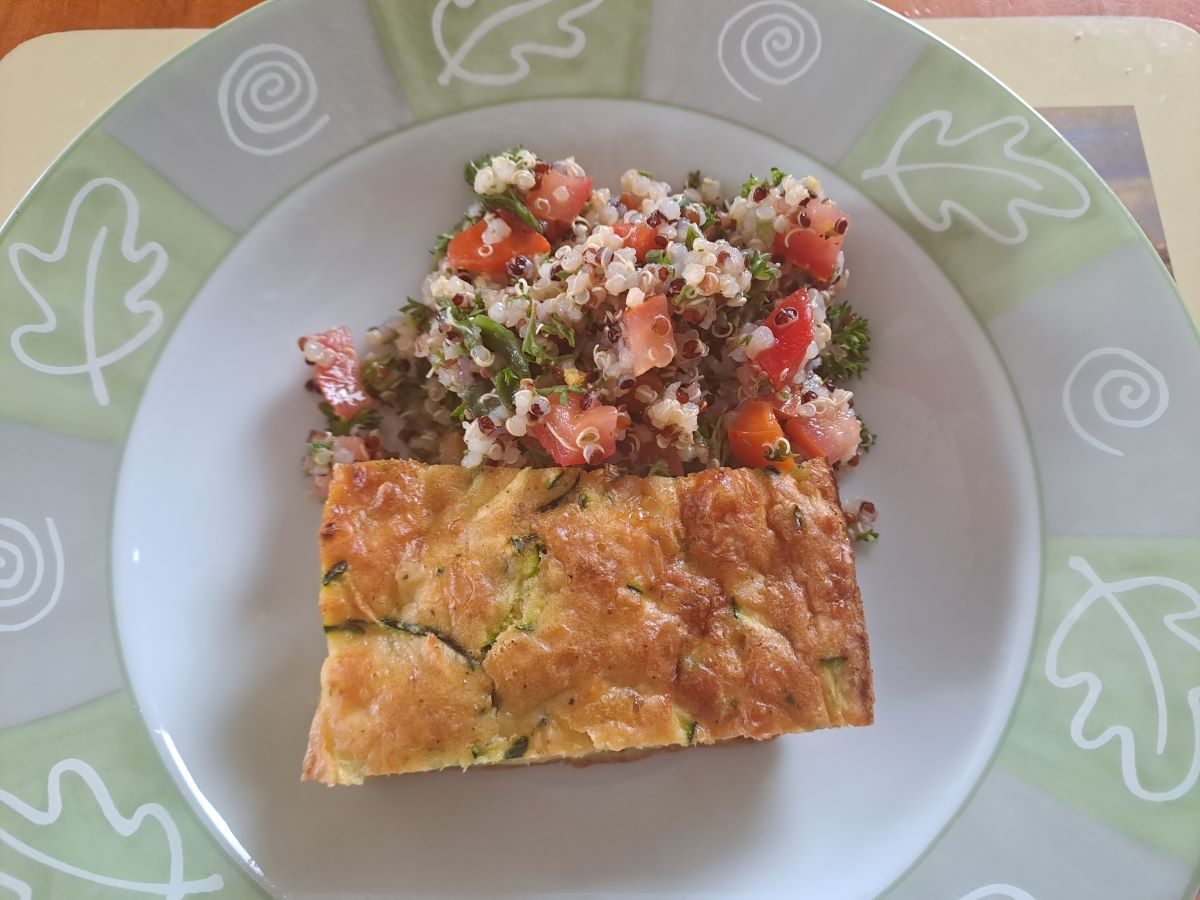
Today I am adding a new ‘recipe’ to the blog. It is tabouleh with a twist – made with quinoa rather than the traditional cracked wheat which makes it gluten free. The fresh, clean feel to this dish makes it perfect for summer meals. Unlike many salads, it can also be made a day ahead. In fact, I think making it beforehand allows the flavours to develop even more.
This is a rather loose interpretation of a recipe as the quantities are variable and can be adjusted according to taste.
The photo shows the tabouleh served with a piece a zucchini quiche for lunch.
QUINOA TABOULEH
Ingredients
1/2 cup tri-colour quinoa 2 cups water 1 teaspoon vegetable stock powder I cup curly leaf parsley, finely chopped 3 spring onions, finely chopped 1/2 tomato, diced 1/2 small cucumber, diced 1/4 red capsicum, finely diced
1 tablespoon olive oil 2 tablespoons lemon or lime juice 1 tablespoon rice wine vinegar Ground black pepper Salt
Method
Cook the quinoa in boiling water with stock powder added. Watch carefully and stir as required. Aim to absorb all of the liquid and not overcook the quinoa. Spread cooked quinoa on a tray, fluff with a fork and allow to cool thoroughly before adding the remaining ingredients and dressing.
I cannot believe that despite writing this blog for over 12 years, growing pumpkins and there being several references to making pumpkin soup that I have never actually written an entire post about making it. Nor have I added a recipe to the index.
Well, I am about to remedy that oversight.
We are still living in temporary accommodation but that has not stopped me preparing meals. The weather is cold and a bowl of piping hot soup is a welcome addition to the menu. I made cauliflower soup a few days ago and now it is time for some pumpkin soup. I bought a whole pumpkin from a nearby roadside stall for $7.
Whilst this may sound expensive it works out to less than 50c for a generous serve and is one of the best flavoured pumpkins I have had in a long time.
There is only one saucepan in our current accommodation so I only used half of the pumpkin.
The following recipe and method are my preference, however, you can adjust and modify according to your own tastes and circumstances.
The quantities are what I used but they are quite variable according to taste.
PUMPKIN SOUP
Ingredients
Half a large pumpkin 2 teaspoons oil 2 teaspoons balsamic syrup 2 medium onions, finely diced Salt Pepper 3 teaspoons vegetable stock powder 1/2 teaspoon smoky paprika 750ml water
Peel pumpkin, remove seeds and cut into large wedges. Place pumpkin in a large bowl. Combine a couple of teaspoons of oil and balsamic syrup and pour over the pumpkin. Toss until it is all coated with the mixture. There shouldn’t really be any excess – just enough to coat the pumpkin.
Place the pumpkin wedges in a single layer in the air-fryer and cook for 30 minutes at 190C. You may need to do several batches depending on the size of the air-fryer.
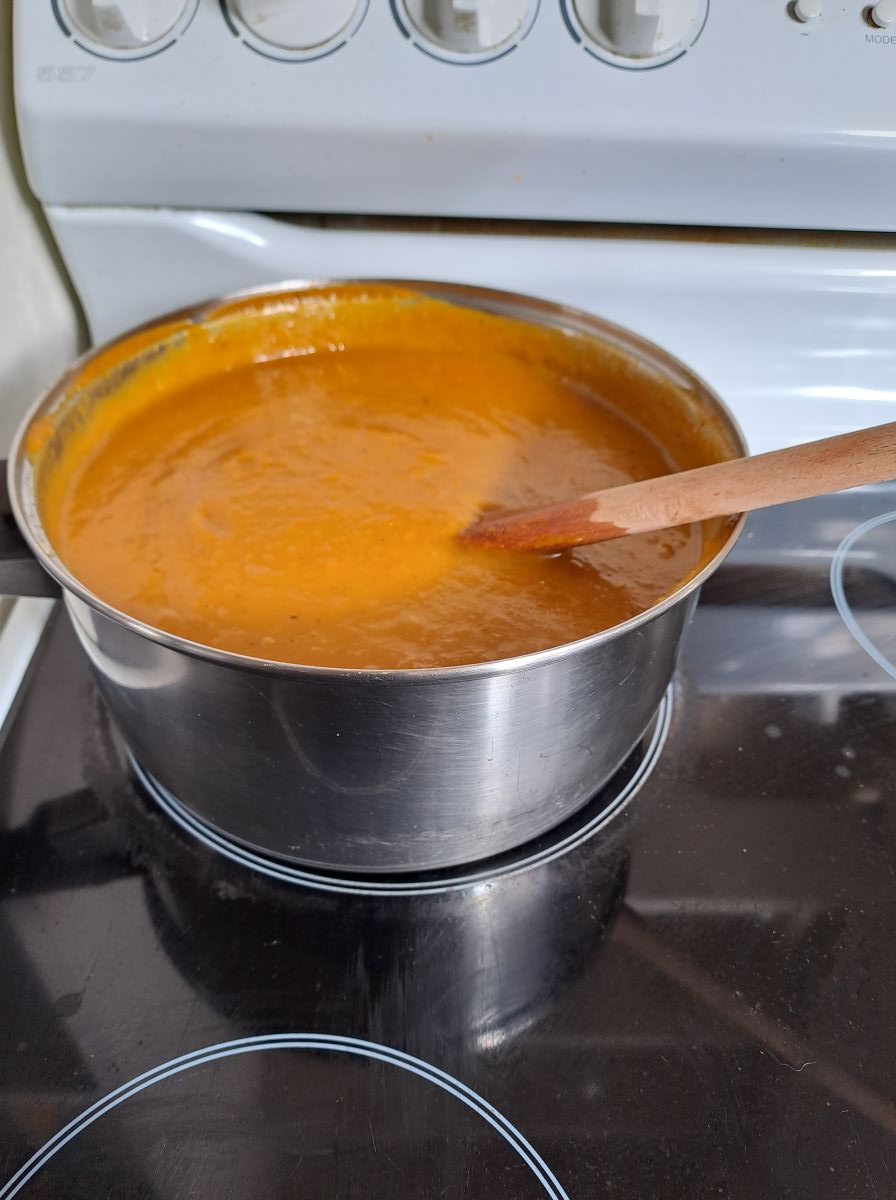
Finely dice 2 medium onions. Add a small amount of oil to a large saucepan or stockpot and saute the onions until soft. Add the pre-cooked pumpkin, water and seasoning. Simmer for 10 minutes then puree and adjust seasoning/liquid as required.
I use a stick blender to puree the soup, however, you could use a blender or food processor.
**WARNING** Whatever method you use to blend the soup you need to be very careful to avoids burns or scalding.
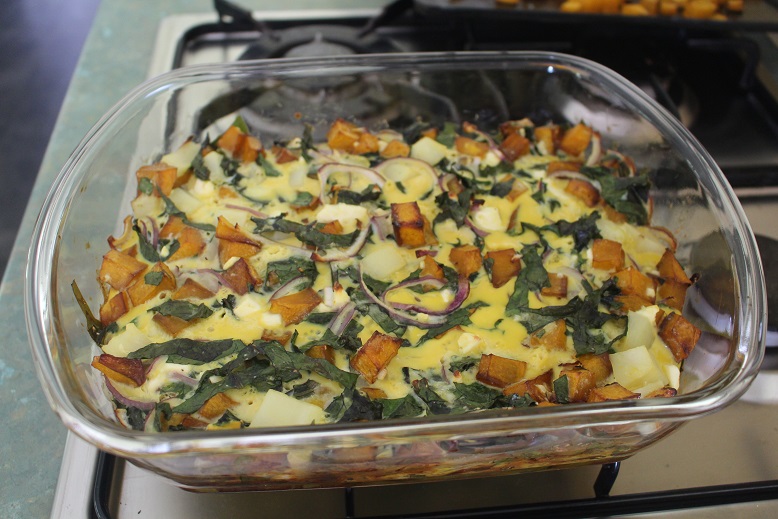
I spent most of yesterday cooking and one of the things I made was a frittata.I was spurred into action when I noticed that we had 26 eggs. They can accumulate quite quickly when the chickens are laying.
There was half a pumpkin in the fridge which I was keen to use up and after checking Google I found this recipe – Pumpkin and Spinach Frittata.
I adapted the recipe to suit the quantities of ingredients I had available and my own requirements. The following ingredients will make 6 generous serves.
This afternoon I posted the following question on a Facebook group.
When I was working I used to menu plan for a week at a time but not so much now.
I have no shortage of ingredients but not too much in the way of inspiration. We eat a predominantly vegetarian and also gluten free. I have eggplant, zucchini, capsicum, carrots, mushrooms and celery as well as all the usual pantry staples.
Ideas?
There were heaps of great suggestions, many of which I will save for another day but this particular one caught my eye.
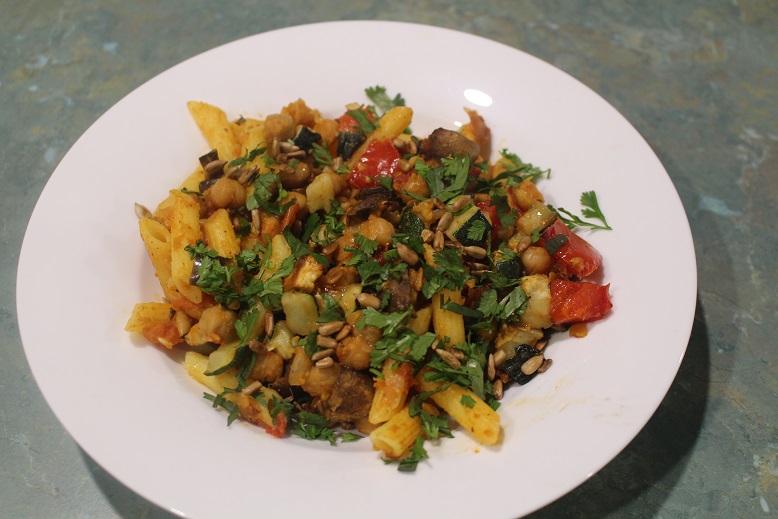
I’d keep it simple. Roast the veges and toss with GF pasta spirals or chick peas, olive oil, seasoning and toasted nuts. If you’re looking for a flavour hit, Moroccan seasoning and fresh coriander is an interesting twist.
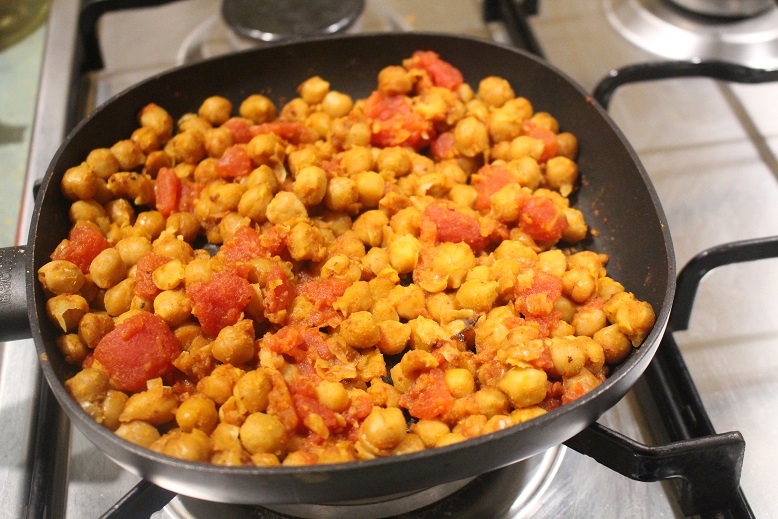
We do not eat a great deal of pasta but I do have some for occasional use. I don’t keep Moroccan seasoning but a quick Google search revealed that it is ground cumin, paprika, ground coriander, ground turmeric, ground allspice, ground cloves, ground ginger, and ground cinnamon. I had all of these apart from the coriander, however, I have an abundance of fresh coriander. I had cooked chickpeas in the freezer as well as the selection of vegetables I mentioned in my original question.
So, I set to work.
Zucchini, eggplant, mushrooms and capsicum of a tray drizzled with olive oil and sprinkled with sea salt. I cooked them for about 20 minutes at 160C.
Chickpeas with Moroccan spices and 1/2 cup crushed tomatoes.
Once the pasta was cooked I tossed the vegetables and chickpea mixture through the pasta, added a spoonful of olive oil and served it topped with chopped coriander and toasted sunflower seeds.
This was really delicious and I will definitely be making it again.
Our dinner last night was a previously untested creation. GMan hailed it as a real success. While there are recipes for Eggplant and Mushroom Stroganoff online, mine is a variation on the beef version I used to make a number of years ago.
Eggplant and Mushroom Stroganoff
1 onion, diced
1 clove of garlic, crushed
1/2 red capsicum, diced
1 medium eggplant, cubed
12 mushrooms, sliced
Olive oil
Sea salt
Freshly ground black pepper
1 teaspoon smoky paprika
2 teaspoons beef stock powder
60ml Worcestershire sauce
125g ricotta cheese
500ml water
2 teaspoons arrowroot
Spread the cubed eggplant on a roasting pan, drizzle with a little olive oil and sprinkle with salt. Roast at 160C for about 15 minutes or until tender.
Saute onion and garlic in a frying pan. Add capsicum, mushrooms and eggplant. Add pepper, smoky paprika, beef stock powder, Worcestershire sauce and water. Simmer gently for 10 minutes. Add ricotta cheese stirring gently to combine. Thicken with arrowroot blended with a little water. Cook for a further 2 minutes.
Serve over pasta of your choice.
NOTES:
I added some finely shredded bok choy which I lightly sauteed before stirring into the stroganoff immediately before serving.
The ricotta cheese was used because it was what I had on hand. You could substitute cream or evaporated milk to create the creamy sauce.
I used gluten free penne pasta. Rice would be a suitable alternative to pasta.
We were out and about for several hours today and since we did not start early, this included lunchtime. Rather than stop for takeaway food, we opted to continue our quest which included buying timber and hardware as well as ordering a garden shed.
So, it was almost 3.30pm when we arrived home so I decided to make a main meal. I am not sure whether to label it as a late lunch or early dinner but we had a delicious mushroom and bok choy risotto.
Risotto is one of those wonderful one-pan meals that you can make using pretty well whatever ingredients you have on hand to add to the arborio rice mixture.
Here is a recipe based on what I made today but you can be as adventurous as you like when it comes to the flavours.
Mushroom and Bok Choy Risotto
Ingredients
1 cup arborio rice
1 onion, finely diced
Oil
6 medium mushrooms, sliced
1 large bok choy
2 teaspoons vegetable stock powder
1 teaspoon smoky paprika
Salt and pepper to taste
Water
Lightly saute the onion in a small amount of oil in a large pan (I use a wok). Add the dry rice and toss until coated with oil/onion mixture. Add stock powder, paprika and 1 cup of water. Gently simmer, stirring occasionally and add more water as it is absorbed – about 1/2 cup at a time. The rice will become cooked and somewhat creamy in consistency.
Meanwhile, separate the stalks from the leaves of the bok choy. Finely slice the stalks and saute in a separate pan. Finely shred the leaves. When the rice is almost ready add the mushrooms, bok choy stalks and leaves. Stir to combine and add seasoning as required.
Serve in bowls. The risotto can be topped with shaved parmesan cheese or nutritional yeast for a vegan option.
NOTES: I generally only add a maximum of 2 ingredients to risotto otherwise the flavours can be overwhelmed. Other options include pumpkin and spinach, green bean and sundried tomato but you are only limited by you imagination. You may choose to omit the paprika and substitute a can of crushed tomatoes instead of some of the water.