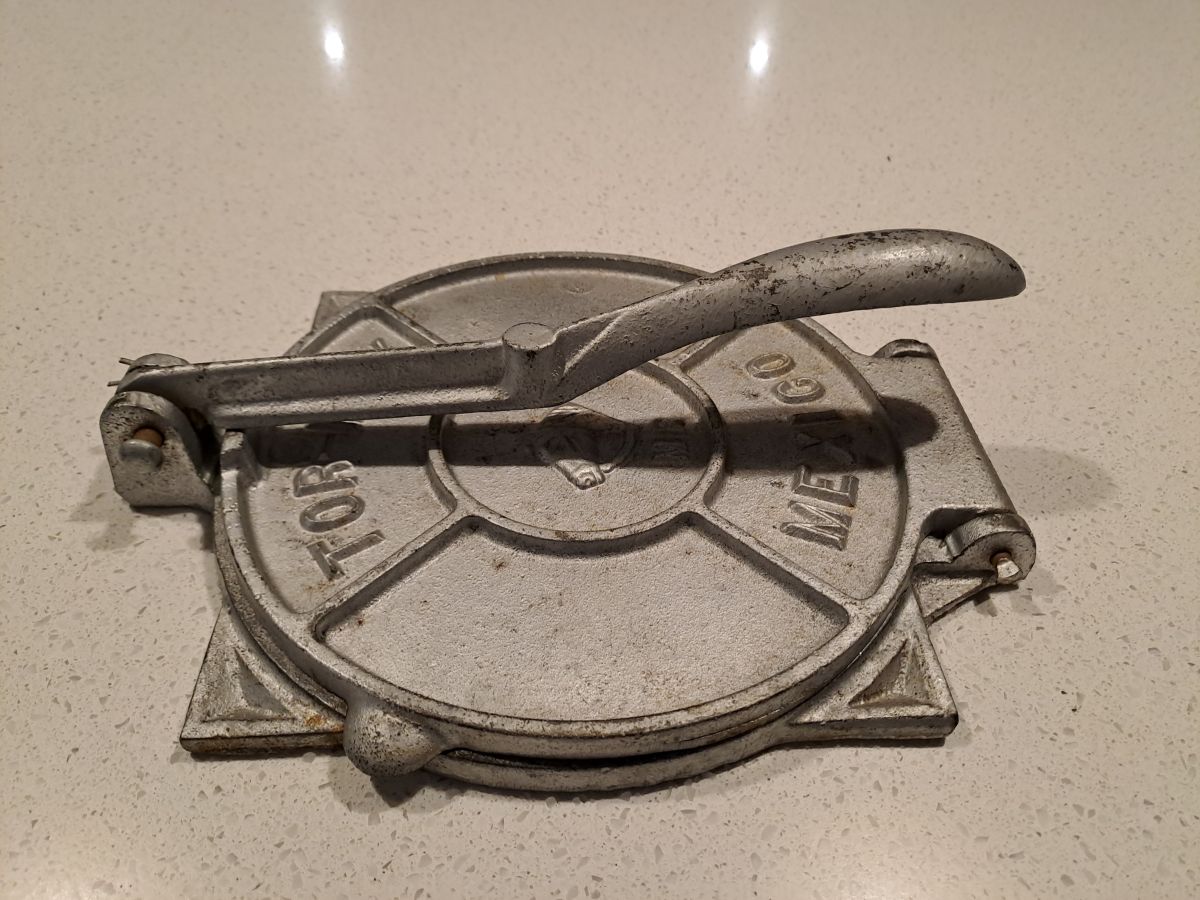
It probably seems a bit at odds with my last post about decluttering but I could not contain my excitement when GMan spotted this in an op shop today. Sometimes you don’t know that you need something until you see it.
For the princely sum of $6 I am now the proud owner of a cast-iron tortilla press.
It needs a bit of cleaning but then I will definitely be attempting to make my own tortillas.
If you have any experience using one I would love to hear about it. I will post about the results in due course.
We have guests coming to stay next week and as well as the dedicated guest room I needed to set up another bed. There is a fold-out sofa bed in the third bedroom so I have unfolded it and made it up in readiness.
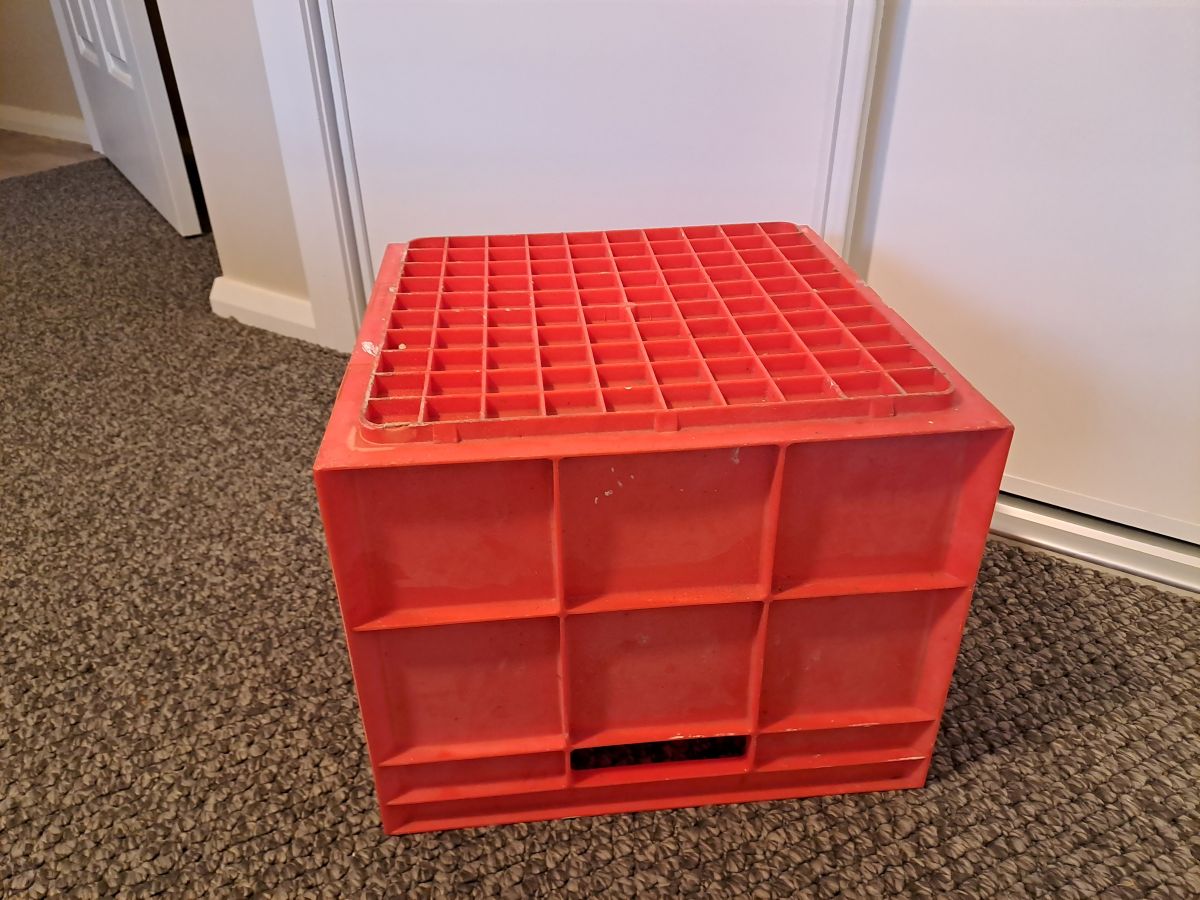
After I had done the bed it occurred to me that there was no side table in that room. After a bit of thought I decided that I could create one fairly easily with things we have one hand.
First……….a spare plastic crate from the shed. No modification needed apart from turning it upside down.
The next step was to add a solid top. GMan found a piece of melamine that was leftover from the pantry renovation and cut it to size. It is heavy enough to stay in place without any additional fixing.
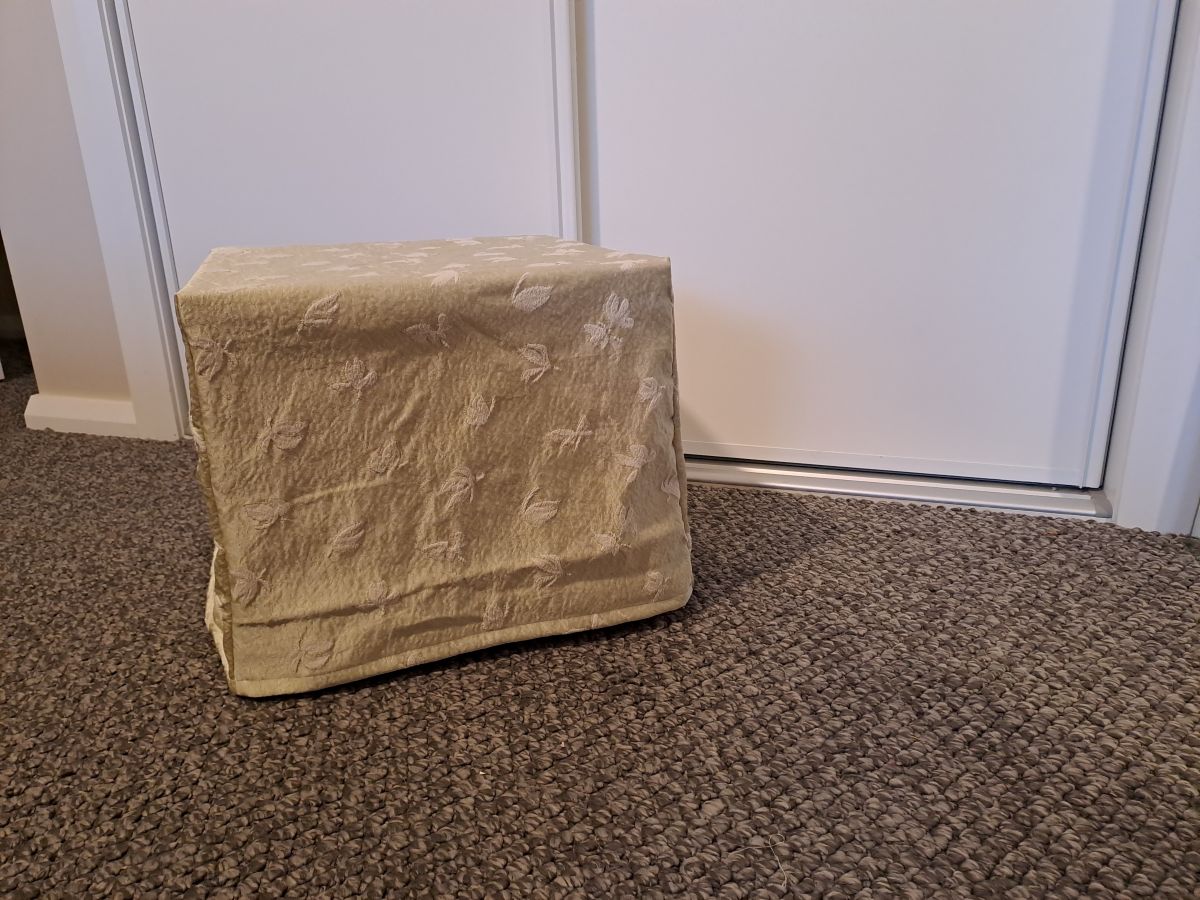
The next step was to find some suitable fabric in my stash to make a cover. I found a large piece of embroidered heavy satin which was originally one side of a thrifted doona cover and made a fitted cover.
The fitted cover in place.
The new side table in position and the room is ready for the guests.
The entire project took less than 2 hours to complete from the moment I first thought of the idea.
The last week of May ran away while I wasn’t looking so welcome to a new month and the first official day of winter here in the southern hemisphere.
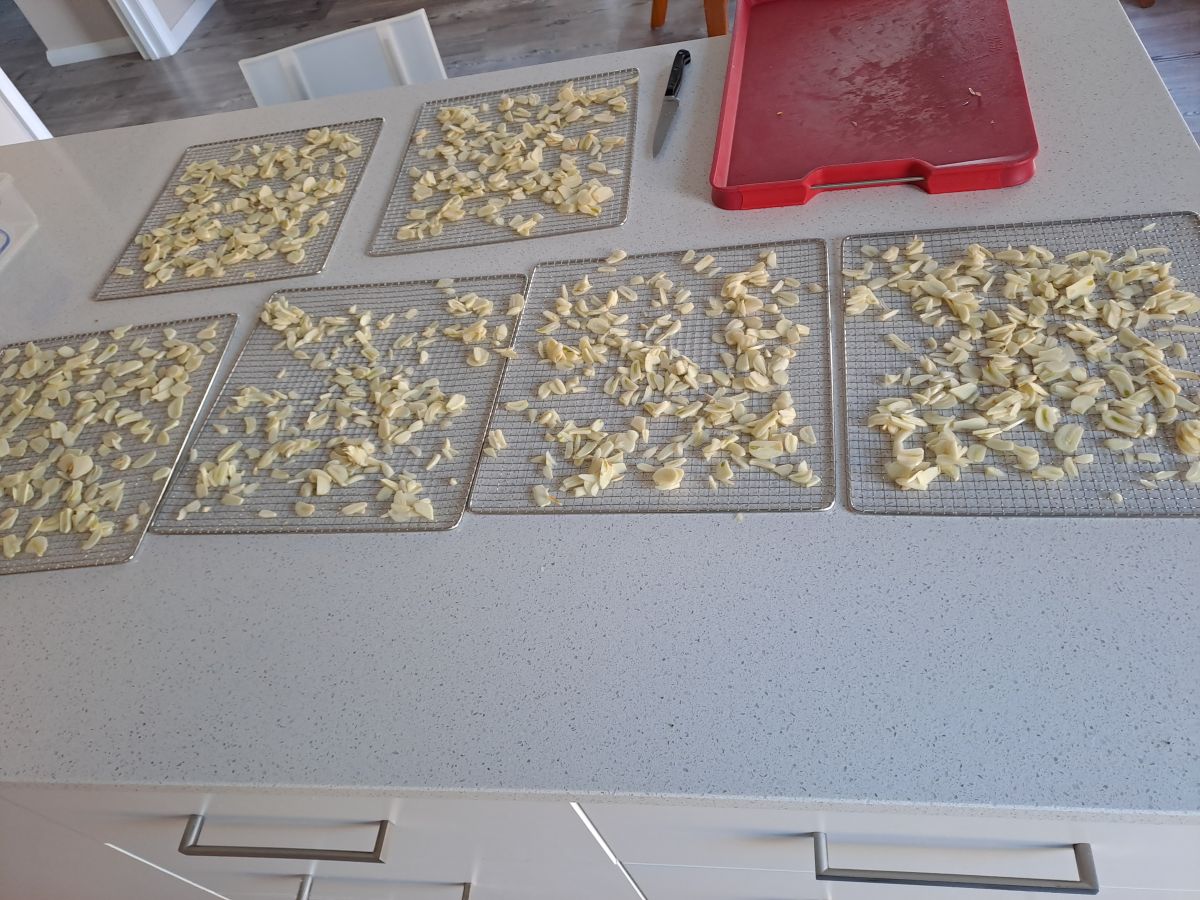
Towards the end of last year I picked a good crop of garlic that I grew. In fact, I harvested 1.7kg of garlic. I have replanted some, given some away and used it as required for the past 6 months. There was still a substantial quantity left so I decided to make my own garlic salt.
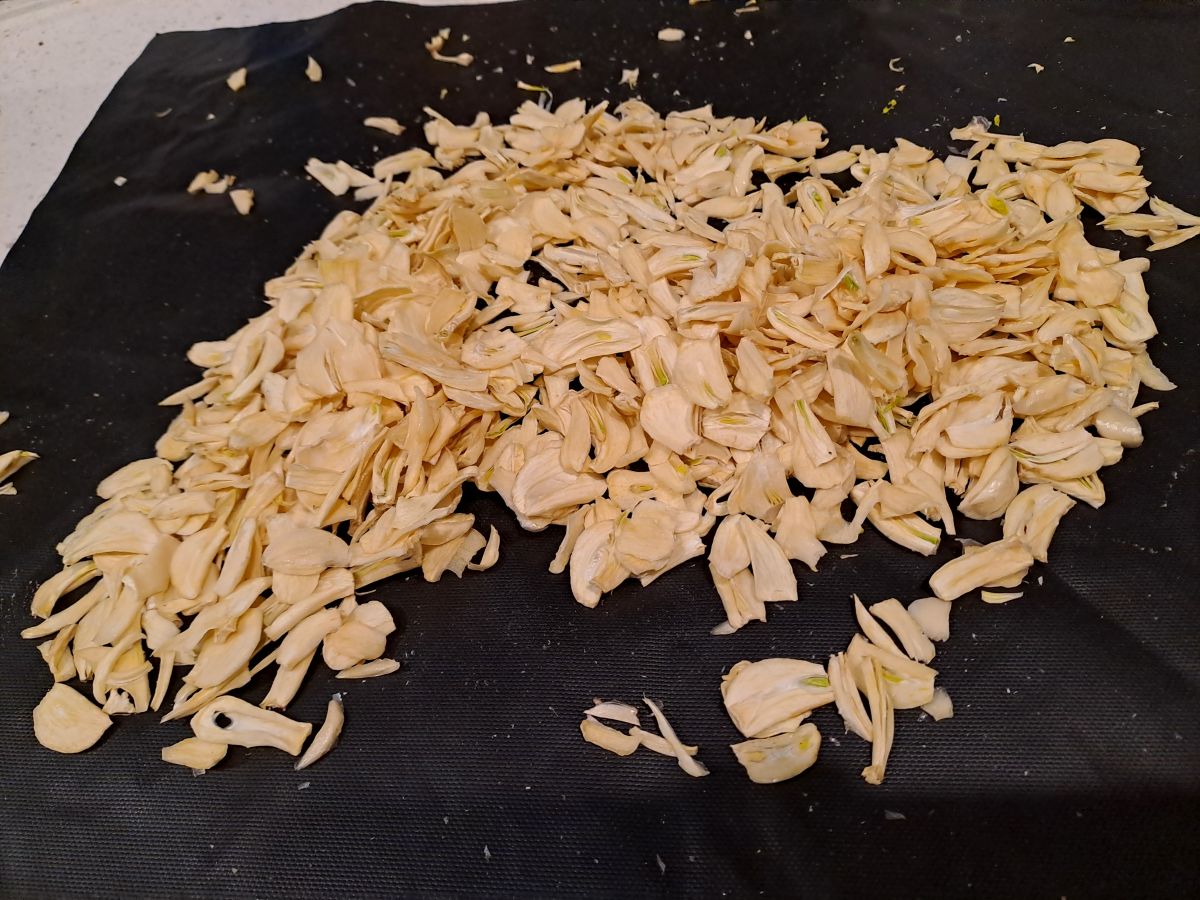
I spent a good few hours carefully peeling and thinly slicing the cloves.
Here they are laid out on the racks and ready to go in the dehydrator.
15 hours later the pieces were dry and crunchy. Here is some of the results.
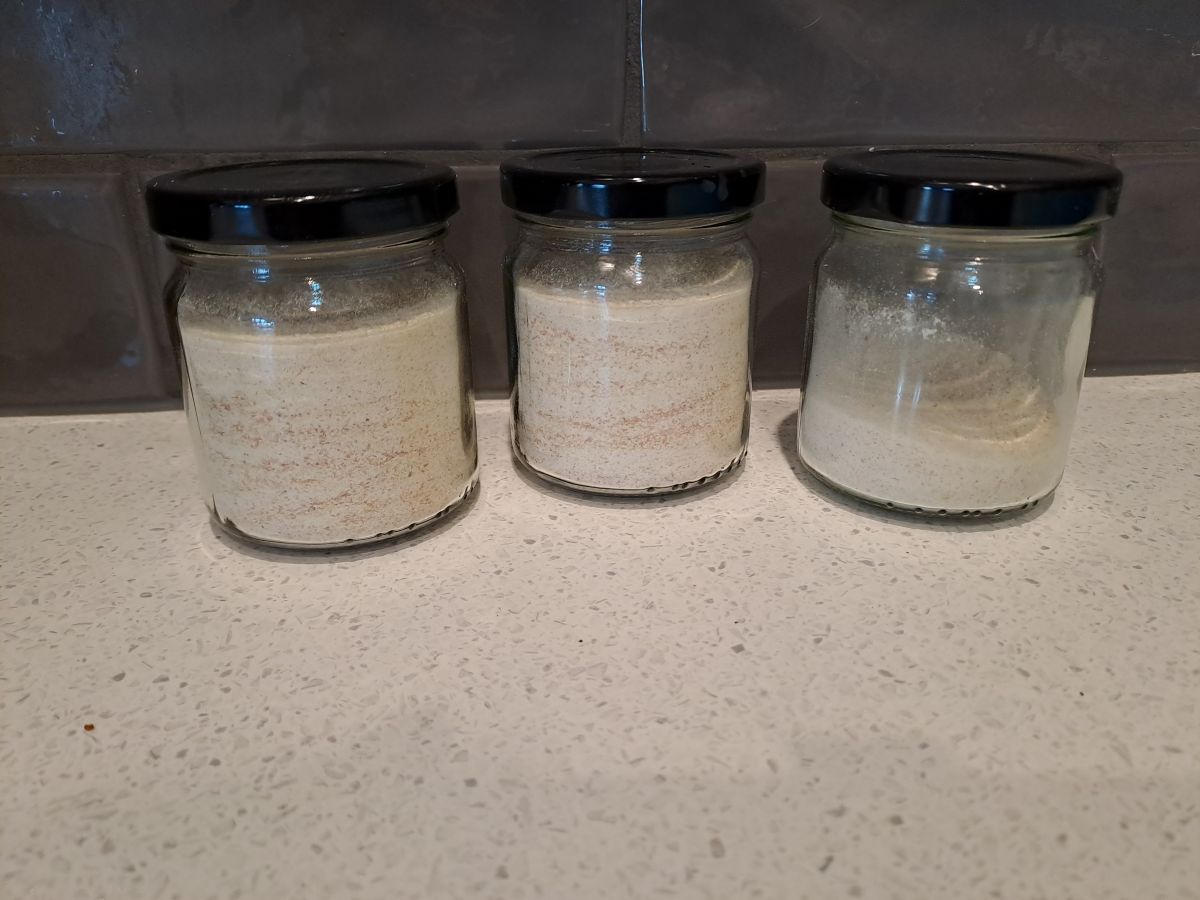
I then ground the dried garlic pieces to a powder and mixed them with an equal weight of salt.
This is the 300g of garlic salt which I now have ready to use in cooking as needed.
Although it was a fairly time-consuming project, I feel that this was definitely worthwhile.
I have done several sewing jobs over the past couple of weeks so I thought I would gather them up and share in a single post.
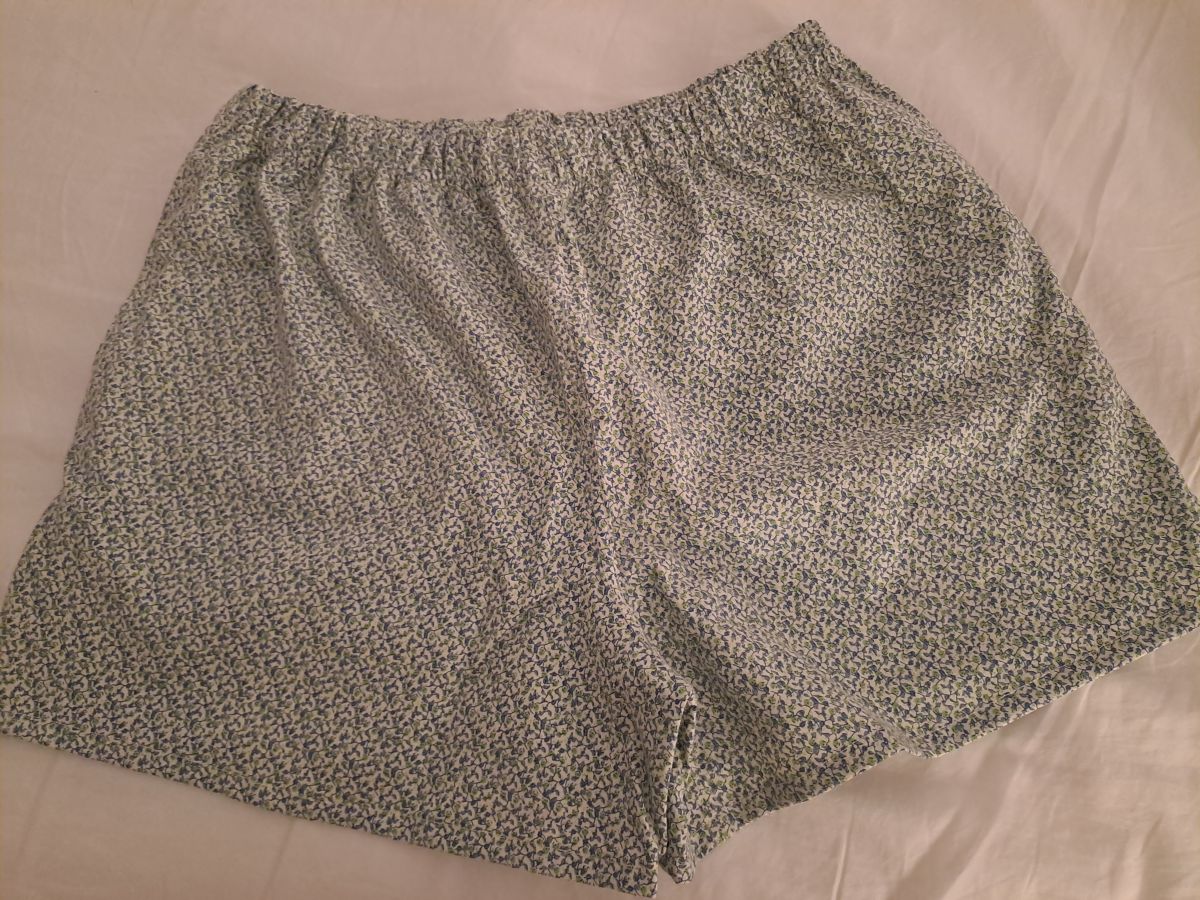
These boxer shorts which are pyjama bottoms were both made from other garments which belonged to my mother. One was a nightie which she had made and the other was a dressing gown. They had been sitting in my stash for nearly 4 years with the vague notion of using them to make sleepwear. My hand was forced when my 2 existing pairs of boxer shorts became so thin that they ripped. Both had also been made from salvaged fabric and had a good life.
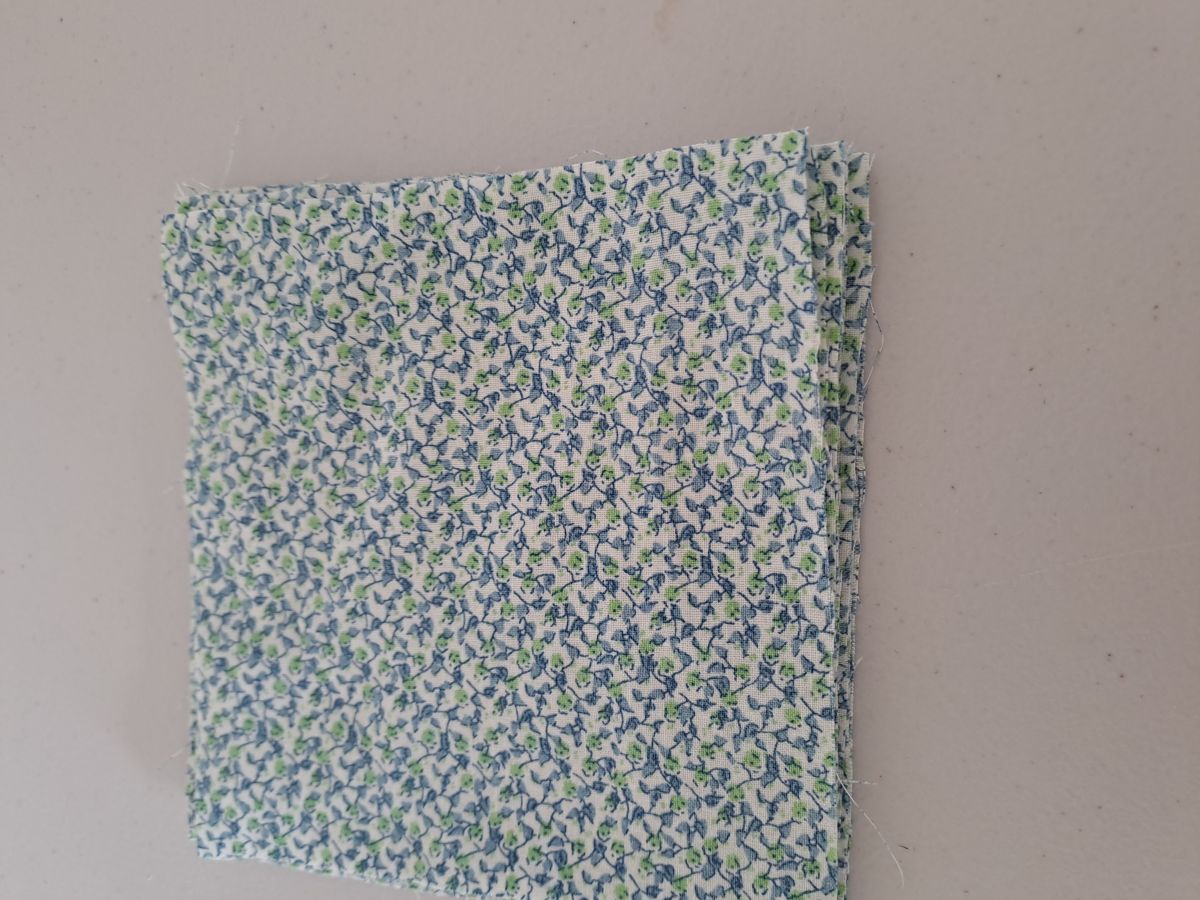
Of course, there were smaller pieces of fabric left over so I cut them into squares ready for future patchwork projects.
This pair of trackpants had been waiting since I bought them at the op shop a few months ago. They were definitely not a priority as we were coming into warmer weather. When I tried them on it was quite hilarious to discover that they were a bit too short in the leg for me. Those of you who know me will understand but for everyone else – I am 5’2″ or 157cm tall so clothes being too short is not normally a problem for me. The also had an odd angled raw edge at the bottom which is not really my style so I straightened it up and added contrasting cuffs. I bought them because they are a neat fit, not at all baggy and will be perfect for winter days at home.
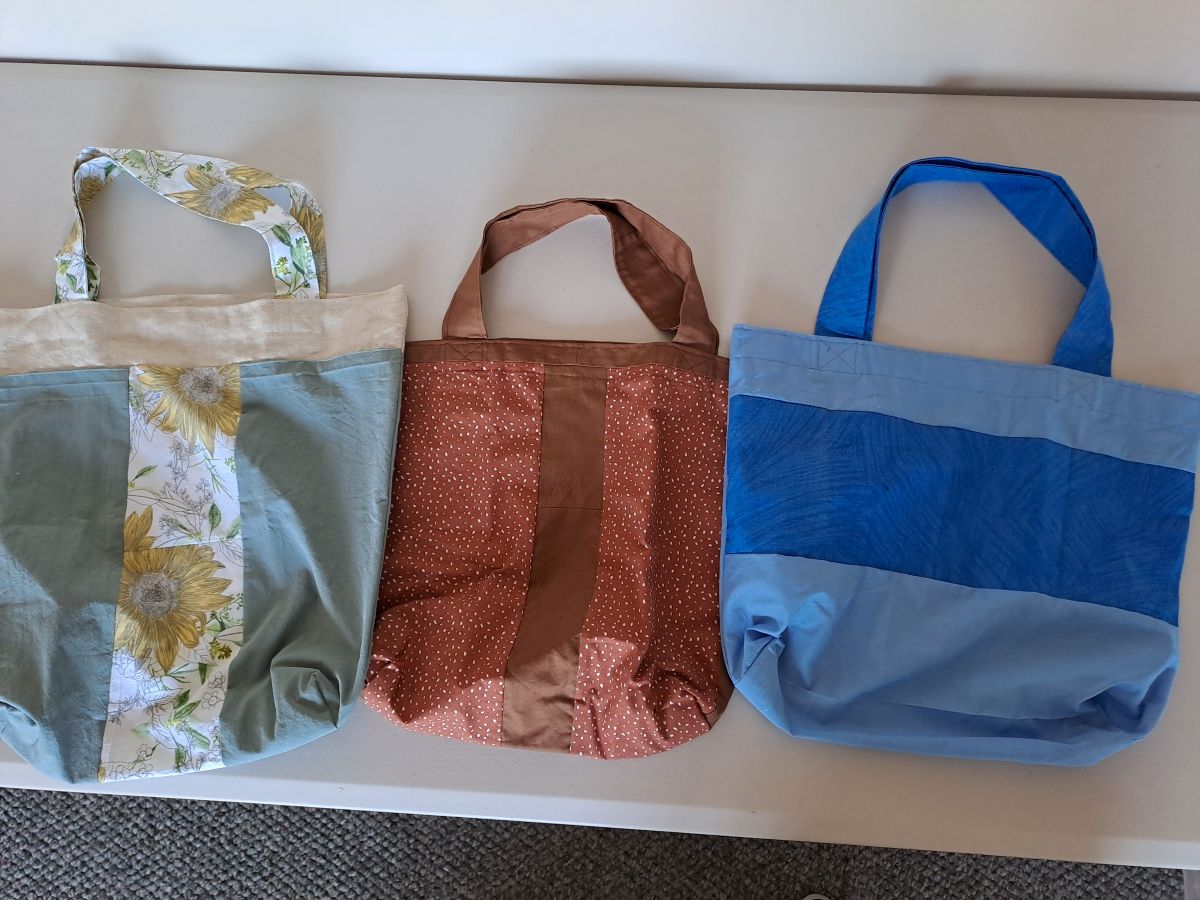
Finally, I used up a few more pieces of fabric by making 3 more bags which I have donated to the Community Pantry.
Fromm time to time I stumble across interesting sounding recipes on Facebook. I generally ‘save’ them on Facebook and often forget to go back and look them again. However, a few days ago I saw one that I could not wait to try out.
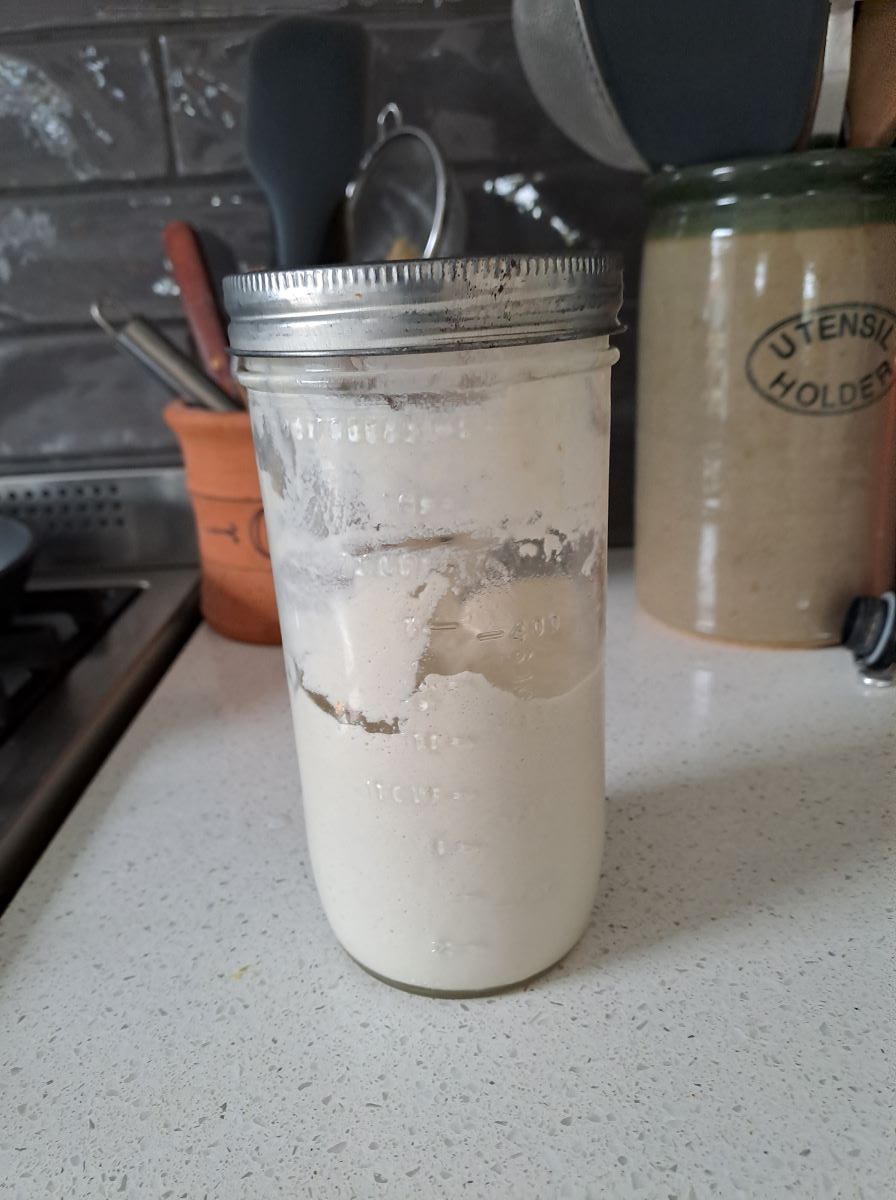
This is for a vegan ‘sour cream’ made from sunflower seeds. Sounds a bit ridiculous? That was my thought, too.
VEGAN ‘SOUR CREAM’
1 cup sunflower seeds 1¼ cups water ⅓ cup freshly squeezed lemon juice ¼ onion 1 large clove garlic 1 teaspoon salt
Place all ingredients in a blender and blitz until creamy. Makes about 500ml. Keep in an airtight container in the refrigerator for up to a week or freeze portions for later use.
NOTE: I have not tried freezing it as yet.
NOTE: You could also try adding additional spices or nutritional yeast to alter the flavour a little.
I know it sounds improbable and ridiculously easy – it really is that simple.
This is the result, although some has already been used. I would say it is a bit like a cross between sour cream, yoghurt and mayonnaise.
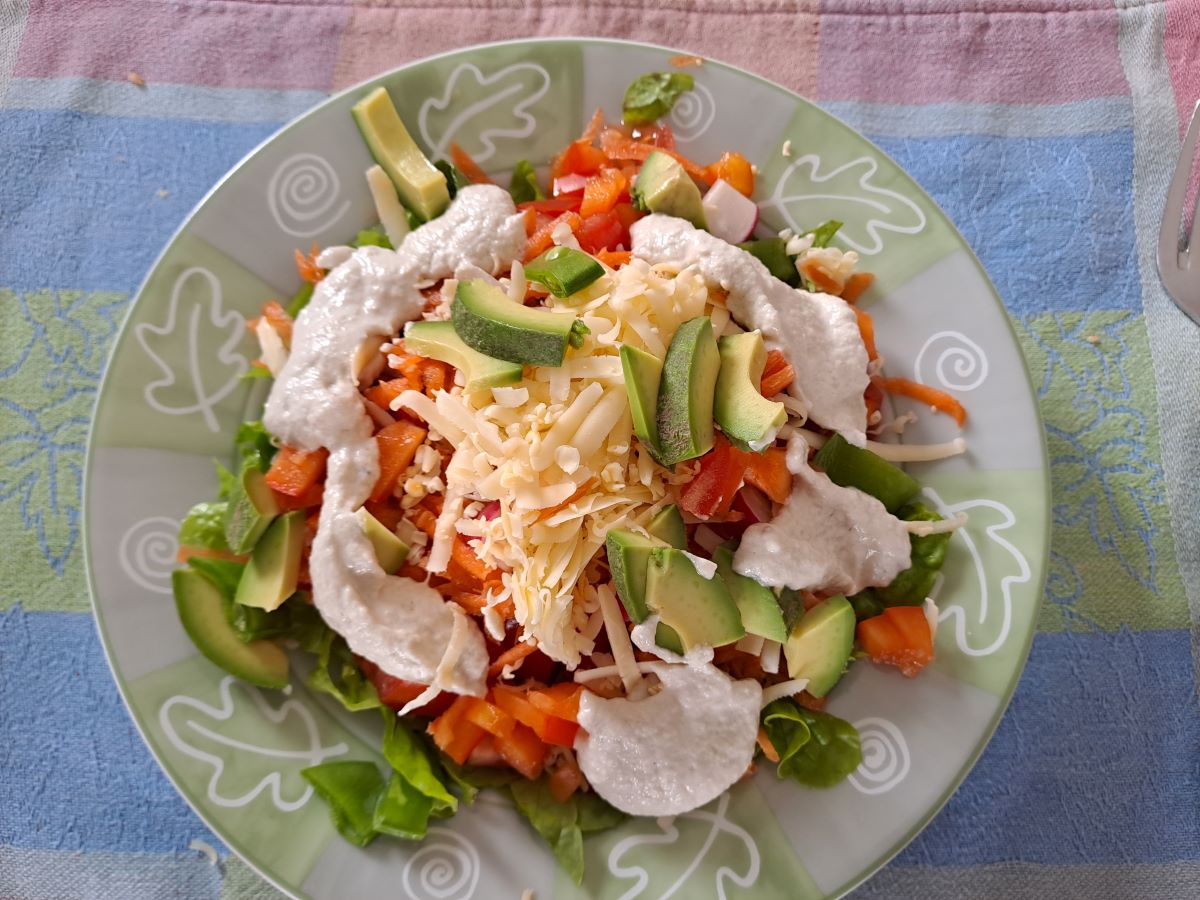
This was my lunch today with a generous serve of my new-found dressing.
Please note that this is not GMan-approved but I am happy to have found an easy and tasty alternative.
However, he is still raving about one of my other homemade sauces, a bechamel-style sauce made using cauliflower instead of flour and butter as the base. We have successfully grown cauliflower this winter and the last 2 became another batch of the sauce. The recipe is here and it freezes really well.
The spiced peanuts and tomato sauce are homemade pantry items and wedges were made on the day but everything else that I made was prepared in advance and either refrigerated or frozen. This made for relatively easy catering.
There are very few photos, however, here are a couple from when I was making the dessert.
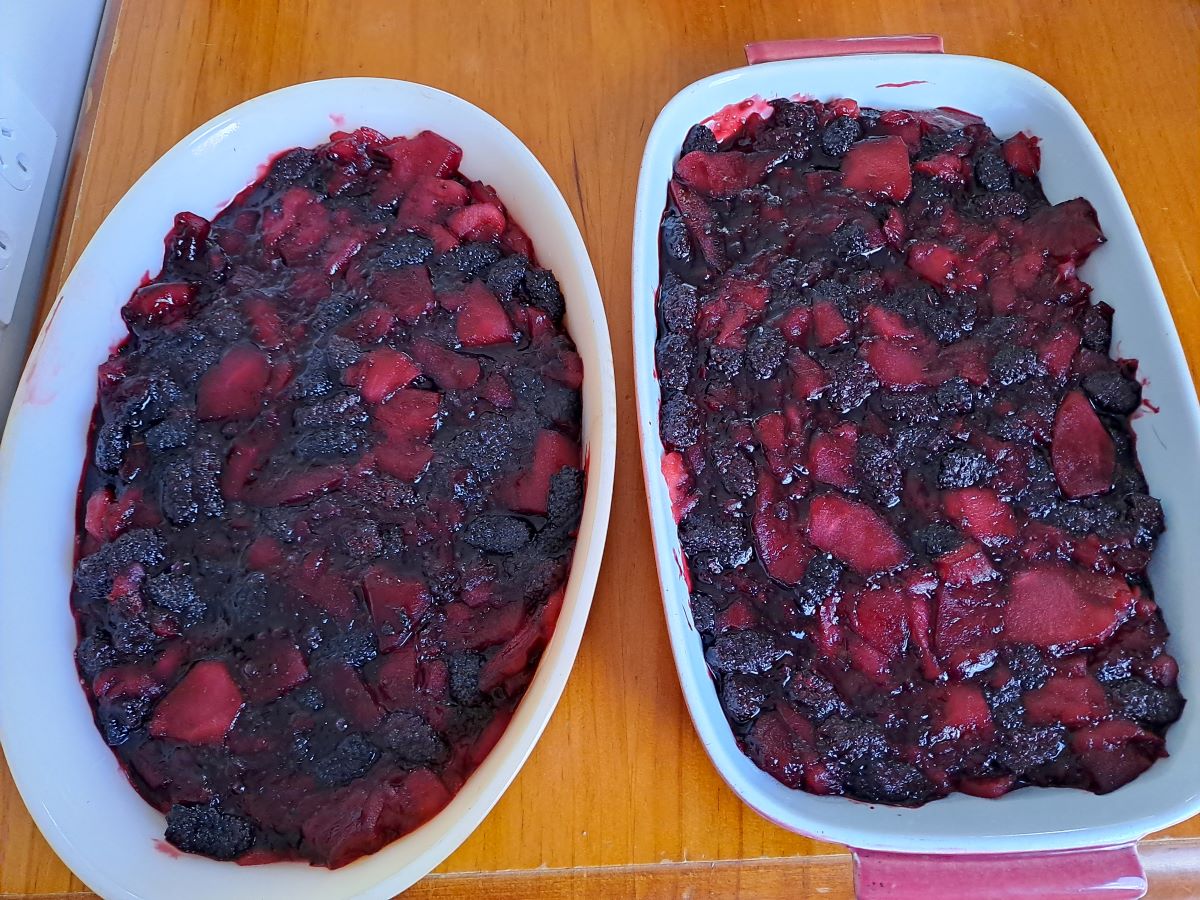
I retrieved about 1kg of mulberries that had been in the freezer since December. I think we picked and froze about 6kg. It is great to have them to use at other times.
The mulberries and apple combined and ready to be refrigerated. I made the crumble topping and froze it. I assembled the crumbles and popped them in the oven on the day.
It is great to eat seasonal produce but it is fairly easy to store some things for a treat in the off season. It is difficult to imagine this mulberry tree laden with fruit but that is exactly what it will be like in another 4 months. It is in a public space in our town and the fruit is appreciated by many.
Meanwhile, there is abundance of citrus everywhere at the moment. These grapefruit were being given away.
So, I made more marmalade. That should keep GMan supplied with breakfast condiments until next winter.
My sewing project today was rather different from anything I had done before.
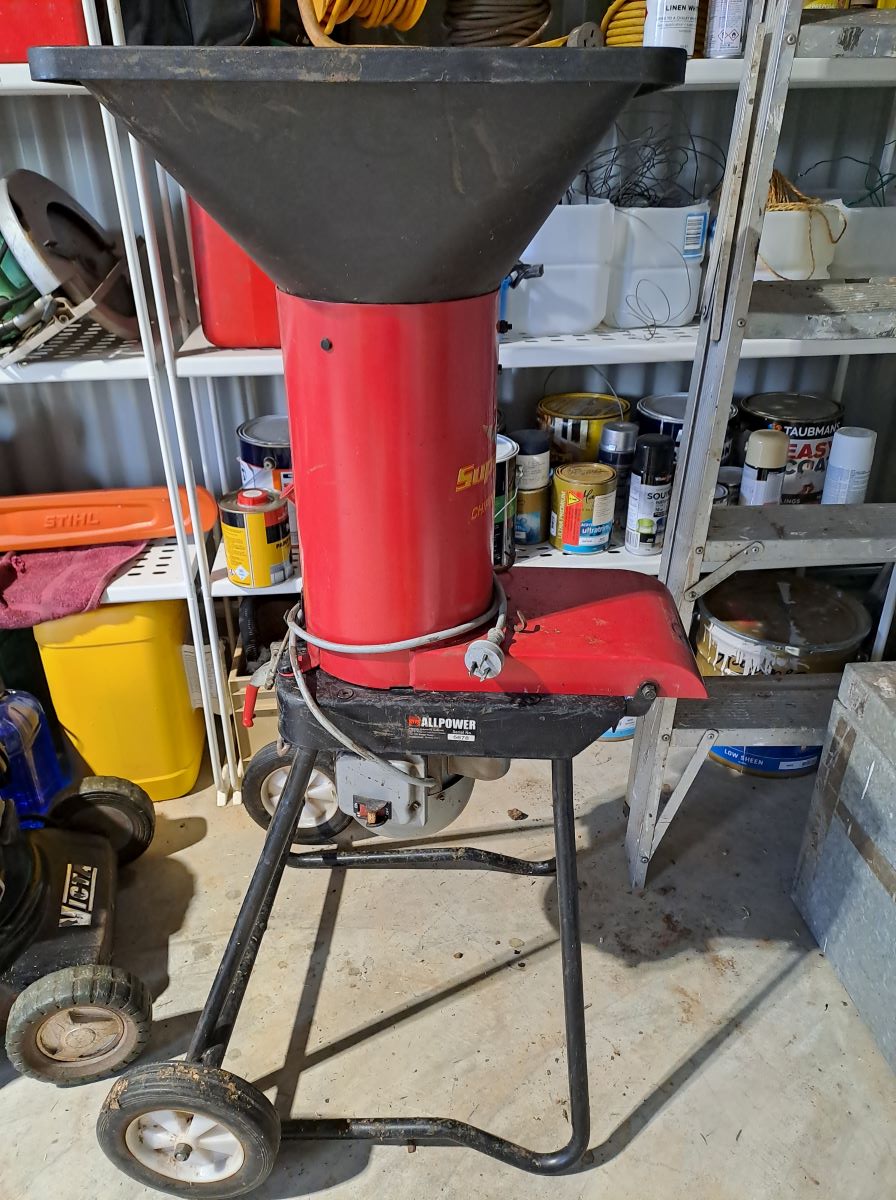
When we left Queensland GMan sold his large mulcher which was very useful for our small acreage with plenty of vegetation but he could not see a use for it on a suburban block. Nevertheless, he found a need for a smaller version so bought this one secondhand several months ago.
It does have a minor design flaw and the mulched material tends to spray everywhere. So, he asked me to make a ‘skirt’ to direct the mulch into the collection receptacle. I have been considering this rather bizarre request for a few weeks and today I finally came up with a plan.
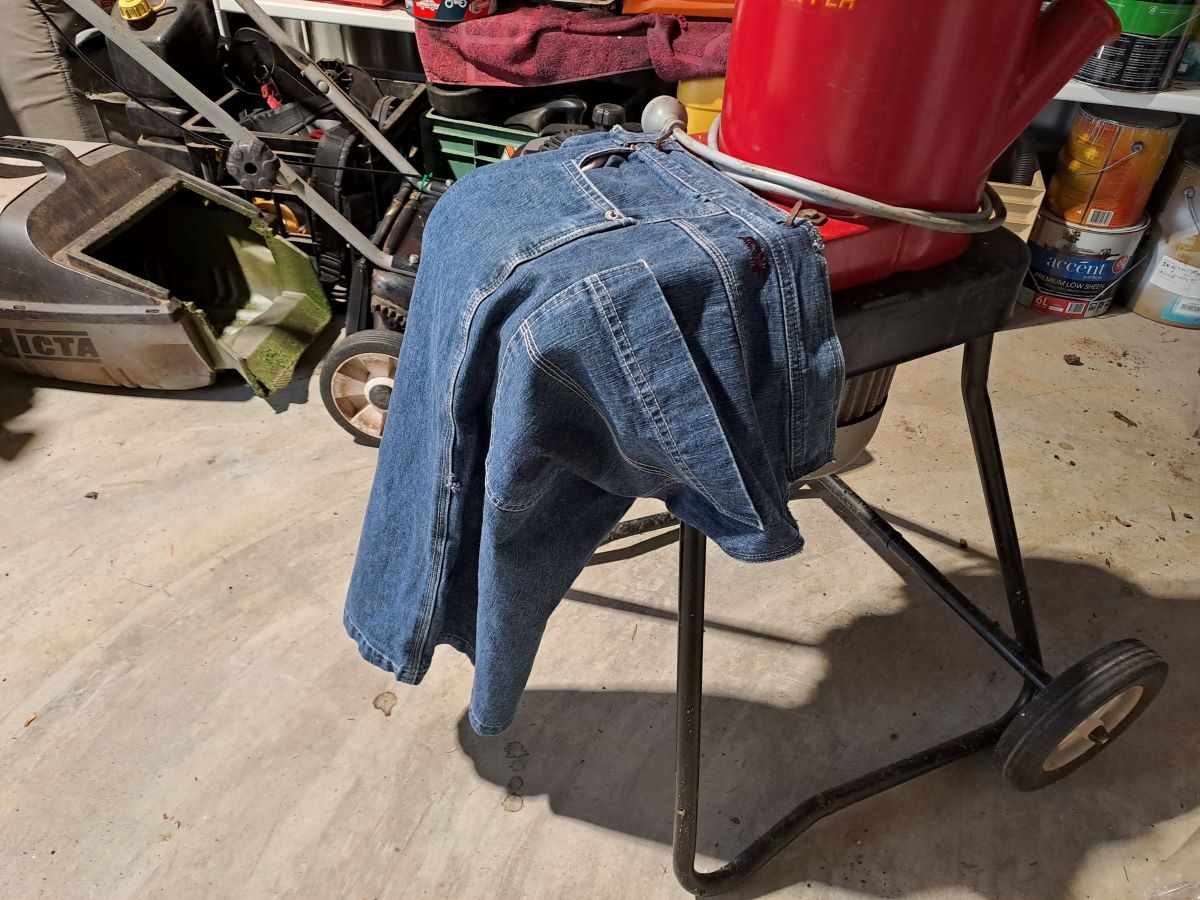
I found a pair of heavy denim shorts in my collection of assorted discarded fabrics and (mostly) unwearable garments. The fabric was integral to their suitability for the project and GMan’s comment was, “you could just use one leg” gave me the general idea.
This was what I ended up with. I used the waistband of the unused half of the shorts to make the straps. The straps fasten around the legs of the mulcher and are attached with 2 velcro strips.
It is not the fanciest sewing I have ever done but I think it is going to be effective.
This photo shows the new ‘skirt’ in place on the mulcher.
I am pretty happy with the end result and it cost me nothing apart from about 30 minutes of my time. We will see how it works when GMan next uses the mulcher. Some modifications my be required.
We recently purchased a new pizza maker as our old one had finally ceased to work properly. I am not sure how old it was but we had definitely had it for more than 8 years. When we first bought the original pizza maker it took about 3-4 minutes to cook a pizza with toppings. Over time this gradually increased until it was taking 7-8 minutes and then finally was not cooking them properly at all. In fact, the dough tasted uncooked which was definitely not our preference.
So, we decided to replace the appliance as it gets well-used and is an efficient use of electricity rather than heating an entire oven. After a bit of research we chose one that is the same size as the original but with some slightly upgraded features.
Better positioned handles that minimise the risk of burns. Also, a glass window in the lid so that you can observe the cooking progress.
A removable pizza stone insert which makes cleaning a bit easier. However, it does not get washed – merely scraped or brushed to remove any debris.
A couple of stainless steel paddles which make it a breeze to lift the pizza in and out of the oven.
We have used the new pizza maker twice so far and I am very pleased to once again have a perfectly cooked pizza in 3-4 minutes.
I know that single-purpose appliances generally get a bad rap as they are expensive to buy, a nuisance to store and only suitable for a very specific purpose. However, we really enjoy making our own pizzas, I have plenty of space to store the item, it is an efficient use of electricity and for me, this is definitely a worthwhile purchase.
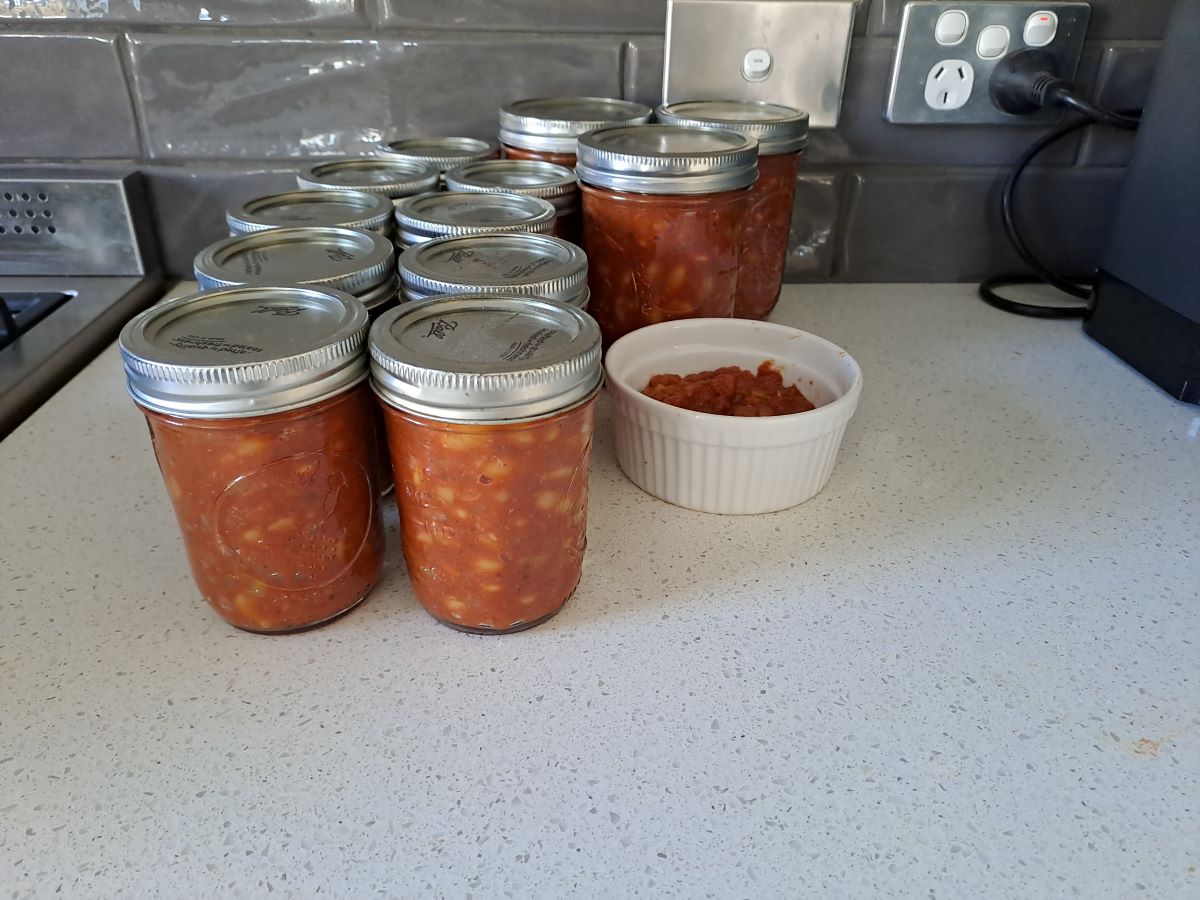
A couple of weeks ago I successfully made baked beans which GMan declared were better than the ones out of a can. Some years ago I had attempted to make them but they were really not that great. This time I was armed with more experience and a video I had chanced upon as a starting point. However, I did adapt it somewhat to suit myself.
I have made another batch and made notes of the quantities and method as well as taken several photos so that I can share the recipe with you.
BAKED BEANS
Ingredients
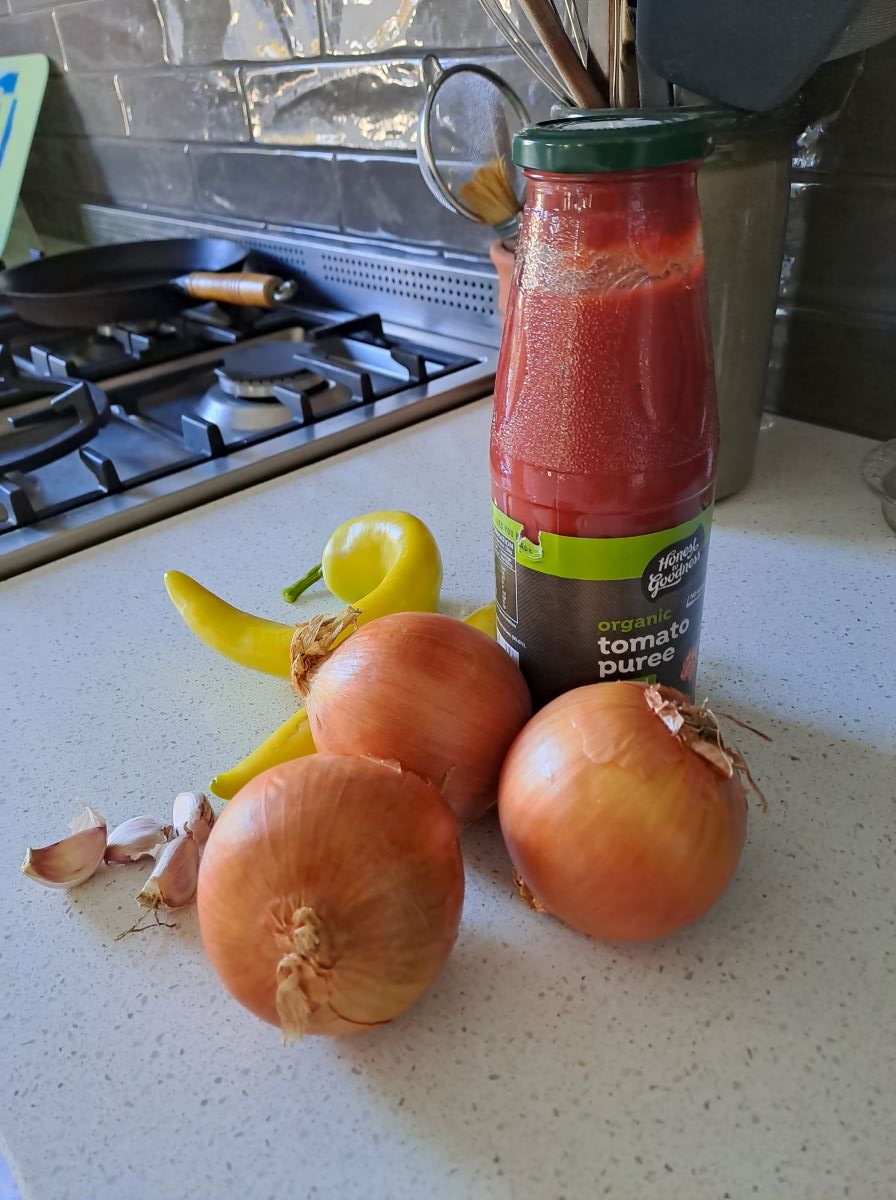
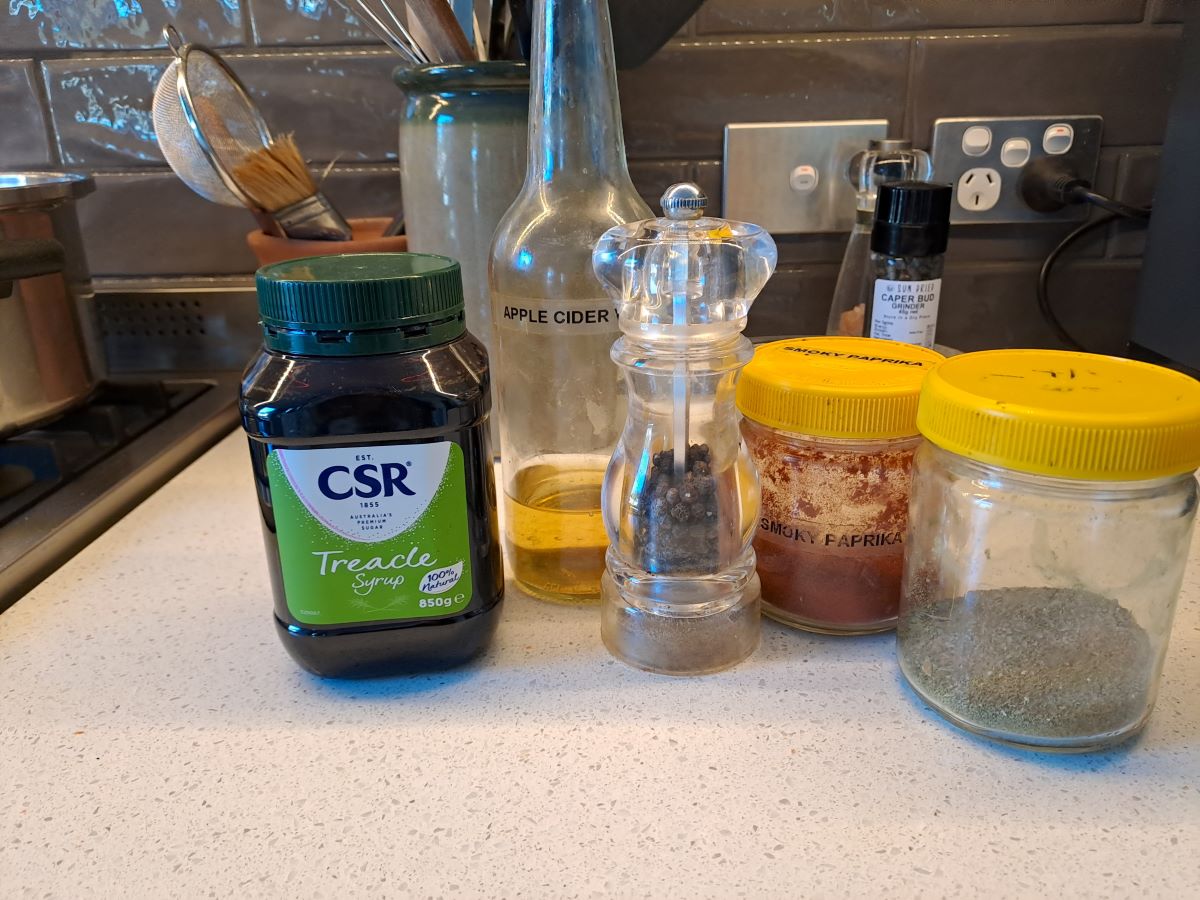
1kg dry white beans Olive oil 3 medium onions, finely diced 4 cloves garlic, crushed 1 capsicum (pepper), diced 700ml tomato passata 250ml water 1 tablespoon treacle 1 tablespoon apple cider vinegar 3 – 4 teaspoons smoky paprika 1 – 2 teaspoons salt 1 teaspoon ground black pepper
Method
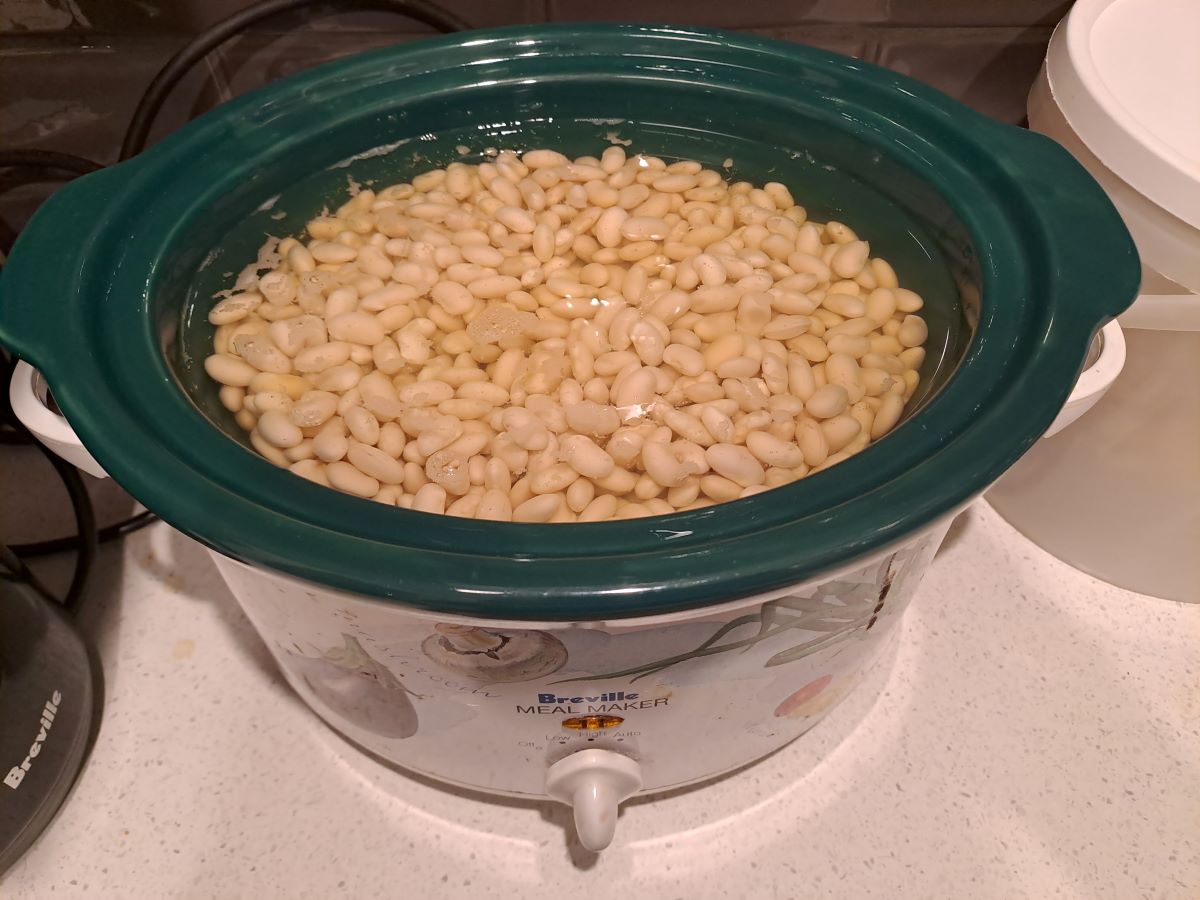
Place the beans in a large bowl and cover with boiling water (about 5cm above the level of the beans). Soak for several hours or overnight. The beans will swell but will still be quite hard. Transfer the beans and water to a slow cooker and add a bit more water. Cook on high for several hours until tender but not mushy.
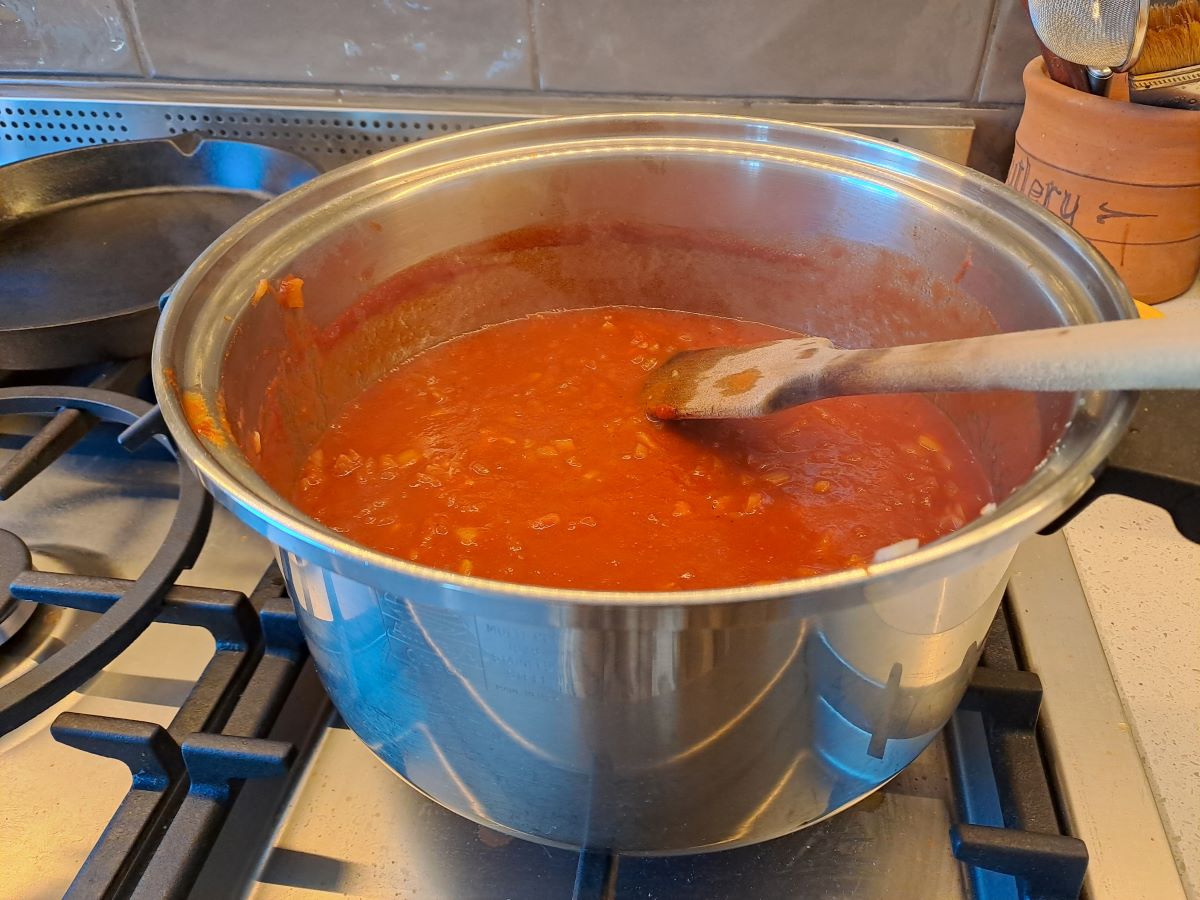
Saute the diced onion in a little oil in a large pan. Cook gently on a low heat so that they soften but are barely coloured. Add the garlic and capsicum and continue cooking. Add the remaining ingredients and simmer gently until well-cooked and the desired flavour.
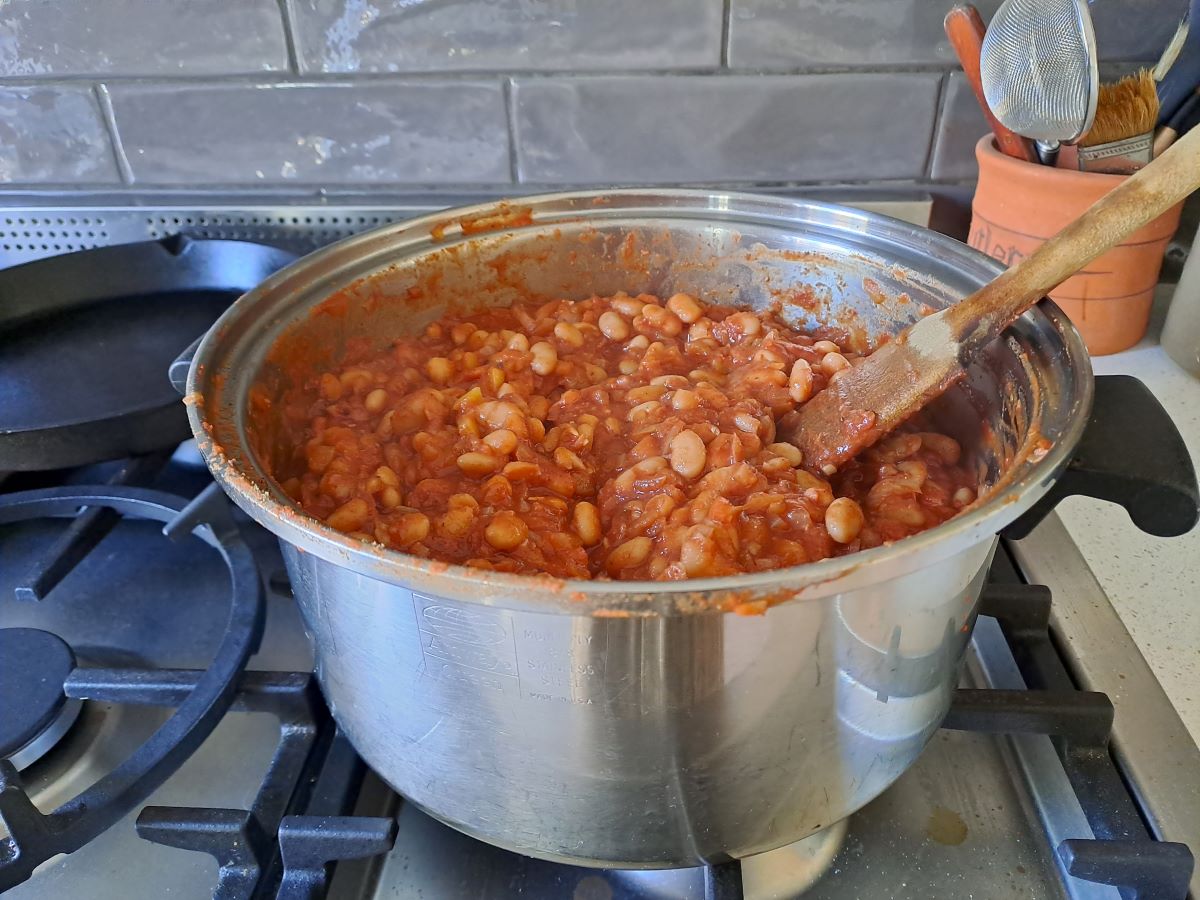
Add the drained beans to the sauce and combine thoroughly but do not break the beans up too much. Allow to stand and cool so that the beans absorb the flavour of the sauce.
Heat, eat and enjoy.
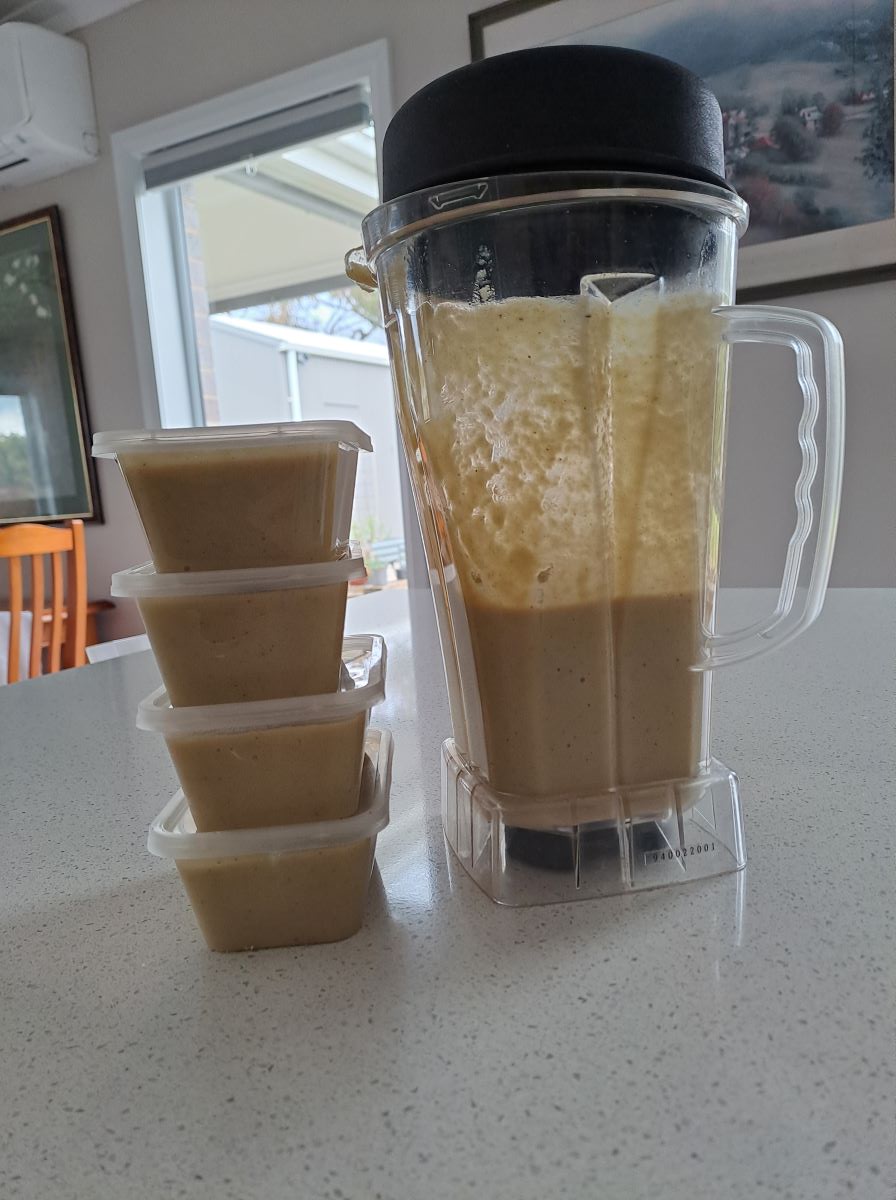
I choose to freeze the prepared beans which works really well. This is the results from the recipe above. The small dish will be my lunch today.
Notes
This is a large quantity – you can reduce the amounts. I used Great Northern beans but you could use navy beans, canellini beans or whatever you prefer. You could used canned beans if you wish. I prefer to use dried beans as they cost less and there is the added benefit of minimal packaging, especially if you buy them from bulk bins. The tomato mixture could be pureed fresh or canned tomatoes or whatever you have on hand. You can also include some tomato paste for a more intense depth of flavour. The original recipe used bacon but I choose to use smoky paprika to replicate the flavour and keep this recipe meat-free. Add the seasonings gradually to account for your personal taste. I used a couple of capsicums from the garden but regular red ones are fine, too. I substituted rosemary salt for half of the salt. I also added 1 tablespoon of Worcestershire sauce and 1/4 cup of my homemade tomato sauce to make it a little spicier.
In other words, this is a basic recipe and you can adjust it to suit your personal taste.
I think everyone has a personal favourite way of making lasagne.
Lasagne was my ‘go to’ dish in the early days of our marriage. In fact, so much so that GMan once commented that our impending dinner guests had eaten at our place previously so we would need to think of something else!
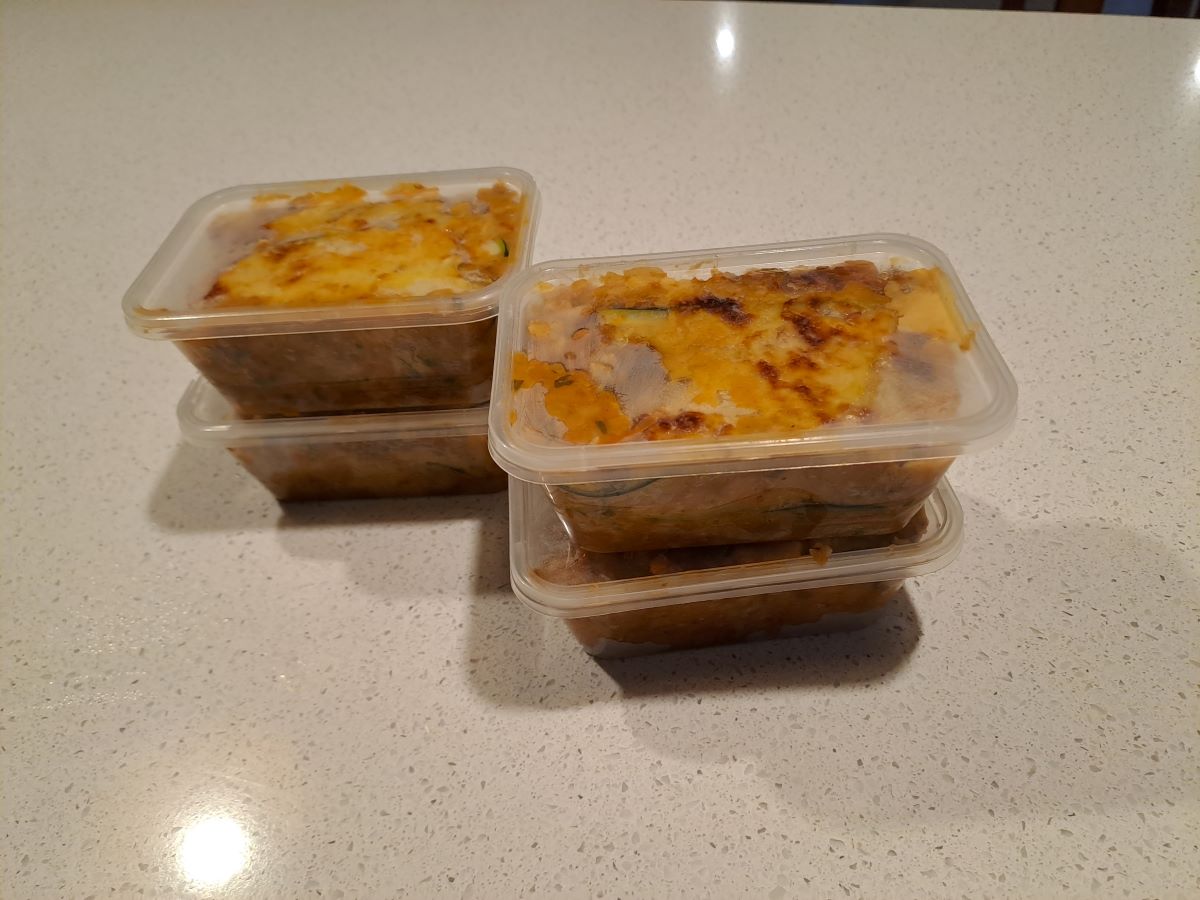
My version of lasagne has evolved noticeably over almost 45 years due to a changing culinary landscape and a variety of dietary considerations. I have reduced the proportion of meat in the dish, eliminated cream, use gluten free flour and pasta. The latest iteration actually replaces the pasta with thin slices of zucchini and the bechamel sauce is made with cauliflower rather than a roux of flour and butter. Interested? Read on for the full details.
LASAGNE
Meat sauce
250g lean minced beef 1 cup dried red lentils 1 large onion, finely diced 2 cloves garlic, crushed 1 large carrot, grated 2 sticks celery, finely chopped 2 teaspoons beef stock powder 2 tins crushed tomatoes } – whatever combination of fresh, dried or frozen tomatoes 2 tablespoons tomato paste } you have on hand. More water may be required. Herbs (fresh or dried) to taste – I used a handful of fresh basil and 1 teaspoons of dried mixed herbs Salt and black pepper to taste
Method
Place the lentils in a bowl and cover with boiling water. Allow to stand for 30 minutes. In a large saucepan fry the onion and garlic, add the mince and brown. Add the remaining ingredients including the drained lentils. Simmer gently until the lentils are tender. Add more water if the mixture becomes too dry.
Chop the cauliflower roughly. The stalk and small leave can be included in this recipe. Steam or microwave until tender. Place cooked cauliflower in blender and gradually add milk until the mixture is smooth and a suitable consistency. Add seasonings to taste. The quantities are only suggestion so add a bit at a time until it reaches your desired taste.
Set sauce aside until required. This sauce can be refrigerated for a couple of days or frozen if you have too much. It can be substituted in any recipe that requires a creamy white sauce. You can use plant-based milk if you choose.
Other
Zucchini, sliced thinly lengthwise Grated cheese, I use a mixture of cheddar, parmesan and nutritional yeast
Assembly
Layer the various components in an ovenproof dish. I usually do meat sauce, zucchini, white sauce and then cheese and repeat 2-3 times until the dish is full.
Cook in the oven until heated through and browned on top. Alternatively, it can be heated in the microwave and finished off under the grill to brown the top.
Makes 6 generous serves.
This is the only photo I have as I did not think of writing this post until after we had eaten dinner. We ate 2 serves and the remainder were packed up and frozen in 4 individual serves.