Handmade

Leave a comment

As I sat down to write this post I was casting around in my mind for a suitable title. After close to 15 years of writing this blog it is inevitable that I end up reusing titles and that does not really matter. However, I was pleasantly surprised to discover that the very simple one-word title of ‘Handmade’ had never featured. This is amazing since so much I what I write about is things that we have made or refashioned, whether it is cooking, sewing, gardening or various constructions.

Anyway, enough about the title and on to a couple of things that I have made recently which I want to share with you. The first is a recipe. This is a quick and easy no-bake sweet treat which is easy to have on hand for unexpected guests as well as a terrific option for times when you need to contribute something at the plethora of end-of-year events which will soon be upon us.

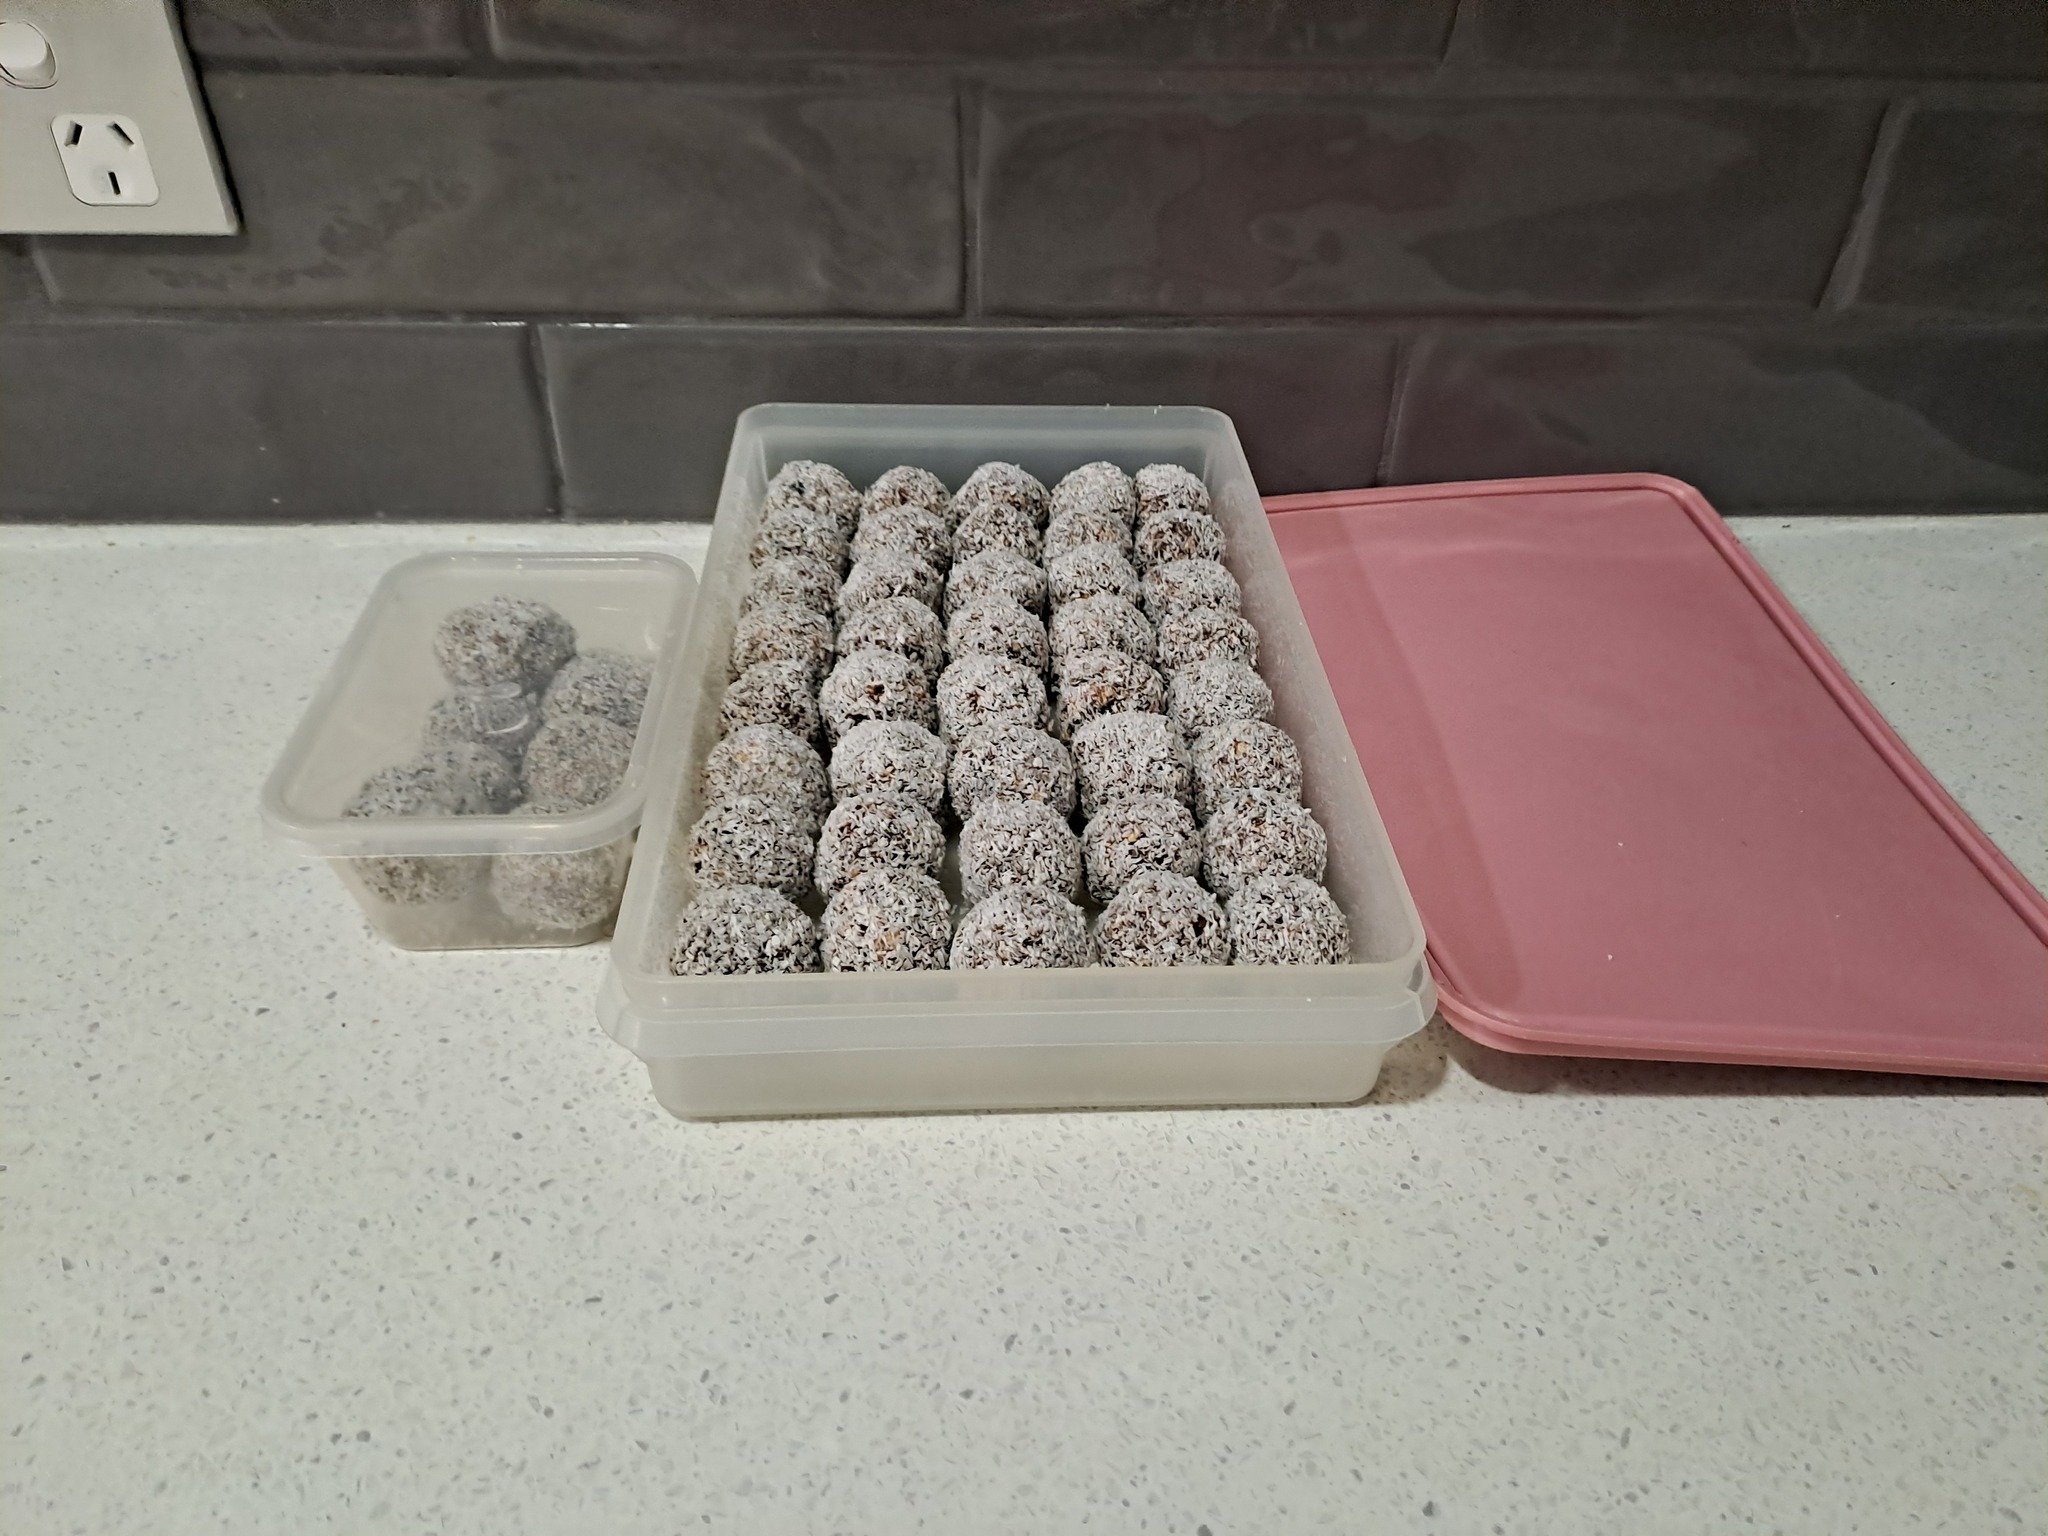
CHOC FRUIT AND NUT BALLS

Ingredients

1 cup raw almonds
1 cup sultanas
1 cup raisins
2 tablespoons cocoa
1/2 cup coconut + extra for rolling
1/4 cup flaxseed meal
1 – 2 tablespoons fruit juice

Method

Place almonds in food processor and process until fairly finely chopped. Add sultanas and raisins and process a bit more. Add the remaining dry ingredients and finally the juice. Drizzle slowly until the mixture forms into a solid mass. Remove mixture and roll into small balls. Roll the balls in coconut and store in the freezer until ready to use.

NOTE: This ‘recipe’ is my own creation and the quantities are only approximate and very flexible. You can use any dried fruit of you choosing. The juice can be fresh orange or lemon juice or any type of bottled juice.

Additionally, it is gluten-free, dairy-free and vegan. Although I have not tried, if you need a nut-free version you could consider using pepitas or sunflower seeds instead of the almonds.

Meanwhile, I have also done some sewing recently. I had picked up some beautiful quilting fabric from an op shop some time ago with no real plans for how I would use it as they are not the colours I generally work with. I added it to my stash for a yet to be decided project. Last week I used some of it to make these blocks.

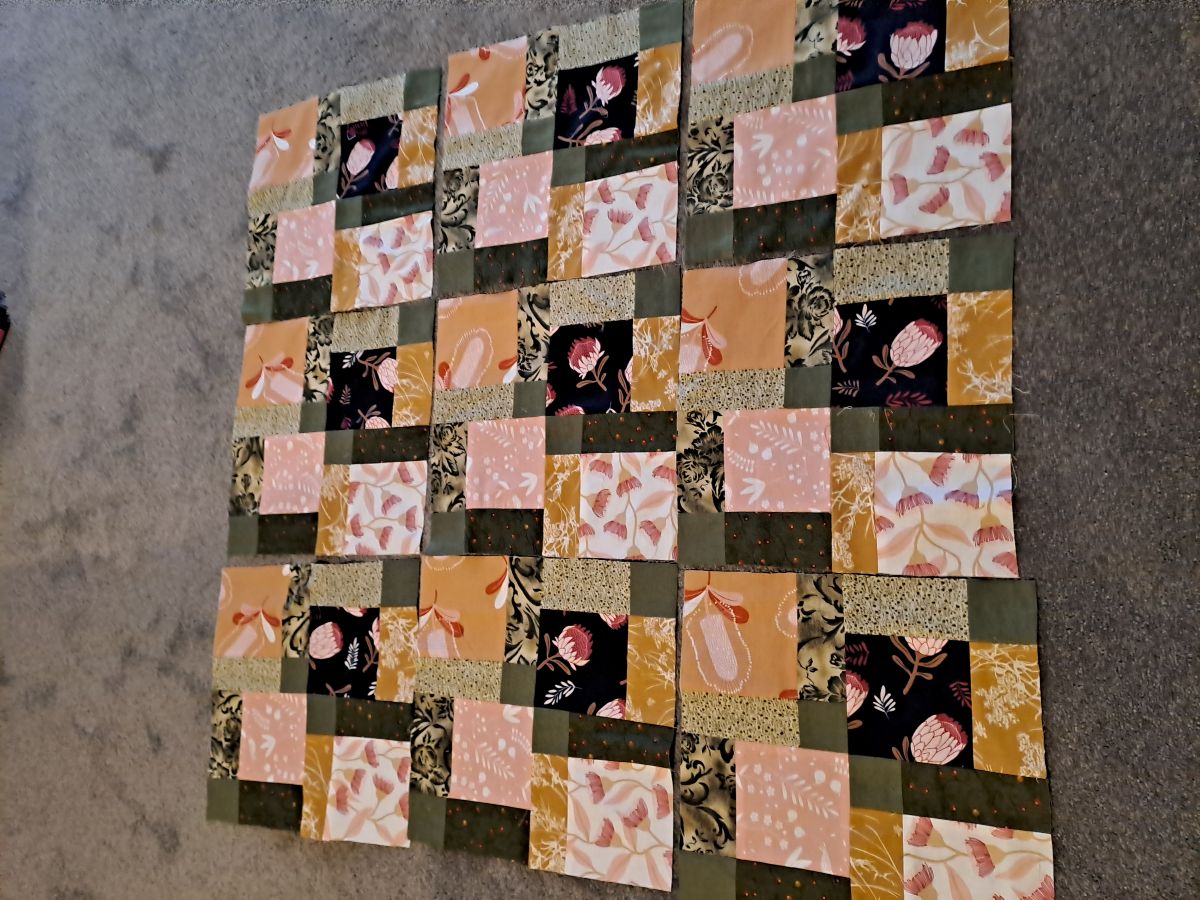
I then turned them into 2 patchwork tote bags which are fully lined with a contrasting internal pocket.

They are both being donated. One went to be part of a raffle at a Frocktober High Tea which a friend held yesterday. For those of you who don’t know, Frocktober is a focused month of fundraising for Ovarian Cancer Research. All cancer research is important but ovarian cancer is a particularly insidious disease which usually has very late diagnosis, and therefore, very poor outcomes and survival rates.

The other bag will also be part of a raffle next weekend but this time it will be at a fundraising fete for our local Community Pantry.

I am pleased to be able to share some of my handmade goods to benefit others in the wider community.

Ready to Roast

1 Comment

It almost 2 years since I wrote this post with a recipe for pumpkin soup. After a long, hot summer we are finally experiencing some slightly cooler days.

Like all of my cooking escapades there is plenty of room for variation. A couple of days ago GMan was baking a couple of loaves of sourdough bread so I decided to make use of the oven being on to roast the pumpkin while the oven was heating up to the temperature required for the bread.

Pumpkin wedges brushed with a mix of balsamic syrup and olive oil.

After roasting the skin peels off easily.

A pot of deliciousness.

We had soup for dinner and there were another 10 serves to go in the freezer for future meals.

It was a productive kitchen day as I had also made a new batch of spreadable butter, deyhdrated the pumpkin seeds and some root ginger which had been in the freezer for a couple of years and GMan made the bread.

Stocking the Pantry

Leave a comment

Today has been a mixed bag, as usual.

Bed changed, 2 loads of washing done, some volunteer admin work and visitors this afternoon for wine, cheese and chat.

Somewhere in between all of that I made time to make another batch of tomato sauce for the pantry.

We have almost finished the last bottle from last year and this is the first time in several years that I have almost run out. I am hoping to make more batches to stock up.

I had less tomatoes than the recipe so I did some quick calculations to reduce the other ingredients proportionally. I took a fairly easy option by chopping the tomatoes and onions in the food processor before simmering them with the sugar, vinegar, salt and spices. You can find the actual recipe here.

We are expecting tradesmen tomorrow to remove and replace some doors and windows so I will hopefully have interesting before and after photos to share before too long.

A Quick Quiche

Leave a comment

This is a long-forgotten ‘recipe’ that pops into my head occasionally. Instead of using pastry for a quiche base this uses rice.

QUICHE BASE

2 cups of cooked rice
1 egg, beaten
Salt and pepper

Place the cooked rice in a bowl. Add the beaten egg and combine quickly. Season with salt and pepper. Spoon the mixture into a quiche dish or pie plate, spread evenly across the base and side pressing in place with the back of a spoon.

QUICHE FILLING

The filling for a quiche is one of those things that can be pretty much anything you want it to be.

Tonight it was:

1/2 onion, finely chopped
2 large leaves of silverbeet (chard), stalks and leaves finely chopped
Small piece of capsicum (red pepper), finely chopped
1/2 tin of tuna, drained and flaked

Lightly saute the vegetables.

Add the tuna. Spread the mixture over the rice base, add a small amount of grated cheese.

Finally, make a mixture of eggs/milk/cream. Once again, this is very forgiving and you can use whatever you have to hand. I generally do not have cream available so I often add a spoonful of powdered milk to the regular milk to make it a bit creamier. However, tonight I did have some cream that I had bought marked down earlier in the week.

3 eggs
100ml thickened cream
100ml milk

Beat the eggs/cream/milk thoroughly then pour carefully over the filling. Bake in oven at 180C for 30 minutes or until firm to touch and golden.

I had started cutting the quiche before I remembered to photograph the finished product.

And dinner is served.

The first slice is always a bit tricky to get out, especially when it is warm but it still tasted great. In fact, this is equally as good hot or cold so that is our lunches sorted for the next couple of days.

A Beach Christmas

Leave a comment

I am quite surprised that I have not used this blog title previously as we have spent several Christmases at the beach over the past 10 years or so. It is always somewhere different and this year we opted for a house at Peregian Beach for a week with our 2 daughters and 2 granddaughters. My sister, brother and brother-in-law joined us for Christmas Day.

Our lunch menu was a mix of tried and true favourites along with a couple of new recipes.

In fact, when I was re-reading some old blog posts today I stumbled upon one from 2017 and the menu looked like this:

Proscuitto wrapped asparagus and haloumi **
Cold curried chicken **
Rice **
Parsley and cranberry crusted salmon
Mango and avocado salad **
Beetroot and feta salad
Green bean salad with slivered almonds
Meringue roulade with berries and pistachio nuts **

The items marked ** were on the table again in 2024. The meringue roulade is a particular specialty from our younger daughter and she excelled herself this year. She thinks this is the best one she has made.

I took this photo before the addition of the chopped pistachio nuts which add a nice touch of festive green contrast to the raspberries and pomegranate seeds.

A new addition was a Crispy Balsamic Thyme Potato Torte which we all agreed was a winner.

I will add the recipes for both of these in posts over the next couple of weeks.

I hope you have had a celebration which suited you and your family (everyone’s circumstances are different). Wishing you a safe and peaceful season from our home to yours.

Homemade Sauce/Dressing

Leave a comment

Fromm time to time I stumble across interesting sounding recipes on Facebook. I generally ‘save’ them on Facebook and often forget to go back and look them again. However, a few days ago I saw one that I could not wait to try out.

This is for a vegan ‘sour cream’ made from sunflower seeds. Sounds a bit ridiculous? That was my thought, too.

VEGAN ‘SOUR CREAM’

1 cup sunflower seeds
1¼ cups water
⅓ cup freshly squeezed lemon juice
¼ onion
1 large clove garlic
1 teaspoon salt

Place all ingredients in a blender and blitz until creamy. Makes about 500ml.
Keep in an airtight container in the refrigerator for up to a week or freeze portions for later use.

NOTE: I have not tried freezing it as yet.

NOTE: You could also try adding additional spices or nutritional yeast to alter the flavour a little.

I know it sounds improbable and ridiculously easy – it really is that simple.

This is the result, although some has already been used. I would say it is a bit like a cross between sour cream, yoghurt and mayonnaise.

This was my lunch today with a generous serve of my new-found dressing.

Please note that this is not GMan-approved but I am happy to have found an easy and tasty alternative.

However, he is still raving about one of my other homemade sauces, a bechamel-style sauce made using cauliflower instead of flour and butter as the base. We have successfully grown cauliflower this winter and the last 2 became another batch of the sauce. The recipe is here and it freezes really well.

What’s For Dinner?

Leave a comment

I do not often post our main meals these days as we mostly eat a selection of the meals already on the index. However, a couple of weeks ago I made a new creation which was a great success so tonight I photographed the steps when making it again.

CREAMY MUSTARD CHICKEN – serves 2

Ingredients

Half onion
Handful of silverbeet
1 chicken breast fillet
1 medium mushroom
250ml cauliflower white sauce** (recipe here) or you could use regular white sauce
2 spoons of mustard mayonnaise

Method

Finely slice the onion, cut and finely slice the silverbeet stalks. Shred the silverbeet leaves and slice the mushroom. Cut the chicken fillet into small strips. Cook the chicken lightly until cooked but not browned. (I cook the chicken in the airfryer). Set the chicken aside.

Saute the onion and stalks, add sliced mushroom and chicken. Cook for 5 minutes. Add cauliflower sauce and mustard. Finally, stir in the shredded silverbeet and cook for a few more minutes until the silverbeet is softened and the mixture is all heated through.

I served the chicken dish with mashed potato, carrots and green beans. It works equally well with rice which I chose previously or pasta could be another option.

Made to Measure

3 Comments

I am always open to new ways of preparing or cooking food to simplify the process.

Since buying the airfryer about 18 months ago I have successfully modified my cooking methods for several recipes. One of these was zucchini quiche which I have converted to mini quiches made in the airfryer using muffin rings.

I recently took this a step further and made them in a muffin pan. Of course, a full-sized muffin pan does not fit in my small airfryer so I said to GMan that I needed to get another one so that he could cut it down to size. I had imagined that I might find one in an op shop but I did not even have to go that far. We were walking the dog one day and noticed a pile and goods on the verge to give away. Yes, it included a somewhat rusty muffin pan. GMan clean it up and cut in into some smaller sections that now fit in the airfryer.

I was very pleased with these zucchini muffins I made yesterday.

There will be no stopping me now. It will be so easy to whip up a small quantity of muffins fresh at anytime without having to heat the huge oven.

A Bunch of Basil

Leave a comment

I grew a very successful crop of basil during the summer.

I made some pesto early in the season and also used some of it fresh. However, it is now going to seed and taking up space that I want to use for winter crops so it is really time for it to go. Yesterday I picked an armful of the younger shoots, stripped the leaves and rinsed them.

This haul was 4 tightly-packed cups of basil leaves so it was time to make more pesto.

Here is my recipe.

BASIL PESTO

4 cups basil leaves, tightly packed
7 tablespoons sunflower seeds
4 cloves garlic
1 lemon, juice and rind
5 tablespoons nutritional yeast
3-4 tablespoons olive oil
1/4 teaspoon salt
Freshly ground black pepper

Place the basil, sunflower seeds and garlic in food processor and process until finely chopped and combined. Add the lemon juice, rind and nutritional yeast. Process until thoroughly combined. Gradually add the olive oil until desired consistency is reached. Add salt and pepper to taste.

I have chosen to replace the traditional ingredients of cheese and pine nuts with nutritional yeast and sunflower seeds which makes this recipe not only gluten-free but also nut and dairy free.

It was rather exciting to know that I had used basil, lemon and garlic which I had grown as well as locally produced olive oil.

Choice Chutney

Leave a comment

I recently encountered a new ‘problem’. Here in central Victoria the weather had definitely turned quite cool. Summer is well and truly behind us and I was left with an abundance of green tomatoes. This never happened in Queensland as tomatoes literally ripened all the year round.

It was time to remove the tomato bushes so that we could reuse the garden bed so I harvested the tomatoes and found that I could use them to make chutney.

The first step was to wash them thoroughly.

I then sliced the tomatoes and layered them with the diced onion and sprinkled with salt. Then I covered the bowls and left them to stand overnight.

This morning it was time to make the chutney.

GREEN TOMATO CHUTNEY

Ingredients

2.5kg green tomatoes, sliced
500g onions, finely diced
1 tablespoon salt
500g sultanas
500g sugar
500g apples, peeled, cored and chopped
1100ml vinegar, I used half white vinegar and half apple cider vinegar
1/2 teaspoon cayenne pepper
30g ground allspice
30g ground cloves

Combine all ingredients in a large stockpot/preserving pan. Simmer gently for about 3 hours. I used a stick blender sparingly to mash the tomatoes a bit more. I kept the pot covered for about 2 hours and then removed the lid for the final hour.

The mixture should be rich, thick and caramel coloured.

Spoon into hot, sterilised jars. This recipe yielded 12 jars so the pantry will be well-stocked.