Project Preparation

1 Comment

Well, I had a couple of days off from blogging as we have been out and about. Yesterday WordPress decided it did not want to play the game when I tried to write this post. However, all seems to be well again and I am back in business.

Over the last couple of days we have purchased some materials and equipment for the next DIY project. 

For a number of years we have talked about creating a defined entertaining area under our high-set house.  When we first moved here over 14 years ago, this area was simply sloping dirt which was of absolutely no use and merely contributed to the dirt and dust which made its way into the house.  So, we had the area concreted , albeit on a couple of levels.  Since then it has really been a storage area for materials collected for future projects as well as overflow from the workshop area.  We had decided that the best approach was to screen off an area for casual entertaining using battens and the remainder could still be used for storage.  After literally years of discussion and refinements of the design we are ready to begin.

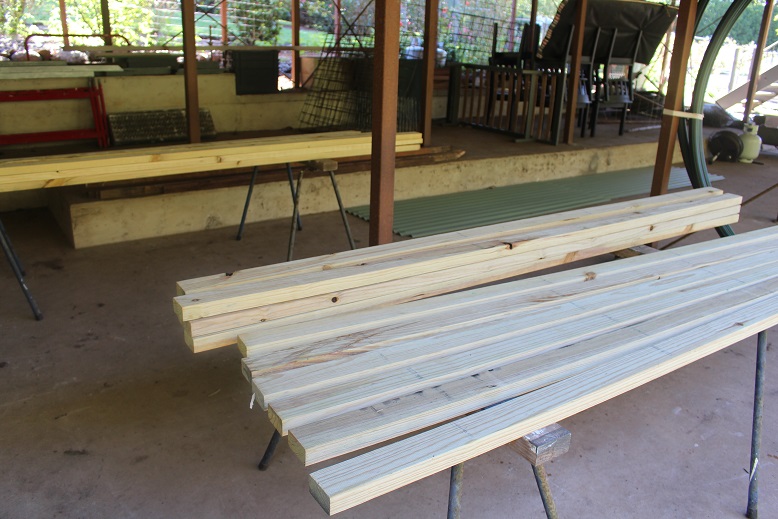
Initially, we planned to use salvaged hardwood for the rails but realised that we could not source enough timber of consistent dimensions that was straight and true so we opted for new timber from Bunnings in this instance.  After carefully measuring and calculating our requirements we bought the necessary lengths whilst ensuring the minimum amount of waste.
2020-06-24 02
The other major requirement for this project which GMan had identified was a saw which would make a quick and accurate cut.  There were 21 rails to be cut plus approximately 170 (yet to be purchased) battens.  He decided on this mitre saw and stand.

2020-06-24 01

The rails were cut to length in no time and are now ready to be painted.  We also need to sand and paint the rusted steel posts before attaching the rails.  

This is clearly not a job which will be done in a week but we are confident that our planning and preparation will ensure the success of the end result.

I am looking forward to being able to use the entertainment area during the summer as our summers are becoming increasingly hotter and this area is definitely the coolest place in the house.



An Opportunist

Leave a comment

We were out and about this morning looking for some timber for our next outdoor project.  It was an area we do not usually frequent and I spied a flat-top truck parked by the side of the road.  It was piled with unpackaged fruit and vegetables so I quickly asked GMan to pull over so that I could see what was on offer.

I had bought fruit and vegetables 2 days ago which would probably last us at least 10 days but I was not about to pass up an opportunity.  There were zucchini, tomatoes, capsicums and lemons and everything was $2/kg.  It had been picked yesterday from a farm in an area about 3 hours drive to the north of where we live.  The tomatoes were not sufficiently ripe for me to consider them and we most definitely do not need lemons as we have 2 trees of our own.

Most of the capsicums were green but I selected a couple which were semi-coloured as well as several zucchini.

2020-06-20 01

This haul cost me $4.70.

While this was somewhat of an impulse buy, it was not without some consideration as to how I would use the produce.  The capsicums are quite large so I am going to cut one in half lengthwise and stuff them for dinner tonight and serve with a side of coleslaw.

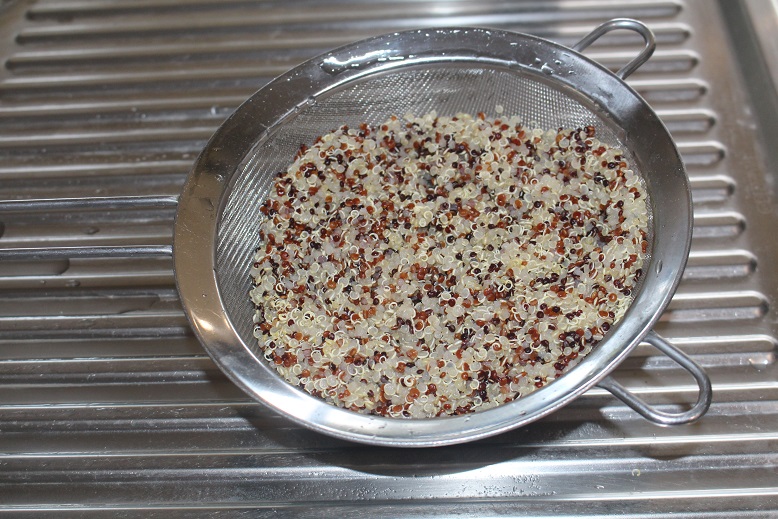
I have cooked some quinoa to use as the basis for the stuffing.

2020-06-20 02

The remaining capsicum will probably be used in a roasted vegetable salad along with some of the zucchini as well as eggplant and mushrooms that I bought on Thursday.

I intend to make another zucchini quiche which will use up a couple more of the zucchini.

It is great to be able to directly support farmers as well as snapping up a bargain.

Most importantly, nothing will go to waste.


New Creation

2 Comments

Our dinner last night was a previously untested creation.  GMan hailed it as a real success.  While there are recipes for Eggplant and Mushroom Stroganoff online, mine is a variation on the beef version I used to make a number of years ago.

Eggplant and Mushroom Stroganoff

1 onion, diced
1 clove of garlic, crushed
1/2 red capsicum, diced
1 medium eggplant, cubed
12 mushrooms, sliced
Olive oil
Sea salt
Freshly ground black pepper
1 teaspoon smoky paprika
2 teaspoons beef stock powder
60ml Worcestershire sauce
125g ricotta cheese
500ml water
2 teaspoons arrowroot

Spread the cubed eggplant on a roasting pan, drizzle with a little olive oil and sprinkle with salt.  Roast at 160C for about 15 minutes or until tender.

2020-06-19 01

Saute  onion and garlic in a frying pan.  Add capsicum, mushrooms and eggplant.  Add pepper, smoky paprika, beef stock powder, Worcestershire sauce and water.  Simmer gently for 10 minutes.  Add ricotta cheese stirring gently to combine.  Thicken with arrowroot blended with a little water.  Cook for a further 2 minutes.

Serve over pasta of your choice.

2020-06-19 02

NOTES:

I added some finely shredded bok choy which I lightly sauteed before stirring into the stroganoff immediately before serving.

The ricotta cheese was used because it was what I had on hand.  You could substitute cream or evaporated milk to create the creamy sauce.

I used gluten free penne pasta.  Rice would be a suitable alternative to pasta.

This made 2 generous servings.


The Lid is On

2 Comments

It is over 2 years since we commenced building the walkway/pergola entrance to our property at the eastern end of the house.

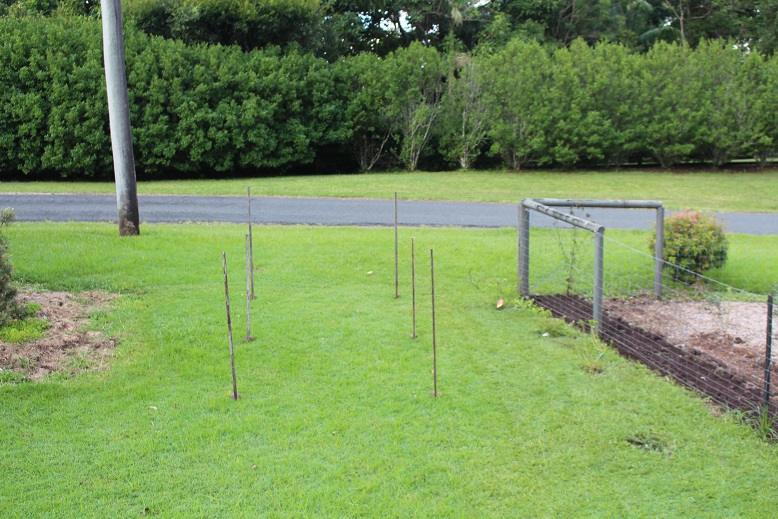
This is a photo I posted in a blog post in mid-March 2018.

2018-03-18 01

The 6 sticks marked out the proposed location of the posts.  You can also see the newly-planted shrubs to the right of the pergola site.

By July 2018 the majority of the structure was completed as per this blog post.

In September 2018 GMan laid the repurposed pavers that we had salvaged from when the entrance stairway was demolished and rebuilt.

2018-09-17 01

The mandevilla creepers have been planted close to the pergola and the garden beds on either side have been mulched.

But, there is still no roof covering on the pergola.  We would still considering our options.

These things take time but a couple of months ago we finally agreed that we would cover the top with wire and we would also need a couple of horizontal rails to support the wire.

We sourced, painted and installed the timber rails a couple of weeks ago and today we added the wire panels, or as otherwise described, put the lid on.

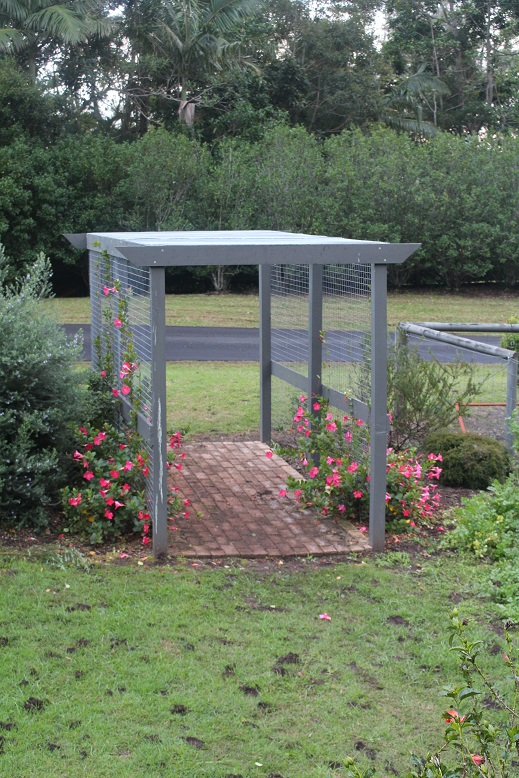
The finished entrance to the eastern end of our house and the vegetable garden area.

2020-06-18 03

The shrubs and mandevilla creepers are well-established and we now have a well-defined entrance.

Chairs, Clothes and Other Bits

Leave a comment

We have recently replaced the protective felt feet on the legs of our kitchen chairs.  There are four high chairs which fit around our large return bench/meals area.

This project was undertaken two chairs at a time so for several weeks there have only been two chairs in the kitchen at any given time.  I realised how much less cluttered the area felt with only two chairs.  Since there is only GMan and I here most of the time, there is really no necessity to have four chairs.

The next question was, where could we store the other two chairs so that they would stay clean and be easily accessible when we had additional guests?  We found that the wardrobe in the guest room would be perfect but the space was currently occupied.  My off-season (summer) clothes were hanging on the rail and the floor was filled with about 100 magazines which are some of my retirement reading material as well as 5 large photo albums.

2020-05-22 04

I set about working out how I could re-arrange things.

The clothes were moved to the empty hanging space in the third bedroom which is used primarily as my sewing room.

2020-06-17 02

The photo albums provided the impetus to continue working on sorting and culling my photos – both digital and hard copy.  You can read more about that in my post from yesterday.  They will live in the library/study until they are no longer required.

2020-06-16 01

The magazines have been relocated to the drawers of the dressing table in the guest room.  I intend to make a start on reading them and expect that once I have finished reading them I will pass them on to someone else who may be interested in them.

2020-06-17 04

The chairs are now in the wardrobe but easy to retrieve when we need them.

2020-06-17 05

I am pleased with the final result and as an added bonus I have been spurred into doing some more work on the photos as well as making a start on reading my large collection of Australian Geographic magazines.

Minimalism, Decluttering and Zero Waste

4 Comments

While each of these concepts or activities are all different and stand alone, they can be inter-related.

Here are some definitions/explanations of the three terms.

Minimalism – is a tool to rid yourself of life’s excess in favor of focusing on what’s important—so you can find happiness, fulfillment, and freedom.  This comes from ‘The Minimalists’.  You can read the full article here.

Decluttering – to remove things you do not need from a place, in order to make it more pleasant and more useful.  From the Cambridge Dictionary.

Zero Waste – is a set of principles focused on waste prevention that encourages the redesign of resource life cycles so that all products are reused. The goal is for no trash to be sent to landfills, incinerators or the ocean.  From Wikipaedia.

Minimalism and decluttering are very personal and subjective topics and I am not here to tell you that you must only own a certain number of a particular item or what you should or should not remove from your life or home.

There is no good reason for the order in which I listed these topics but I feel as though decluttering should come first.  I think it would be almost impossible to consider minimalism without  first removing the clutter.

Identifying and removing clutter is the first step to clearing both physical and mental spaces.  However, beware of anyone who tells you that they they decluttered their entire home on the weekend.  It is best done as a considered and incremental process otherwise the results are likely to be the same as a ‘crash diet’.  You may lose your way and end up in a worse position than when you started.

Below are are couple of photos of my bathroom.  It did not always look like this.  I do not expect that is how yours should look.  It is simply an example.

2020-06-15 01

2020-06-15 02
It is close to 20 years since I began to question the variety of lotions and potions I seemed to have but I did not throw any away.  I gradually used things up and did not replace them.  Routines have been simplified and we no longer use shampoo or conditioner.  I mostly wash my hair with plain water and occasionally use a small amount of body wash.  This was not a conscious decision but a by-product of questioning what we really need.  I am not alone as you can see here.

The reason that I mentioned not using shampoo or conditioner is that is a perfect example of how minimalism, decluttering and zero waste can be tied together.  My shower shelf and bathroom cabinet are not cluttered and our bathroom needs are minimal.  There are no shampoo bottles ending up in landfill or at best, possibly being recycled.  Additionally, trying to avoid harsh chemicals and toxins ceases to be an issue.

You do not need to subscribe to any particular philosophy but living an authentic life which works for you is important.

Your thoughts?


Lemon Curd – My Way

Leave a comment

It is early winter where we live and that means we have citrus fruit in abundance.  The fruit on the Meyer lemon were ripe and we picked them all as this particular variety does not seem to hold well on the tree.

We gave away heaps as well as freezing some juice and using it generously in drinks and recipes.  GMan asked if I would make some lemon curd, also known as lemon butter.

Apart from wanting to use up some of the lemons, I was keen to find a reasonably ‘healthy’ version of this sweet treat.  So, I turned to the ever-useful Google.

This is an indication of the usual lemon butter offerings.

  • 4 eggs
  • 3/4 cup sugar
  • 1/2 cup lemon juice
  • 2 teaspoons lemon zest
  • 125g butter

After a bit more research I found a recipe which seemed to align with my goals.

  • 2 eggs
  • 1/2 cup sugar
  • Juice of 2 large lemons
  • 4 tablespoons lemon zest

I was keen to try it but moderately sceptical as the proportions are vastly different.

The full recipe is here.  My slightly amended version is below.

First I collected the utensils I needed.  You can read more about my kitchen utensils here.

This image has an empty alt attribute; its file name is 2020-06-14-01.jpg

Low Fat Lemon Curd

Ingredients

2 large lemons, juiced
Lemon zest from 2 large lemons
1/2 cup caster sugar
2 eggs

Grate the zest from the lemons and set aside.

2020-06-14 02

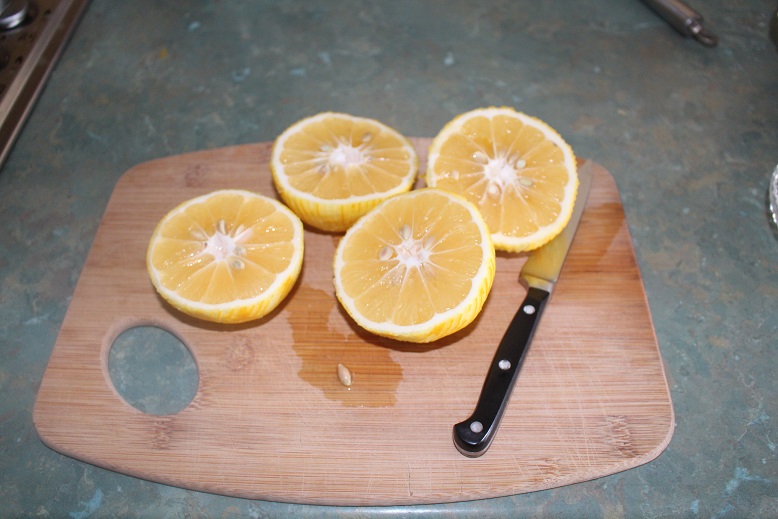
Juice the lemons.

2020-06-14 03

Place the strained juice and sugar in a small saucepan. Heat on low and stir until sugar has dissolved.

2020-06-14 05

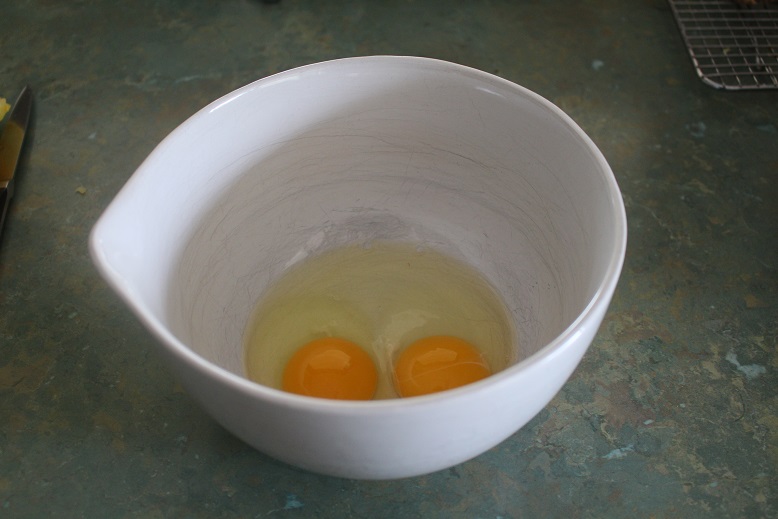
Lightly beat the eggs in a medium bowl.

2020-06-14 04

Remove lemon syrup from heat and pour slowly into beaten eggs while stirring the mixture with a whisk. Continue to whisk by hand for one minute.

2020-06-14 06

Return mixture to saucepan; add lemon zest, and heat on low until it thickens―about two minutes.

2020-06-14 07

 
Allow to cool then refrigerate.
 
NOTE:
 
My concerns were realised as the mixture did not thicken as much as I would have liked.  So, I resorted to my back-up plan.
 
2 teaspoons arrowroot blended with a little water.
 
Gently reheat the lemon curd until it reaches boiling point the stir. Add the arrowroot mixture slowly and continue stirring constantly.  Cook for one minute.  Cool and refrigerate .
 
2020-06-14 08
 
This version of lemon curd does not have the smooth richness that additional eggs and butter creates but I am very happy with the result.  It is definitely worth trying if you are looking for a healthier version of the traditional lemon curd recipe.

Almost Finished

Leave a comment

We are on a mission to try to finish several projects around the place.  Hot on the heels of the completed cold frame, we finished replacing the handles on our latest restoration project.

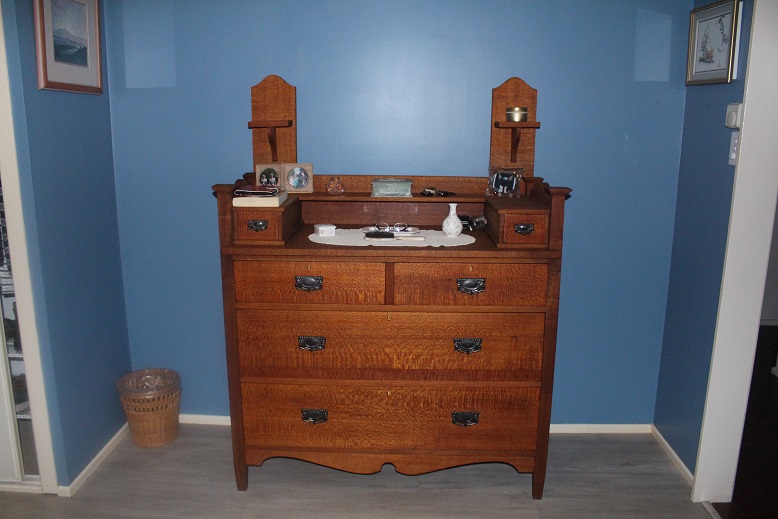
It is now over 6 years since I wrote about the silky oak dressing table/drawers that we restored.  You can read about it here.  This piece has now been relocated to the guest room.

2020-06-13 01

The latest restored piece is slightly larger and now has pride of place in my bedroom.  It is also silky oak and a very similar style to the other one.  The mirror for this one is larger and rectangular rather than oval.

2020-06-13 02

The final step is the new mirror which we hope to pick up this week.

I do not think we are likely to be restoring any other large pieces of furniture in the foreseeable future but there are plenty of other jobs.  We are now working on finishing the top of the pergola/walkway.  This has become rather necessary as the mandevilla creeper has now almost reached the top of the wire on the sides of the pergola.

2018-09-17 01

This was just after we had planted them in September 2018.


Easily Pleased

4 Comments

Those of you who know me well or have been following this blog for an extended period of time will be aware that shopping is not a great love of mine.  For the most part, I have pretty well everything I need.  However, my plastic spatula which I have owned for at least 20 years met an untimely end courtesy of the blades of the blender.  I realised that I definitely needed one so checked online and found that Big W had Pyrex brand large and small silicone spatulas on special so when we were out and about on Tuesday I attempted to get one of each size.  The small ones were sold out so I will look again another day as GMan is keen for a small one to use when making sourdough.

In the meantime, here is the new addition to my collection of kitchen utensils.

2020-06-11 01

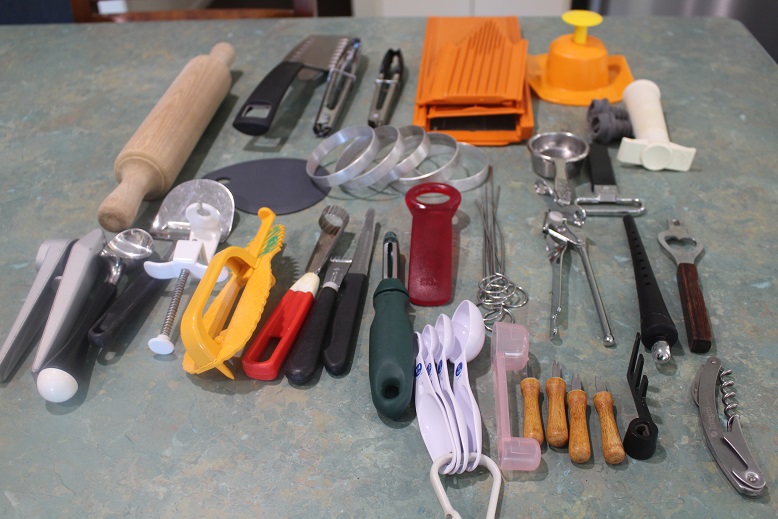
Coincidentally, I had planned to clean out the utensil jars and drawer.  Each time I do this there is usually something which I decide is no longer required but I have culled my collection of utensils to a point that everything is worthy of its place in the kitchen.

Like all decluttering/streamlining projects, there is no ‘one size fits all’ as we all have different needs in the kitchen.

I have 2 utensil jars.  These hold the majority of frequently used utensils.

2020-06-11 02

Here they are laid out on the bench.

The hand beater lives in the side of the regular cutlery drawer.

2020-06-11 05

The contents of the utensil drawer.  These are generally too small or too sharp to stand in a utensil jar.  Some, such as the vegetable peeler and measuring spoons are used every day while most would be used at least once a month and a few less frequently.

2020-06-11 06

I have an expanding bamboo divider which helps to keep them in some sort of order.  Once I had wiped the drawer and the divider, I replaced all of the items.

2020-06-11 07

There is one item missing from these photos.  The pie slice which GMan is revarnishing the wooden handle.

I have not shown the sharp knives which I keep separately in a knife block.

I have multiples of a few things – measuring spoons, tongs, wooden spoons and pastry brushes but these are all used.

What are your essential kitchen utensils?  Have you reviewed or reduced what you have recently?

What We Grow

Leave a comment

One of the by-products of growing your own food is a need for increased creativity when it comes to meals.  What we eat is at least somewhat dependent on what is available in the garden.

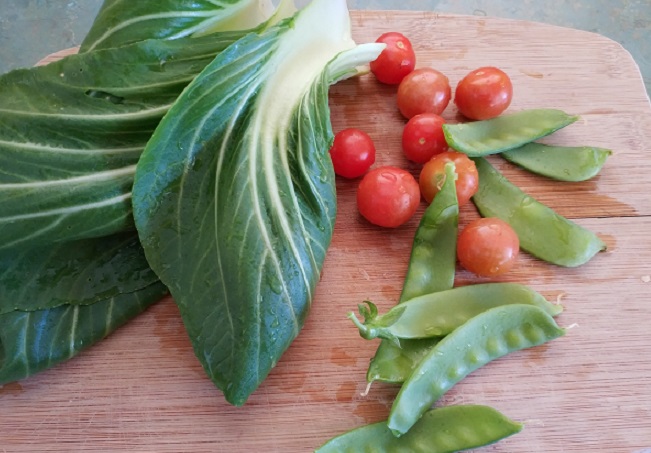
Bok choy, a type of chinese cabbage, is a quick-growing vegetable.  Commercial crops are harvested while they are relatively young and generally sold in bunches of three.  We ate some of our current crop while they were small, however, the few remaining plants are now quite mature and strongly flavoured.

New ways to use up the mature bok choy leaves and stems.

2020-06-07 01

Freshly picked leaves shredded and sauteed with cherry tomatoes, snow peas and mushrooms for breakfast.

2020-06-07 02

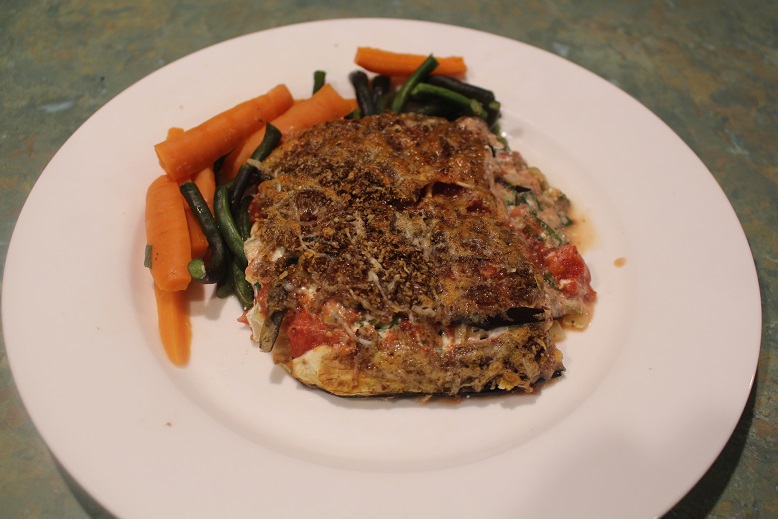
Tonight I made a vegetarian lasagne with layers of lightly roasted eggplant slices, bok choy mixed with ricotta and finally, crushed tomatoes.

2020-06-07 03

It was topped with a mixture of parmesan cheese, cheddar cheese and flaxseed meal.

2020-06-07 04

Served with beans and carrots.

2020-06-07 05

VEGETARIAN LASAGNE

1 large eggplant, sliced
1/2 onion, diced
Handful of large bok choy leaves and stems, sliced and shredded
180g ricotta cheese
Can of crushed tomatoes
Olive oil
1 teaspoon mixed herbs
Salt and pepper

TOPPING

1 tablespoon grated parmesan
1/4 cup grated cheddar cheese
2 tablespoons flaxseed meal

Place slices of eggplant on roasting tray.  Brush with a little olive oil and bake at 160C for about 10 minutes – until soft.

Saute diced onion and bok choy stems until soft, add shredded leaves and stir until wilted.  Add vegetable mixture to ricotta and combine.  Season with salt and pepper.  Add mixed herbs to crushed tomatoes.  Place a layer of eggplant slices in dish followed by the ricotta mixture then tomatoes.  Repeat until all ingredients are used.  Combine ingredients for topping and sprinkle over the lasagne.  Bake until heated through and browned on top.

This is not a definitive recipe but simply what I made today.  The quantities quoted would serve 3 adults.