Taking Responsibility

1 Comment

I stumbled upon this article online today.  It is about a study showing the correlation between age, gender, race and political ideology to belief in the reality of climate change and the impact caused by humans.  The content did not surprise me greatly, however, I was bitterly disappointed by the following couple of paragraphs towards the end of the article.

“But accepting climate change did not necessarily make you greener, at least in your home life, the study also found.

While those who accept human’s role in climate changes were more likely to take more public action, such as signing petitions or joining demonstrations, that was not necessarily replicated in private action, such as cutting energy use at home and using public transport over the car.”

I find this very sad indeed and downright depressing.  It is yet another example of the overwhelming apathy which so many people display.  Everybody wants ‘something to be done’ but expect that it is the responsibility of someone else, usually the government, the mythical ‘they’ or in the case of climate change, the global community or, at the very least, another country.

Australia may be a small player in the global sandpit in terms of population but we create far more than our share of mess when it comes to environmental vandalism.  Yet, our governments consistently drag the chain when it comes to making real changes that will tackle climate change and benefit the planet.  Sadly, government policy by all parties seems to be limited to the interval between the present time and the next election.  This is not limited to addressing climate change but policy in general.

In the absence of clear government action, the driver of change must come from each and every one of us.  Remember the saying, “mighty oaks from little acorns grow”.  We can and should all play our part in changing everyday habits.  Addressing the problem of climate change is not just about legislation, coal mines and power stations.  It is about each one of us doing our bit.

Can’t afford solar panels?  Live too far from public transport?  Organic food is too expensive?  This does not mean that you cannot make a significant contribution by reducing your carbon footprint.  In fact, many of the actions you can take to save money will also save the planet.

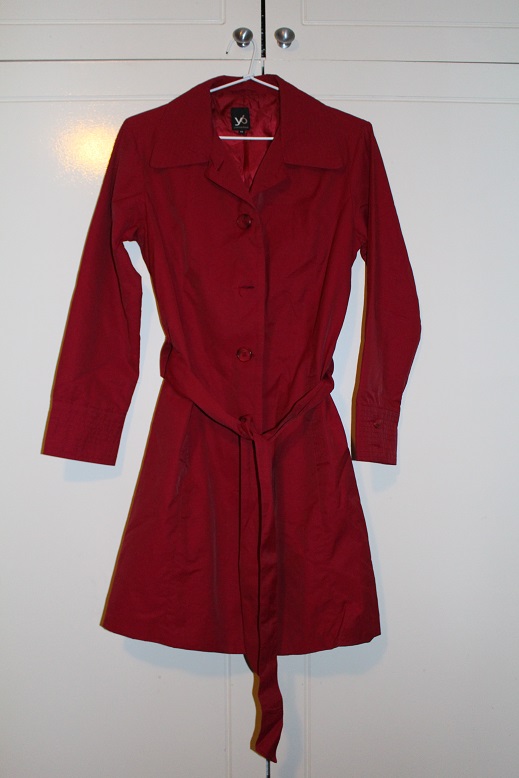
Buy second-hand – clothes, furniture, tools, toys
Do not waste anything – use up leftover food, finish the last shampoo in the bottle
Consider re-usable alternatives – cloth serviettes instead of paper, lidded containers instead of plastic wrap, refillable drink bottles instead of bottled water

These are just a few examples.

What have you done to reduce your carbon footprint?

Running Repairs

Leave a comment

Both GMan and I have have some really old clothes which we wear when we are gardening or doing other outdoor jobs.

Last weekend we were busy building a new hen house and we both managed to cause some damage which necessitated some mending.  After the clothes were washed today I set about repairing them.

Here are the ‘before’ shots.

2016-01-06 01

I ripped a 3 cornered tear in the back of my cotton trousers.  They are very thin and some would say they are not worth repairing.

2016-01-06 02

Gman’s patched trousers had a different problem – the stitching of the crotch seam below the zip gave way.  I think the thread had just worn out.

Here is a close-up view.

2016-01-06 03

I started with my trousers and placed a patch on the inside using double-sided iron-on interfacing.

2016-01-06 04

Zig-zag stitching over the tear plus around the edge of the patch and the job was complete.

2016-01-06 05
This is the view from the right side.

2016-01-06 06

For the crotch seam I sewed a seam from the wrong side and then 2 rows of stitching from the right side.  Like many of my mending jobs, it won’t win a prize but it is effective and extends the life of the garment.

2016-01-06 07

Do you mend clothes?


Red, Recycled & Revamped

6 Comments

It is definitely spring-cleaning time and it seems that many of us are taking a long, hard look at what is in the wardrobe.

i 001This is a gorgeous, lightweight trenchcoat that my sister retrieved from her wardrobe recently.  She offered it to me as she admitted that it was really a bit too big for her and she had never felt entirely comfortable with it.  The coat fits me perfectly and being the perfect shade of red made it doubly attractive.

She did point out that the buttons on one sleeve had been damaged with one completely missing and the other one broken in half.

i 002I went to Lincraft in the city today and found some buttons to replace them with.

i 003They are the same size and style as the originals but are plain red rather than a variegated red/black as the others are.  I am going to replace all 4 buttons on the sleeves and while they will be slightly different to the ones on the front opening, I don’t think that is going to matter.

I am looking forward to doing the necessary repairs so that this coat is ready to be a really useful addition to my wardrobe.

This is the sort of positive story that is happening every day when you choose to let go of things that are not quite right and languishing in the cupboard.  There is someone out there for whom it will be perfect.  They may be a family member, an op shopper or someone looking on eBay or even a Facebook Buy, Swap, Sell page.

Old News

Leave a comment

While I have been sorting through the blog photos, I have come across some that I took to use in blog posts that never eventuated.  Maybe it was because something more exciting came up or I simply did not get around to it.

Anyway, here are some that were sitting in a folder just waiting for the story to be written.

2015-03-17 01I noticed these small holes just below the collar on one of The Duke’s polo shirts.  It was where the label was stitched on and it was beginning to tear away as there was only a single layer of fabric and no facing.  2015-03-17 02

I carefully unpicked the label.

2015-03-17 03The next step was to iron a small piece of fusible interfacing to the wrong side.  This helps to reinforce the fabric.

2015-03-17 04I then stitched over the holes using a zigzag stitch.  The thread was a close match and the mend is barely visible.  It is certainly an improvement on the holes that were there.

2015-03-17 05Finally, I trimmed the interfacing back close to the stitching and the repair was complete.

In future, I think I will remove any labels that are on a single layer of fabric when the garment is new to avoid this happening.

Oh, and you may have noticed that ‘The Duke’ still exists.  Thank you for your suggestions and I have have come up with a couple but none of them really captured his imagination so I will ponder a bit more.  It is enough of a challenge to change once but I do not want to find myself in the same position in the future.

A Laundry List

4 Comments

Tonight I want to share a germ of an idea that has formed gradually over a period of time.

Some people have an ongoing shopping list to which they add items as they find that they are required.  Others keep a list of what is stored in the freezer and cross things off as they are used.

I am thinking of creating a laundry list. I have this cupboard in my laundry.  On the left-hand side are the assorted brooms and the vacuum cleaner (not shown), hangers for knitted items and dispensers for plastic bags as well as the racks on the inside of the door for laundry liquid and presoak and the rag-bag.

2015-02-16 01The right-hand side has the laundry hamper with shelving above.  This holds various cleaning items as well as spare light globes, batteries, rubbish bags and shopping bags.  However, the door is clear and this is where I could put my list.

2015-02-16 02I envisage a write on/wipe off board and am thinking of making one myself from a sheet of coloured A4 card and laminating it.

So, what am I going to write on this list, I hear you ask?  It will basically be a reminder of extra jobs that need doing such as ‘stain on white trousers’, ‘scrub cuffs of mauve shirt’, ‘hem of black skirt’ or ‘darn striped sock’.  They will be all the little things that seem obvious at the time but by the time I am doing the washing/ironing it can be overlooked.

What do you think?  How do you keep track of the extra laundry jobs?

Sew My Stash Sunday – 3

Leave a comment

As promised, here is an update on how my sewing from my stash is progressing.  This week I have done pretty well, albeit with a couple of hiccups along the way.

This is the polo shirt for The Duke that I started a couple of weeks ago.

001I have put the collar on and finished the tab front, however, when he tried it on it is way too big.  How did I manage that?  I chose the size of a multi-sized pattern based on an existing polo shirt that fits him well.  Anyway, now I know.  So, it is back to the drawing board with this one.  The sizing does not influence the neckline/collar or tab front so I think I should be able to cut it apart along the side, underarm and sleeve seams and recut the pieces to a smaller size while maintaining all of the neckline and collar.  Here’s hoping!

In the meantime I decided to make myself another pair of boxer shorts for pyjamas.  This was another sizing issue as I could not remember whether I had previously used the medium or large sizing of a multi-sized pattern.  I went for the medium and of course I was wrong but all was not lost.  I went ahead and completed the boxer shorts and a camisole top and have given them to my sister.

002I have now cut out a pair for myself in the correct size but have yet to start sewing them.  It is a quick and easy task so I may do that after dinner.

002A few weeks ago my mother gave me a book and equipment for making your own custom-sized patterns.  It is not for the faint-hearted or novice as there are no real instructions, just an expectation that you are familiar with dressmaking techniques and construction.  There is a selection of nearly 300 designs so there are plenty to choose from.

I decided to start with a fairly simple skirt using a piece of navy/white striped seersucker from my stash.  Once I had created the pattern I checked it for fit and felt that it would be OK.  Today I cut out and made the skirt apart from the zip and finishing the inside of the facing and the hem.

003It has loose inverted pleats off a wide, shaped yoke with side pockets and a centre back zip.  The fit is absolutely perfect so if the other patterns work similarly, I will be very happy.

I also managed to re-fashion one of The Duke’s long-sleeved business shirts into a short-sleeved one as the cuffs had worn out but the rest of the shirt was still in good condition.

I am not sure what my next project is as I need to finish these first but stayed tuned for more sewing next Sunday.

Adding More Life

2 Comments

It is nearly 3 years since I wrote this post about extending the use of a pair of 3/4 trousers by making them into shorts.  That project worked extraordinarily well as I still have the shorts and wear them almost every weekend during the summer.  They are lightweight and comfortable and great for gardening and generally hanging about at home.  Imagine my despair a few days ago when I realised that the zip had broken.

001I thought that they were finally destined for the bin but after rummaging in my stash of extra zips I found one that would be suitable.

002I decided that I had nothing to lose as they were no use with a broken zip so I set to work.  In my opinion, there is only one thing more challenging than putting in a zip and that is replacing one because when putting a zip in a new garment it is inserted near the beginning of the construction rather than at the end.  Due to the purpose of the shorts, I was not too worried about the finished look.

003While it is somewhat rustic, I was very pleased with the end result which is a perfectly functional pair of shorts.

004This whole project took me about 10 minutes to complete.

That Moment When……………………

Leave a comment

You realise that the ironing board cover needs replacing.

2014-12-21 01One minute it seems OK and the next it has ripped to shreds.

2014-12-21 02This is the cover I made from a brand new cotton doona cover I bought from the op shop.  It was the first time I had made one and I was very pleased with the result.  You can read about it here.

I could never have told you how long an ironing board cover lasted but thanks to this blog I now know that this one has given 2.5 years of service.  I regard that as pretty reaonable as I do a fair bit of ironing.

Patchwork – Part 2

2 Comments

It is a week since my last post and I have not even replied to your kind and thoughtful comments.  I think work got in the way last week.  I also went to a community meeting about solar power one evening and spent time with members of my family so blogging has taken a back seat.

Today I did some more of my patchwork.  I now have 22 of the 36 squares I need.  I have decided that I will just join the blocks directly rather than putting sashing between them as I am looking for a random allover pattern.  I spread the completed blocks out on the floor to get an idea of how it is going to look and I am very pleased with the result so far.

Patchwork
I also mended a pair of jeans for DD’s partner.  They were brand new but the stitching had come undone for about 3cm on one side seam.  I completely reinforced both side seams so hopefully they will be OK now.  There was a pair of The Duke’s socks with a hole in the toe so they are now fixed too.  Finally, I put my skills to the test and replaced the legs of this bear.

Bear
It was signed by DD’s friends when she finished school and we were moving interstate so it has some sentimental value for her.  However, I think my granddaughters had been ‘playing’ with him and the buttons that hold his legs in place had come adrift.  Luckily the thread was still through his torso so with a bit of ingenuity and a large curved needle I was able to reattach the legs.  I don’t think I will repair dolls and bears for a living!

It has been a long weekend here and I have enjoyed the break from work.

More Mending

12 Comments

Mending is to sewing like using leftovers is to baking.

Most people can bake or create a meal by following a recipe but often you need to have a good understanding of the underlying principles of cooking and meal preparation to be able to creatively and effectively use leftovers or random ingredients.  The same applies to sewing.  It is one thing to follow the instructions on a pattern to make an item but sometimes you need to use your understanding of some of the methods to apply it to mending tasks.

Today I was confronted with a pair of The Duke’s business trousers that had worn through right on the crease of the hem.  I do not know how this happened as the trousers are the correct length and do not drag on the ground.  It is difficult to see but the area just to the right of my thumb is a split.  It is more obvious in the following photograph.

Worn trousers
I unpicked a section of the hem.

Split in trouser hem
The damage is clearly evident.  I trimmed the couple of loose threads.  I placed a piece of iron-on interfacing over the split on the wrong side.  I made sure that the two edges of the split were closely aligned and then ironed the interfacing to seal it.  With the sewing machine set on a short zigzag stitch, I stitched over the split.

This is the wrong side after I had stitched it.

Mended trousers
Then it was a simple matter of rehemming the section of the hem which had been unpicked.  I have not posted the ‘after’ photo as the mend is virtually invisible.

Do you mend clothes?  If you have any mending questions please ask and I will see if I can help.